In part 0 I discussed initial installation and configuration. Now it’s time to get into the code. The things I am going to do in this post are:
- Understanding the concept of Project and Apps in Django world.
- Creation of App.
- Using templates to create home page.
Projects vs Apps
Django offers a very useful modular approach of creating web applications. Unlike other frameworks like PHP Laravel or Rails, Django let you create multiple apps under a project. This idea might look alien to those coming from the background of other frameworks where a project == app and you need to rely on routes etc to divide functionality. Let me take example of my own website.
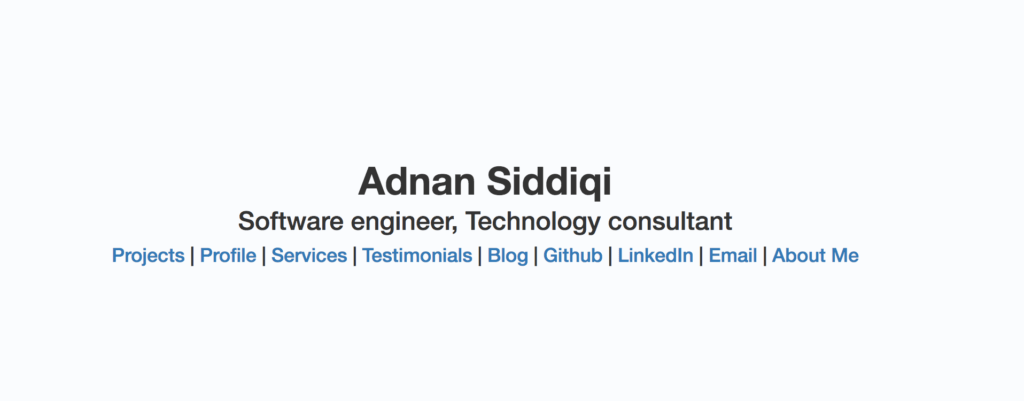
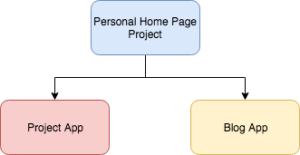
If you look at it, it contains a few static pages like Profile, Services, Testimonials etc and a couple of dynamic sections: Blog and Projects. If you are working on Rails or Laravel, you might come up with a group route to group relevant routes. This might work for task but what if you want to add a blog in another project, now you have no choice other than copy pasting code and manage accordingly, pretty boring right? Django will provide you following solution:
I can now plug in as many apps as I want under a single Project (e.g: My Home Page) and Django will itself take care of the respective URLs of the app under a project. It is not necessary that you can only add your own app, you can incorporate any 3rd party app within your project and use it on your own.
App Creation
It’s time to create the app. I will name this app as tracker. Go to your newly created project folder, in my case ohbugztracker and run the following command:
./manage.py startapp tracker
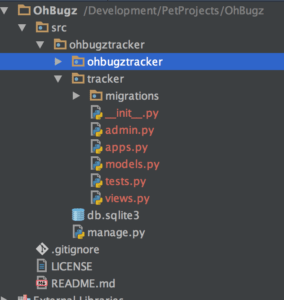
Once it’s run it will create a new folder tracker and now your project directory will look like this:
You can things like migrations, admin.py, models.py and views.py.
The app is created but Django is still not aware of it, you will need to perform a couple of actions now. First, go to settings.py file and under INSTALLED_APPS section add your app entry for installation purpose. It will then look like this:
INSTALLED_APPS = [
    'django.contrib.admin',
    'django.contrib.auth',
    'django.contrib.contenttypes',
    'django.contrib.sessions',
    'django.contrib.messages',
    'django.contrib.staticfiles',
    'tracker',
]
And creation of urls.py file under tracker app folder.
from django.conf.urls import url
from . import views

urlpatterns = [
    url('^$', views.index, name='index')
]
Don’t get scared as I will be explaining what does it all mean.
OK so I installed my newly created app by adding into INSTALLED_APPS list and created urls.py. Let’s run the server and see how it goes. I run the server by running ./manage.py runserver and now visit: http://127.0.0.1:8000/tracker

Ouch! what’s that! Why am I seeing this! Wait! I forgot one thing. I did create urls.py under tracker folder but I did not add entry of it in main urls.py. No worries, there’s always a second chance. Go to main urls.py, in my case in ohbugztracker\urls.py
from django.conf.urls import url, include
from django.contrib import admin

urlpatterns = [
    url(r'^admin/', admin.site.urls),
    url(r'^tracker/$', include('tracker.urls')),
]
here I imported include first and then add the entry. It should work, right? Wrong! because now server is not starting and giving error:
url('^tracker/$', views.index, name='index')
AttributeError: module 'tracker.views' has no attribute 'index'
Fair enough as I have not added index method in views.py. Before I do it, let me exaplain what is happening.
As I mentioned in the diagram above, Django lets you add multiple apps under a project or I say under a domain(example.com). When you do something like:
url(r'^tracker/$', include('tracker.urls')),
You are telling server that when someone visits a URL http://127.0.0.1:8000/tracker, Django will try to match possible pattern, if found, it will include respective app.urls file. In our case it is tracker.urls.
If you notice, Django let you use RegEx to define your URLs pattern. Now let’s try again
Now open views.py file and add the following:
from django.shortcuts import render
from django.http import HttpResponse


def index(request):
    return HttpResponse('<h1>I am the root of Tracker App<h1>')
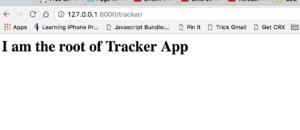
Here I imported HttpResponse and add a view method index which is responded a string in return. If you are a Laravel, Rails or any other MVC user, you might be surprised that why is it being called a View rather than a Controller. Here is a good explaination that Django is not an MVC framework but an MTV (Model Template View) framework. Now try again and you should see something like:
Cool! so we created and installed our new Django App and created a view method which displays text on visiting the application URL.
Before I move further, I will make a small change in my route file. Usually each app has it’s own unique url prefix, tracker in our case which helps to differentiate from other installed apps. Since there is only one app in our case, I will make a change in main urls.py file. Go to main urls.py and change the following from:
url(r'^tracker/$', include('tracker.urls')),
to
url(r'^$', include('tracker.urls')),
What actually I did, instead of making one to visit http://127.0.0.1:8000/tracker to visit the only app, I just made it available on root URL. So now when I go to http://127.0.0.1:8000/ I will be seeing same page as you see above. Much better, right?
Tired, No? Good! Now just move to next step and integrate the markup of home page in our app.
Templates in Django
Like other web framework Django provides facility of Templates which not only helps to organize the presentation layer but also to avoid redundancy of the markup. I will discuss it further in next part, for the time being just bring our required HTML in the app.
First off, add the templates folder under your app folder tracker. Why templates folder? Well I just set this in main settings.py under TEMPLATES DIRS key.
TEMPLATES = [
    {
        'BACKEND': 'django.template.backends.django.DjangoTemplates',
        'DIRS': [os.path.join(BASE_DIR, 'templates')]
        ,
        'APP_DIRS': True,
        'OPTIONS': {
            'context_processors': [
                'django.template.context_processors.debug',
                'django.template.context_processors.request',
                'django.contrib.auth.context_processors.auth',
                'django.contrib.messages.context_processors.messages',
            ],
        },
    },
]
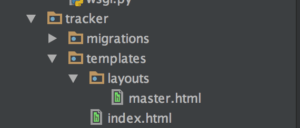
If you want, you may change it, I will go with the convention suggested by Django. Now go to templates folder and add another folder, named as layouts and add a file master.html in newly created layouts folder. In this file I am just dumping all the markup of HomePage of my application.
In next step add another html file under templates folder and call it index.html and add the following line in it. Don’t worry I will explain it later in detail. Your folder structure should look like this:
{% extends "layouts/master.html" %}
Go to views.py file and make following changes:
from django.shortcuts import render

def index(request):
    return render(request, 'index.html')
Now I am using render method which accept request as first parameter and template file as a second parameter. If all goes well, you should be able to see the following:
In case you wonder why this all looking quite stylish, the reason is I am calling bootstrap from the CDN and since my own css files are not included it is just showing everything out of proportion at the moment. Later I will be calling all css/js files from local machine. I will be covering it in next post.
The Github repo has been updated for this project


4 Comments
Emmanuel
Hi Andan!
How often do you release the parts of this tutorial?
Thanks in advance and my best wishes,
Manu!
Adnan
Good question 🙂
I was supposed to end this series up by end of this month but got busy in some personal work. Will try to wrap it up ASAP!
Subscribe to my newsletter to get latest updates
John
What a waste of time.
Terrible writing and incomplete. No way to follow up.
Adnan
Thanks for your comment.
If you scroll down you will find links of related articles.