ChatGPT is a large language model developed by OpenAI that has gained immense popularity for its ability to generate human-like text responses to prompts. With its advanced natural language processing capabilities, ChatGPT has become a powerful tool for a variety of applications, including sentiment analysis. By analyzing text data and identifying the underlying sentiment, ChatGPT can provide valuable insights into customer feedback, social media sentiment, and other aspects of public opinion. In this blog post, I’ll explore how ChatGPT can be used for sentiment analysis without using any library or code to write the main logic. Let’s proceed!
If you are in a hurry or not interested in technical details then you may watch the demo video given below:
Before I proceed with writing the code, I’d head to chatGPT and will try a few prompts.
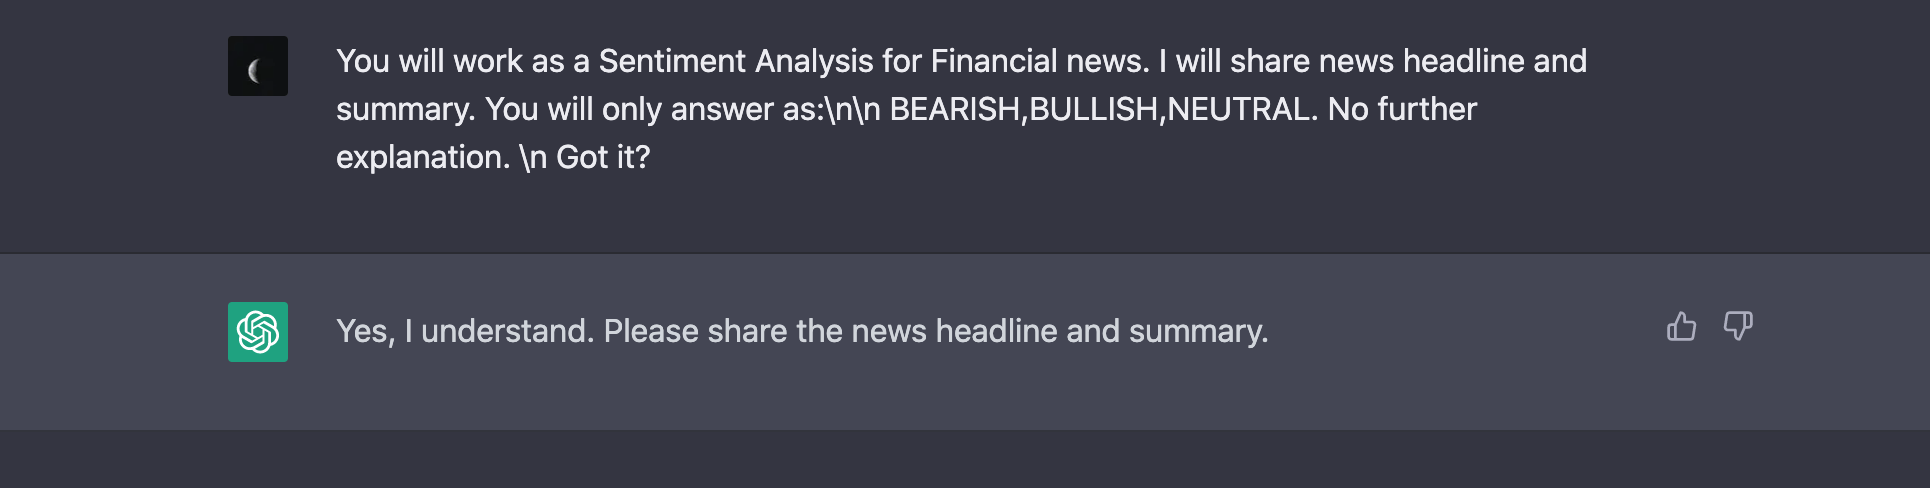
The very first thing I am going to do is provide context. It means, you are instructing the chatGPT system how are you going to behave for future messages.

I just picked random news from Google and pasted its title and summary and voila! It responded as BULLISH. Here is another:
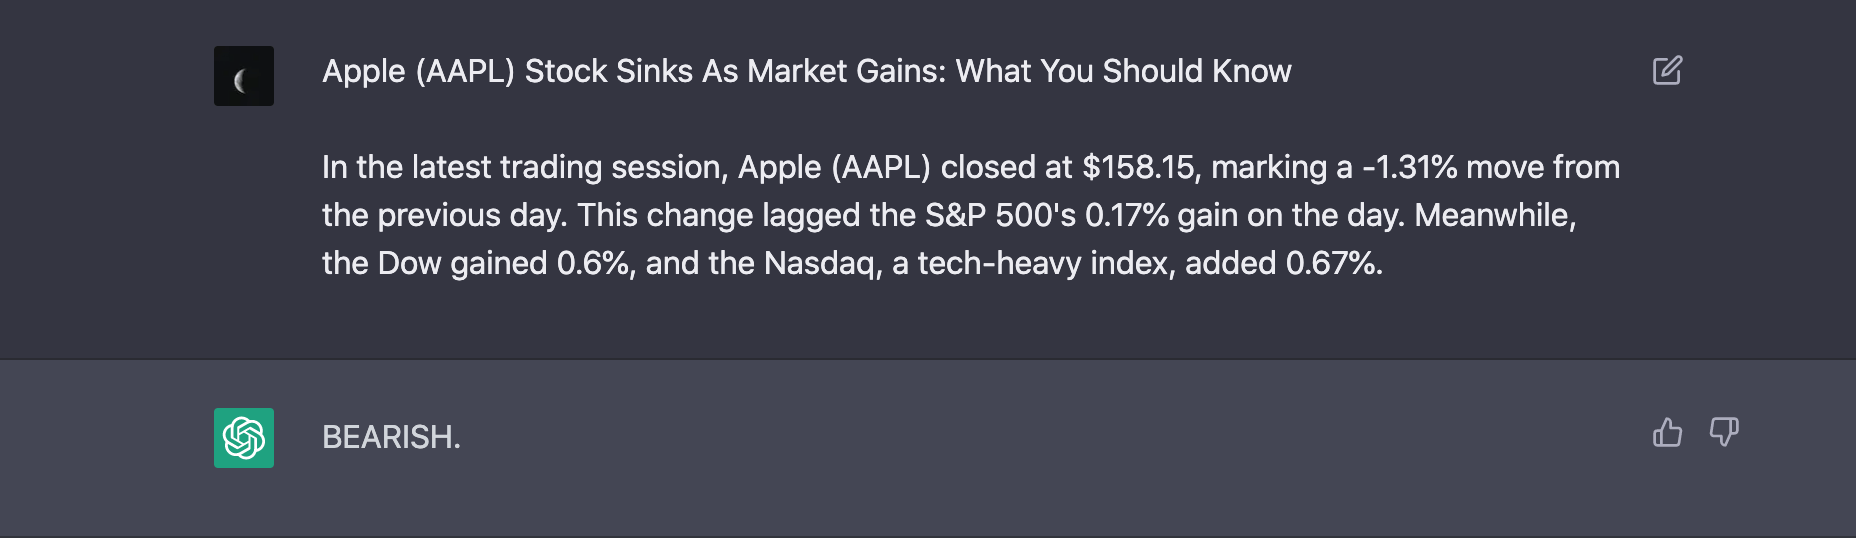
Our chatGPT-based system responded as BEARISH which is correct. Now, the last one:
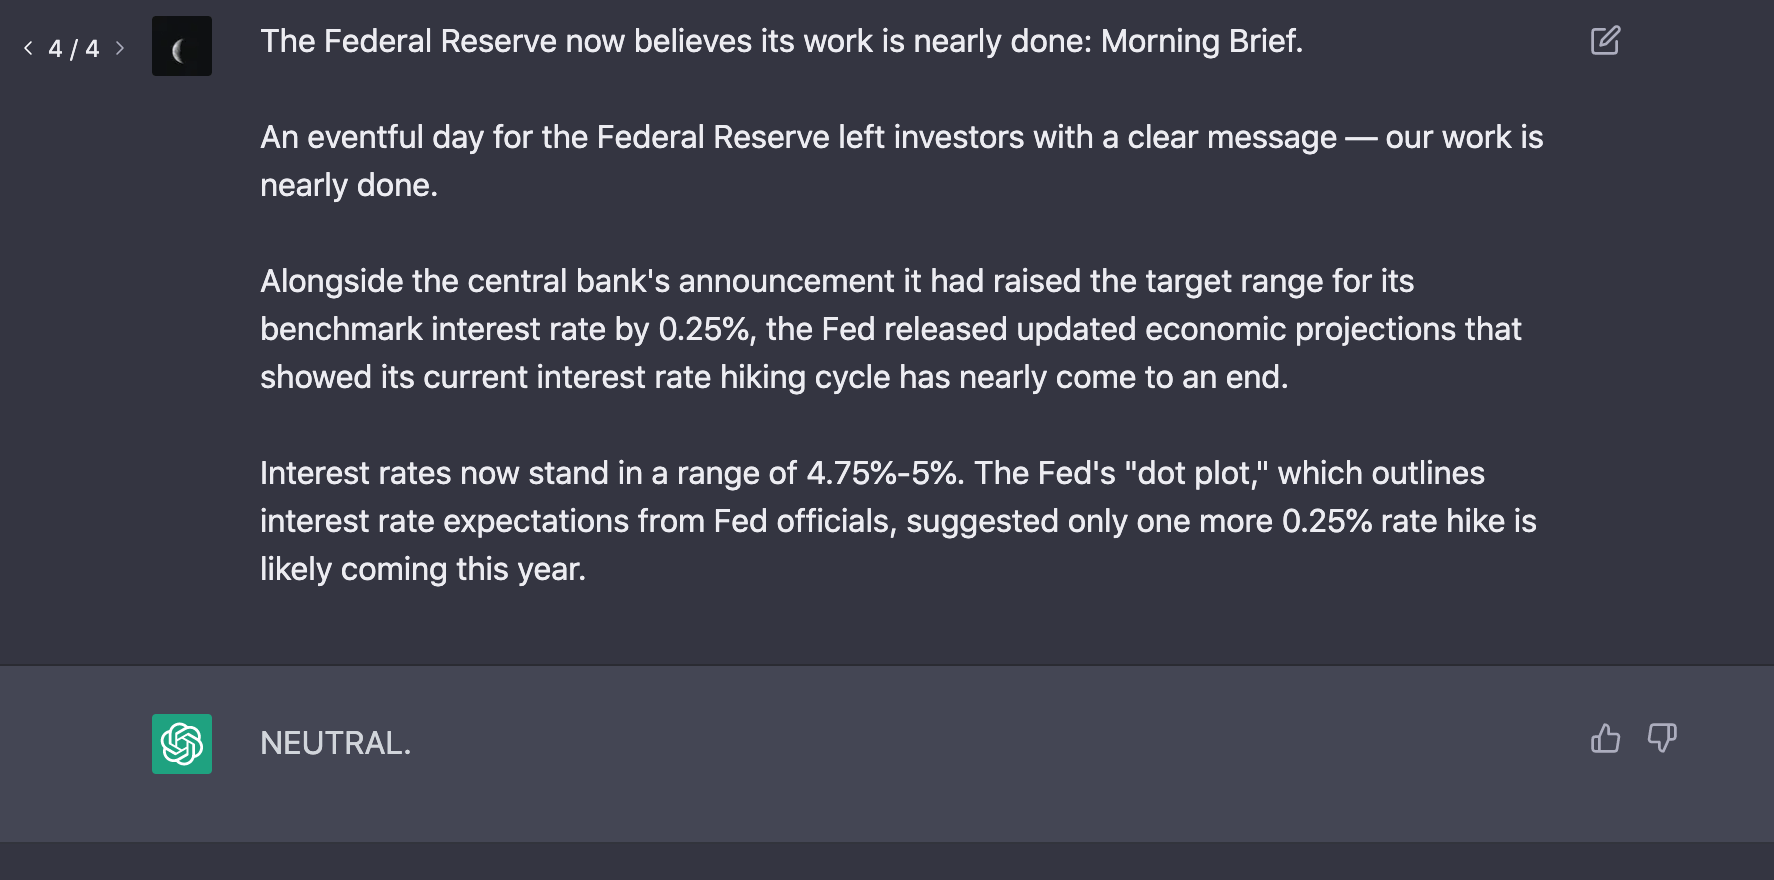
It labeled it as NEUTRAL because it was not able to figure out what sentiments should be attached to it. Pretty cool!
Now, all is being done manually, how about automating the entire thing? Luckily, OpenAI provides APIs to fulfill our dream. I will also be using news API from NewsCatcher which returns data in JSON format and provides different parameters to query news based on provided keywords.
Development Setup
We will be needing two libraries: OpenAI and Flask. Flask for web interface for our sentiment analysis.
pip install openai
pip install flask
I will also install python-dotenv package to read .env file
pip install python-dotenv
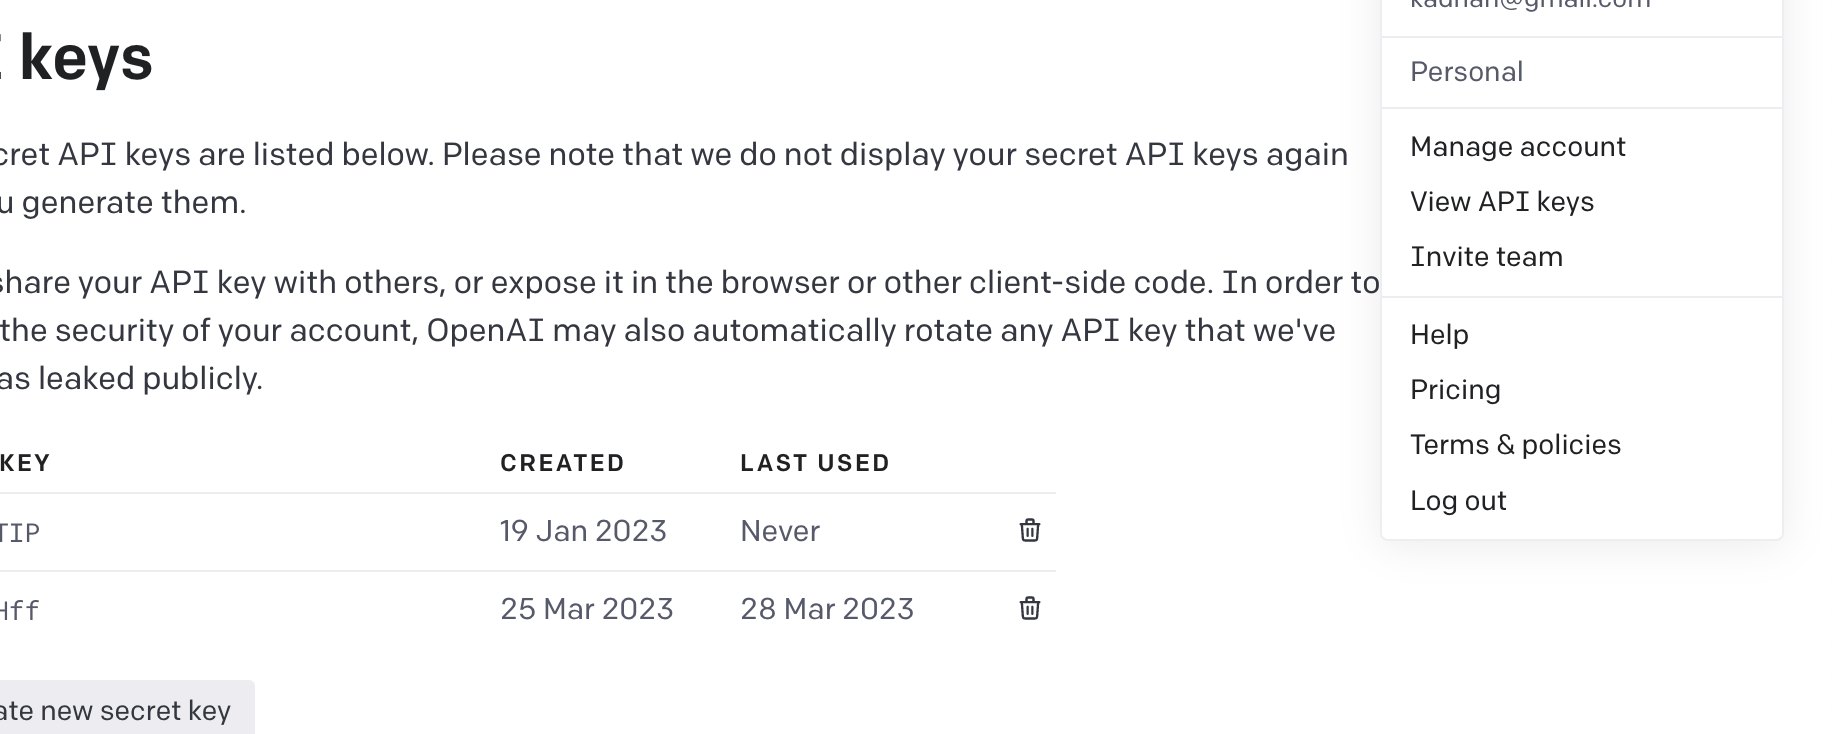
Assuming you are already registered, head on to the API KEY page URL and create your key.
Create an .env file where you will be storing API keys for both OpenAI and NewsCatcherAPI.
OPENAI_API_KEY=<KEY>
NEWSCATCHER_API=<KEY>
I am creating a file, app.py which will be the main Flask script.
Now let’s talk about the chat() function which will be communicating with the OpenAI servers.
def chat(msgs):
    response = openai.ChatCompletion.create(
        model="gpt-3.5-turbo",
        messages=msgs
    )
    message = response['choices'][0]['message']
    return message
OpenAI offers multiple products and their APIs. I am going to use the competition API with the model gpt-3.5-turbo, the model that feeds ChatGPT. Though ChatGPT4 is also available, it is only being offered to paid users. Anyways, you can see the list of currently available models to your API by using the following API:
models = openai.Model.list()
The competition API offers many parameters, but I am sticking to the model and messages only. I am then extracting messages from the returned JSON object and returning them to the function caller. Use this easy-to-use JSON Viewer to render data properly.
The next function I am going to discuss is fetch_news() which takes a symbol as a parameter and key
def fetch_news(symbol, key):
    records = []
    headers = {
        'x-api-key': key,
    }
    params = {
        'q': symbol,
        'topic': 'finance',
        'countries': 'US',
        'lang': 'en',
        'from_rank': 0,
        'to_rank': 100,
        'sort_by': 'date',
        'page_size': 5,
        # 'to': '1 day ago'
    }

    r = requests.get('https://api.newscatcherapi.com/v2/search', params=params, headers=headers)
    articles = r.json()['articles']
    for article in articles:
        records.append({'title': article['title'], 'summary': article['summary']})

    return {'symbol': symbol, 'articles': records}
I just randomly picked this service as it was providing a proper format of news as well as different parameters to narrow down the kind of news you want to search. If interested, you can check the docs here.
Now in the search route I am going to combine the above routines to get the desired results:
@app.route('/search', methods=['POST'])
def search():
    OPENAI_API_KEY = os.environ.get('OPENAI_API_KEY')
    NEWSCATCHER_API = os.environ.get('NEWSCATCHER_API')
    symbol = request.form['symbol'].upper()
    message_history = []
    sentiments = []
    openai.api_key = OPENAI_API_KEY
    system_message = 'You will work as a Sentiment Analysis for Financial news. I will share news headline and summary. You will only answer as:\n\n BEARISH,BULLISH,NEUTRAL. No further explanation. \n Got it?'
    message_history.append({'content': system_message, 'role': 'user'})
    response = chat(message_history)
    articles = fetch_news(symbol, NEWSCATCHER_API)['articles']
    for article in articles:
        user_message = '{}\n{}'.format(article['title'], article['summary'])
        message_history.append({'content': user_message, 'role': 'user'})
        response = chat(message_history)
        sentiments.append(
            {'title': article['title'], 'summary': article['summary'], 'signal': response['content'].replace('.', '')})
        message_history.pop()
        sleep(1)
    # Render the HTML template with the search results
    return render_template('index.html', data=sentiments, query=symbol)
Like I did in the ChatGPT interface, I sent the instruction, and then in the loop, I am computing the sentiment of each news article. Finally, the result, which is a list of dicts, is sent in the HTML template.
If all works fine, you will see something similar:

Conclusion
In this post, we explored OpenAI’s APIs, also how to use the chatGPT model to work as a sentiment analysis system instead of writing one from scratch or using APIs. Obviously, you can modify the “Sentiment Analysis System” based on prompts. I am not an expert hence my prompts are simple. You can modify as much as you want. Like always, the code is available on GitHub.