This post is part of the Voiceflow Series
Chatbots have become a common part of modern businesses. Companies use them to answer customer questions, collect leads, assist with online purchases, schedule appointments, and much more. Their conversational nature makes it easier for users to get the information they need quickly, often reducing response times and improving the overall customer experience. As a result, chatbots have become an effective way for businesses to engage with visitors while automating repetitive interactions.
There are many chatbot platforms and frameworks available today, but I personally recommend Voiceflow because of its simplicity and, to be honest, it just works. To keep things simple, we’ll build a Pizza Ordering chatbot that collects a few details from the user and displays an order summary. It won’t connect to a backend ordering system or make any API calls. The goal of this tutorial is simply to give you a feel for how chatbot development works in Voiceflow. Let’s get started!
What is Voiceflow
Voiceflow is a platform for building chatbots and AI assistants without writing much code. It provides a visual canvas where you can design conversations, test them, and deploy them to different channels.
What We’ll Build
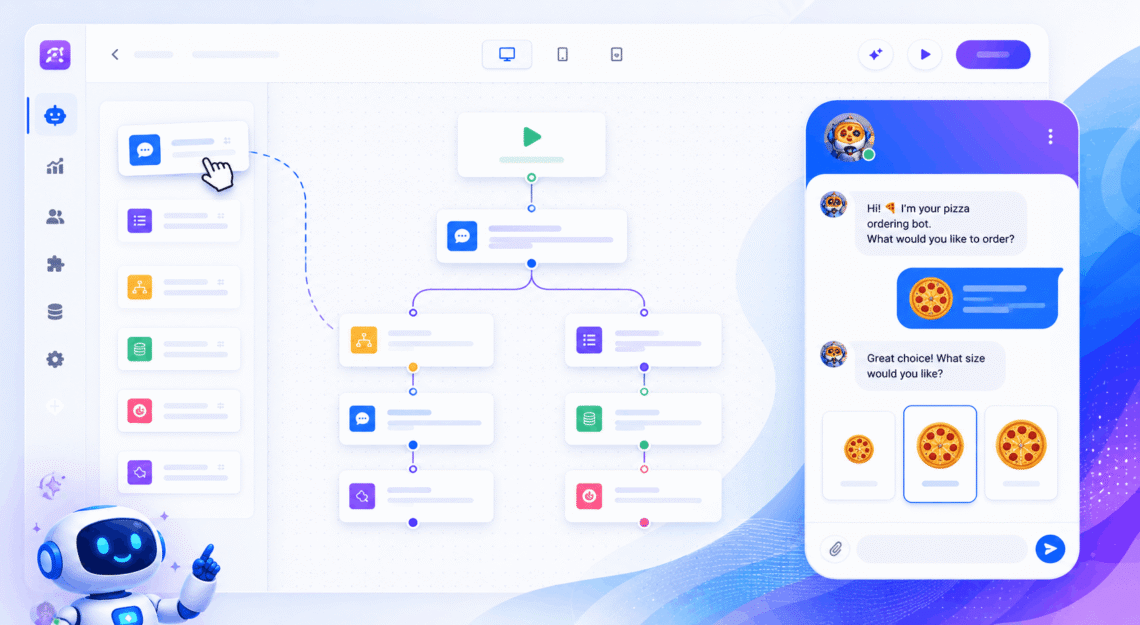
For this tutorial, we are going to build a simple Pizza Ordering chatbot. The bot will ask users to choose a pizza flavor and size, confirm the order, and then display an order number and order details.
Building Your First Chatbot
It is obvious, but Voiceflow still asks you to sign up (it’s my referral link. I hope you don’t mind). Once you are registered and verified via email, the onboarding process will start. You are asked about the reason for using it. I select Personal for the sake of this series.

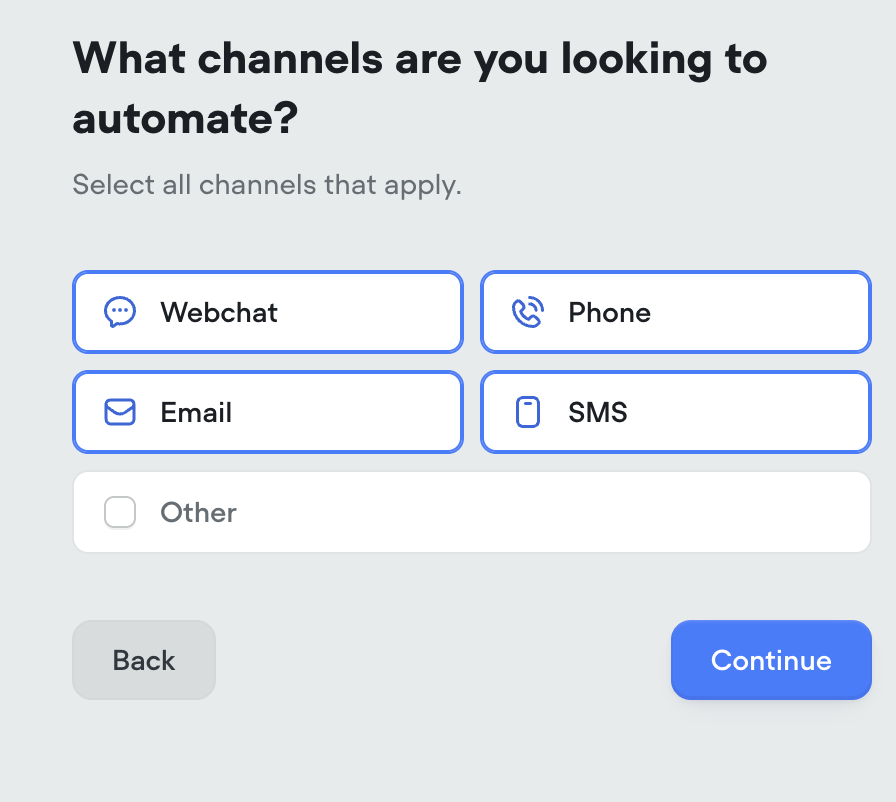
Next, select a channel for your chatbot. For this tutorial, you can choose Web Chat.
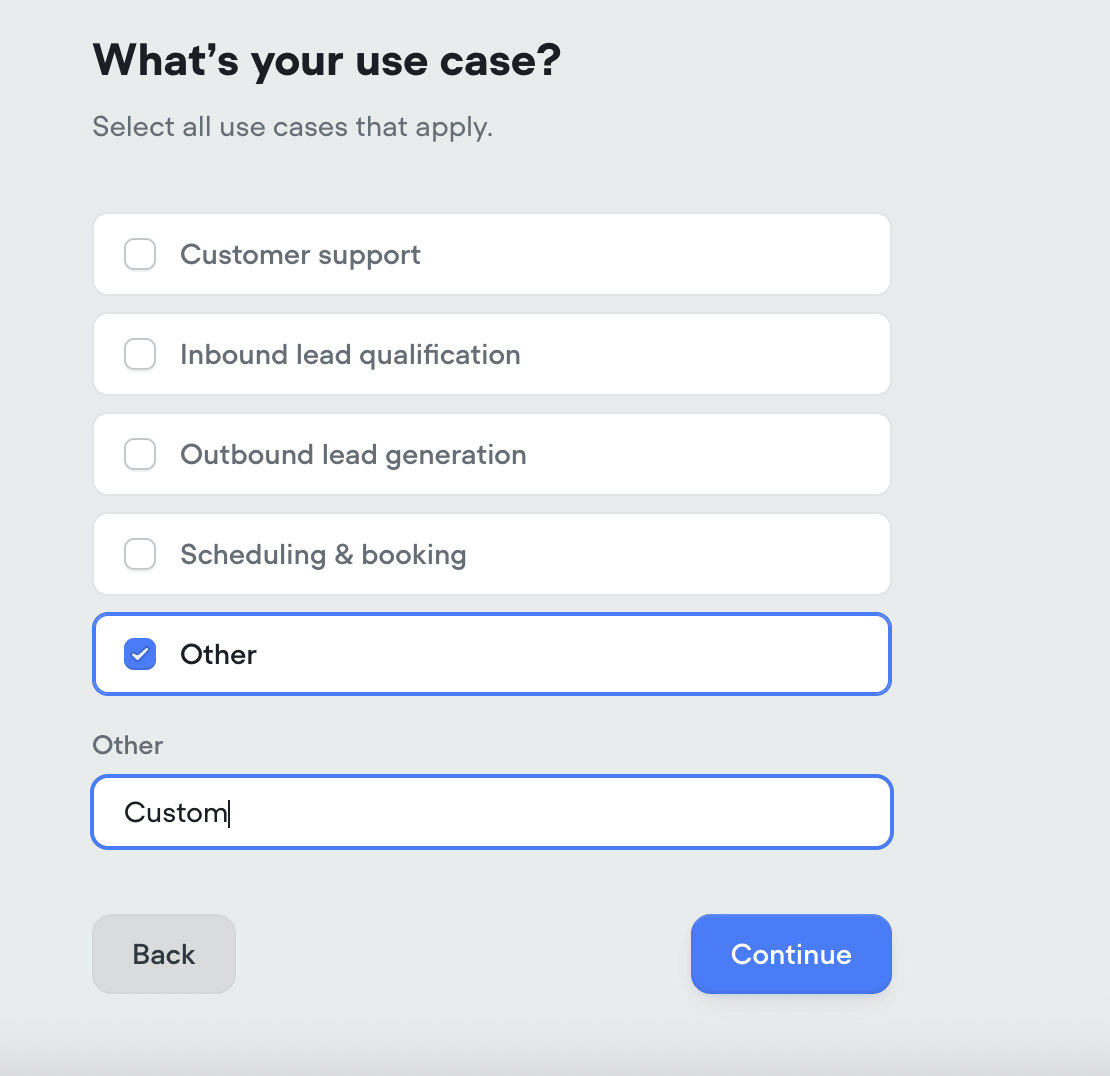
Next, Voiceflow will ask you to select a use case. I chose Other because we’ll be starting from scratch.
It will ask about the number of requests, click on top of it, and eventually, it’ll be redirected to this screen:
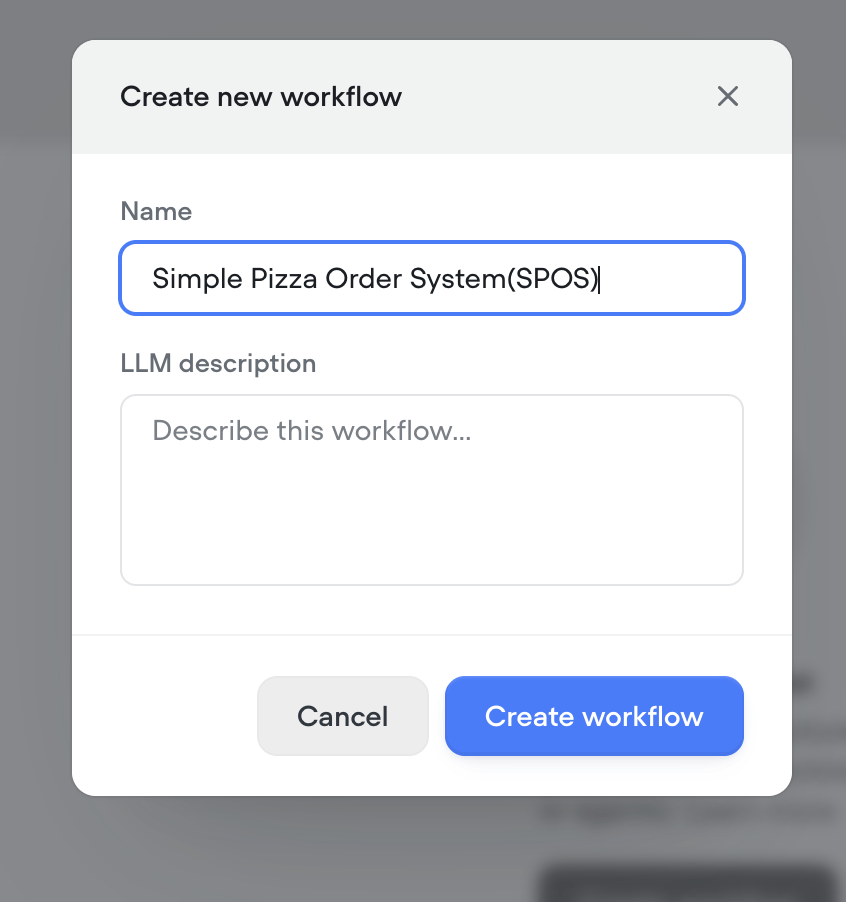
Now click the Workflows option, then click the Create workflow button. Do it as I mention below and create the workflow.
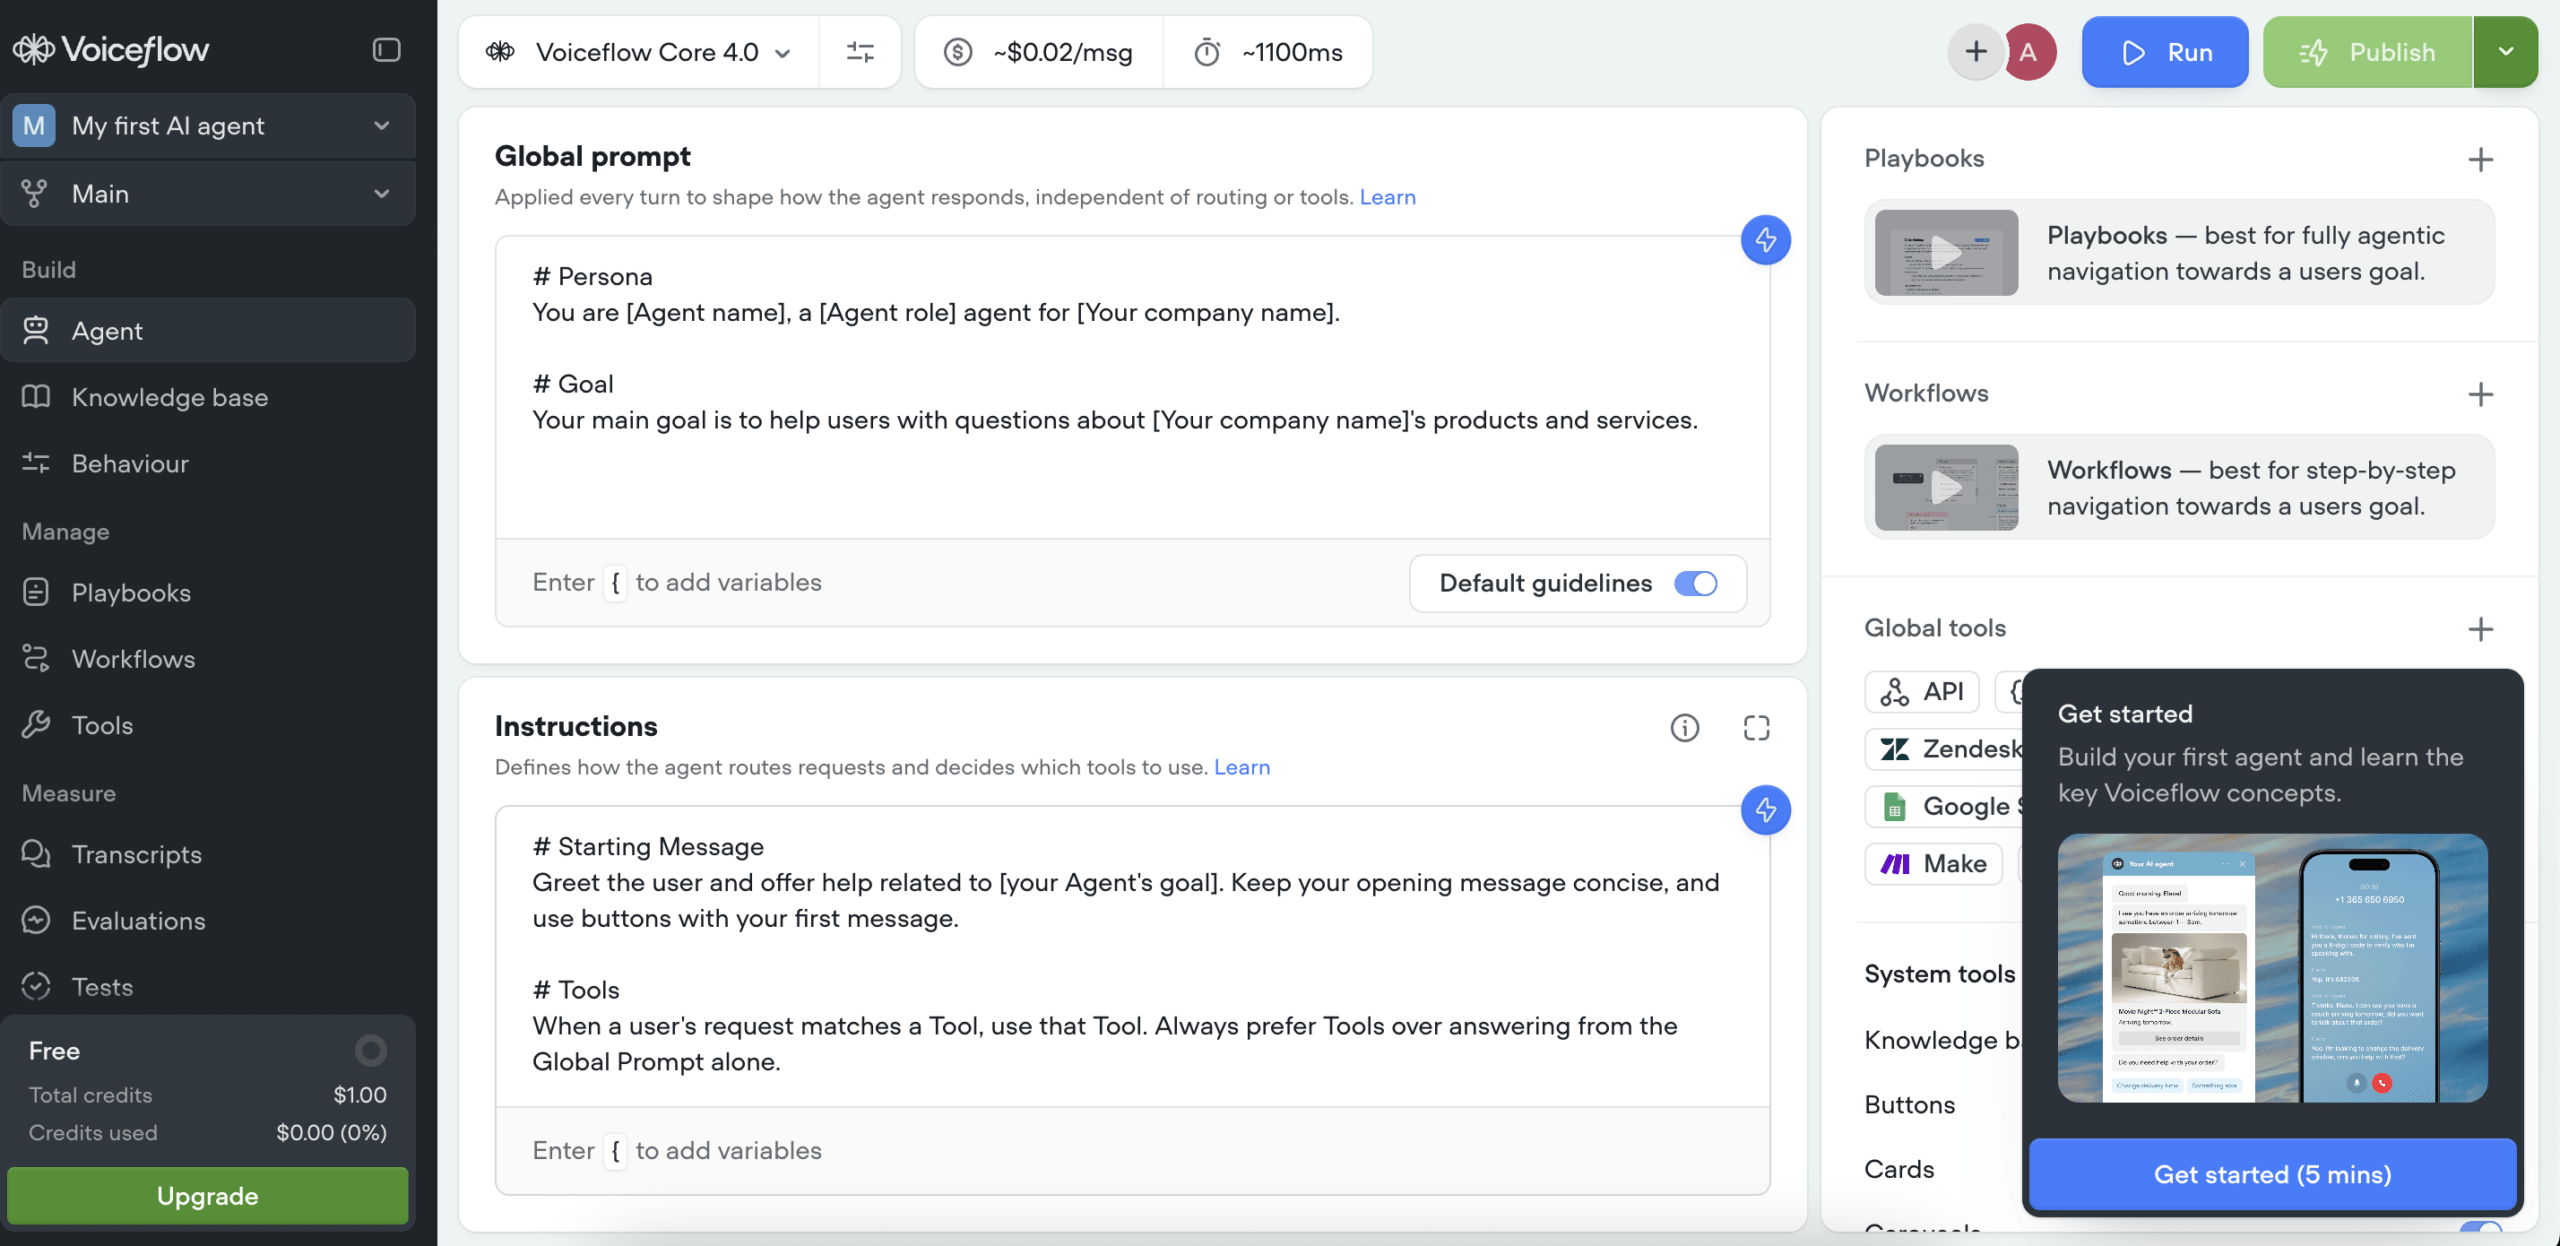
What you see now is the Canvas or Design Editor, if you prefer.
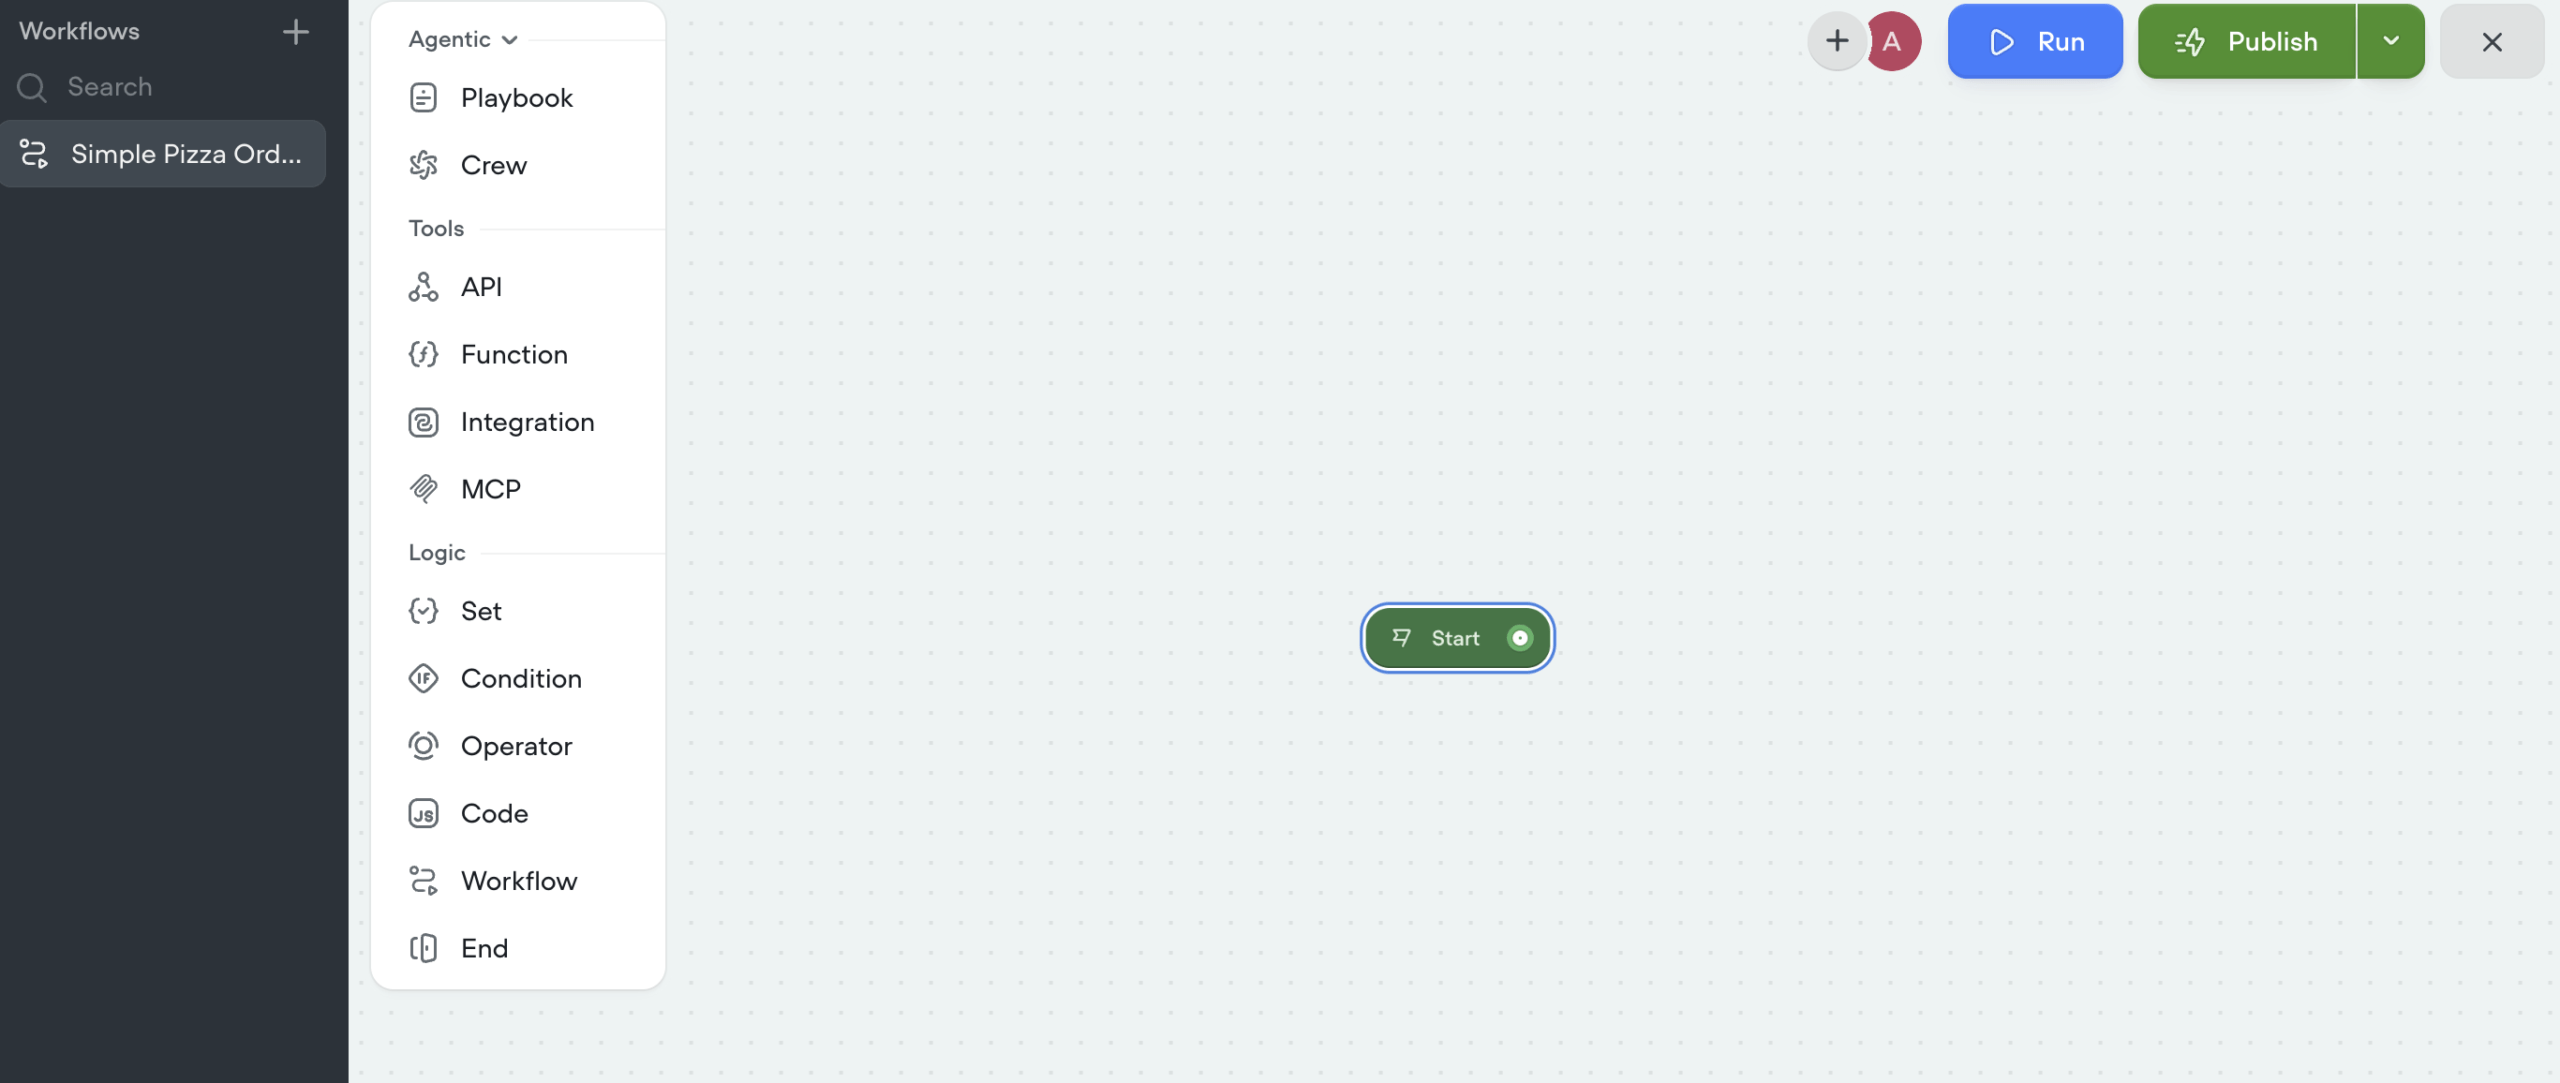
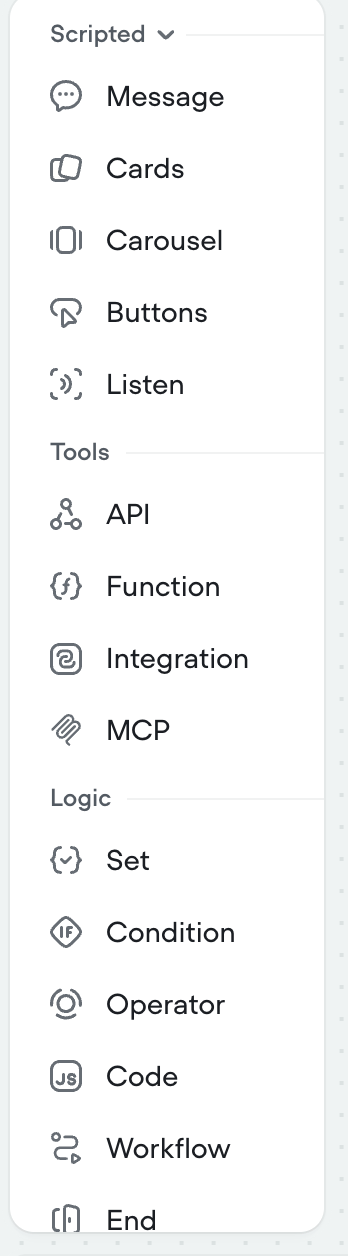
Click the down arrow next to the Agentic heading to see basic sections like Message, Cards, etc.
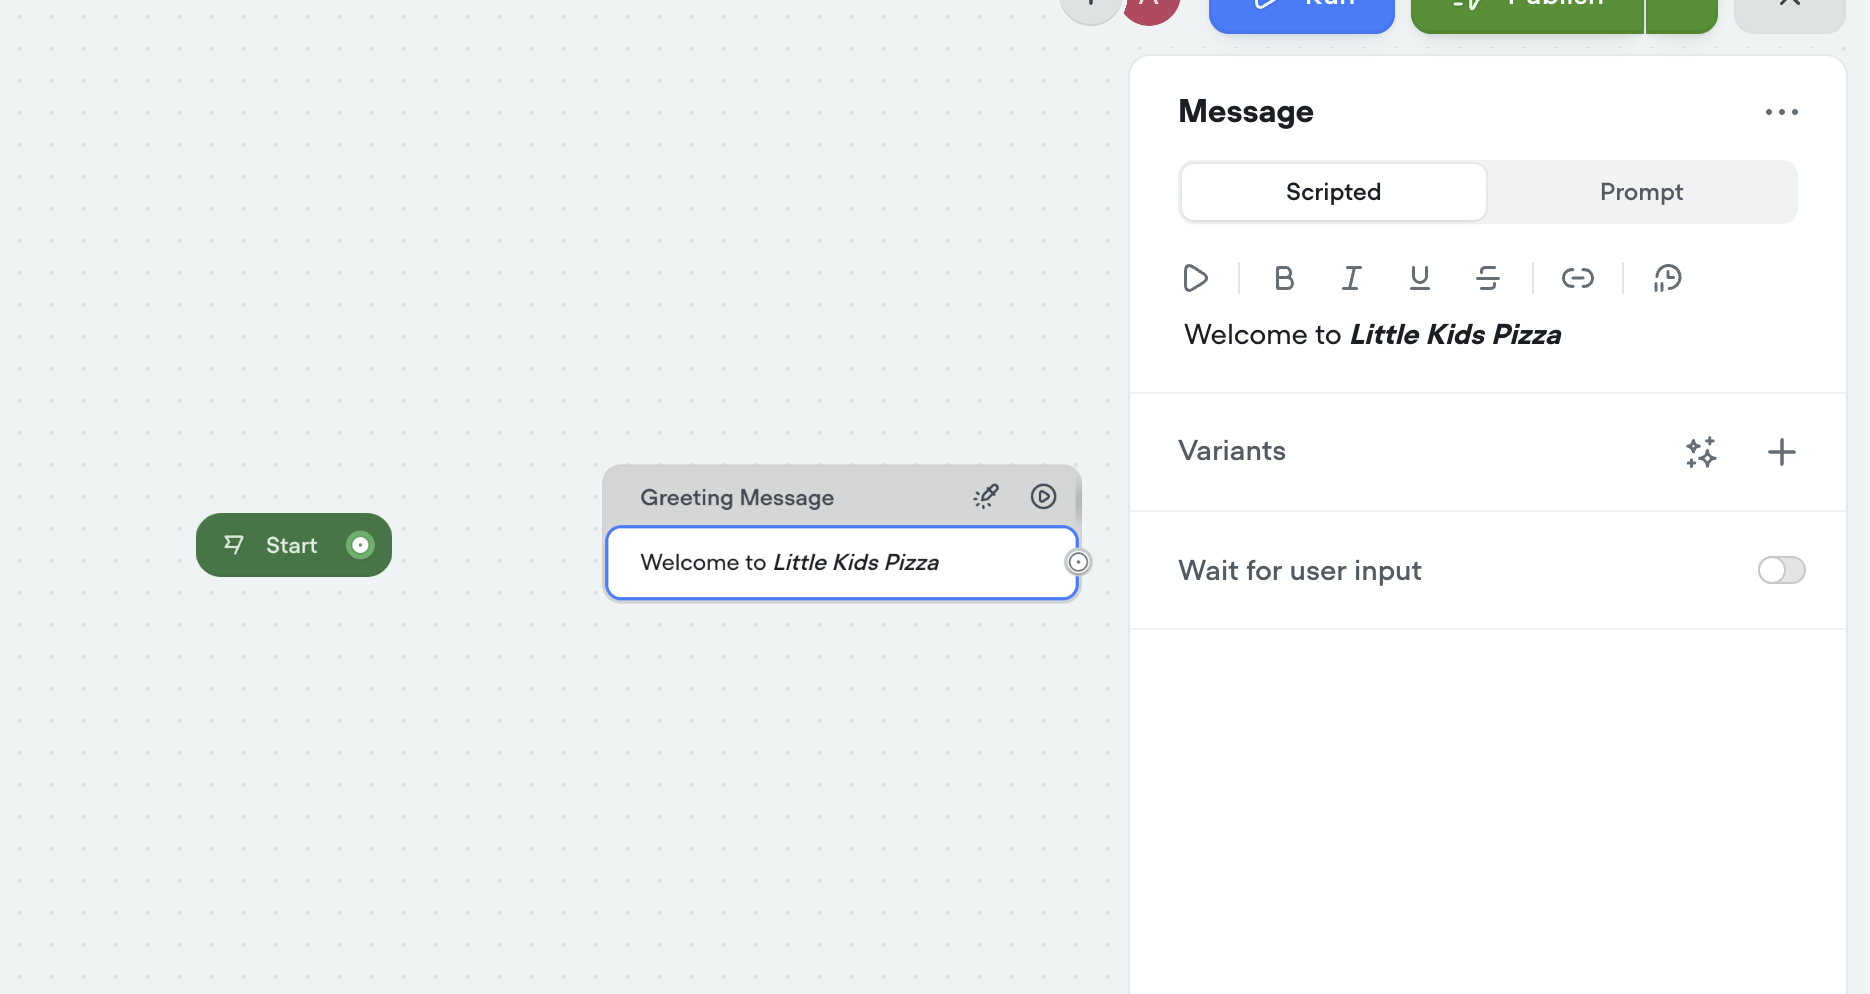
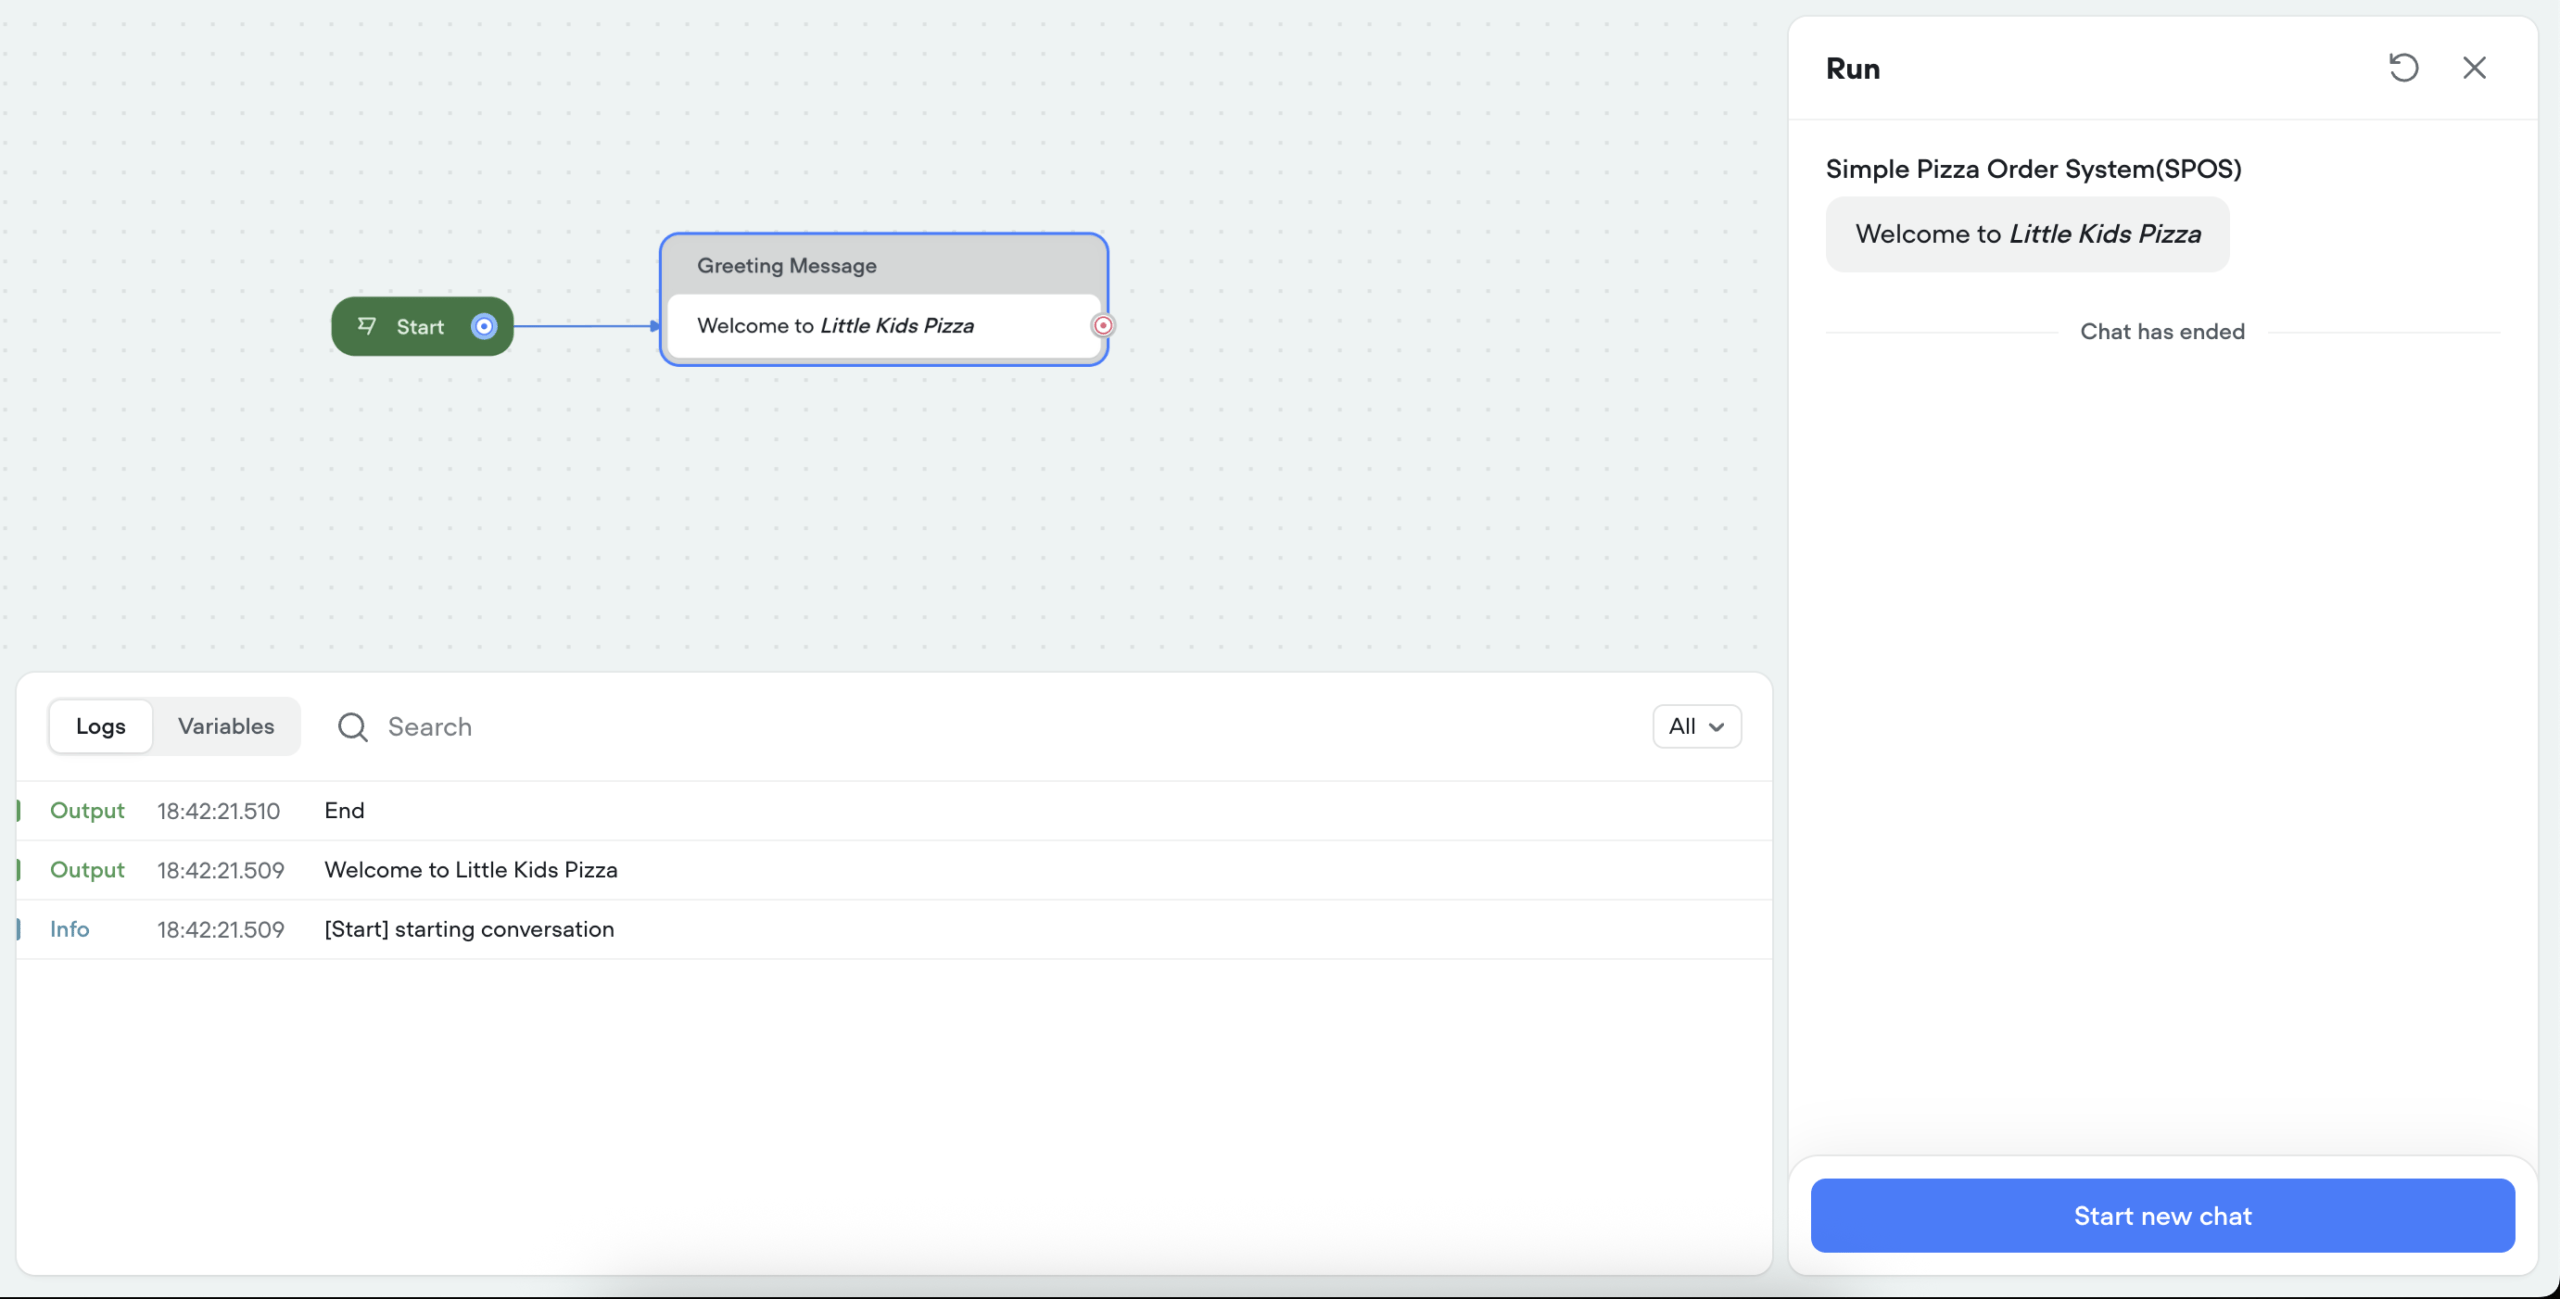
Let’s set the greeting message for our bot. Click and drag the Message option on the canvas and set any message you want, for me it is: Welcome to Little Kids Pizza.
Connect the two and hit the Run button.
Next, let’s ask the user to select one of the available pizzas.
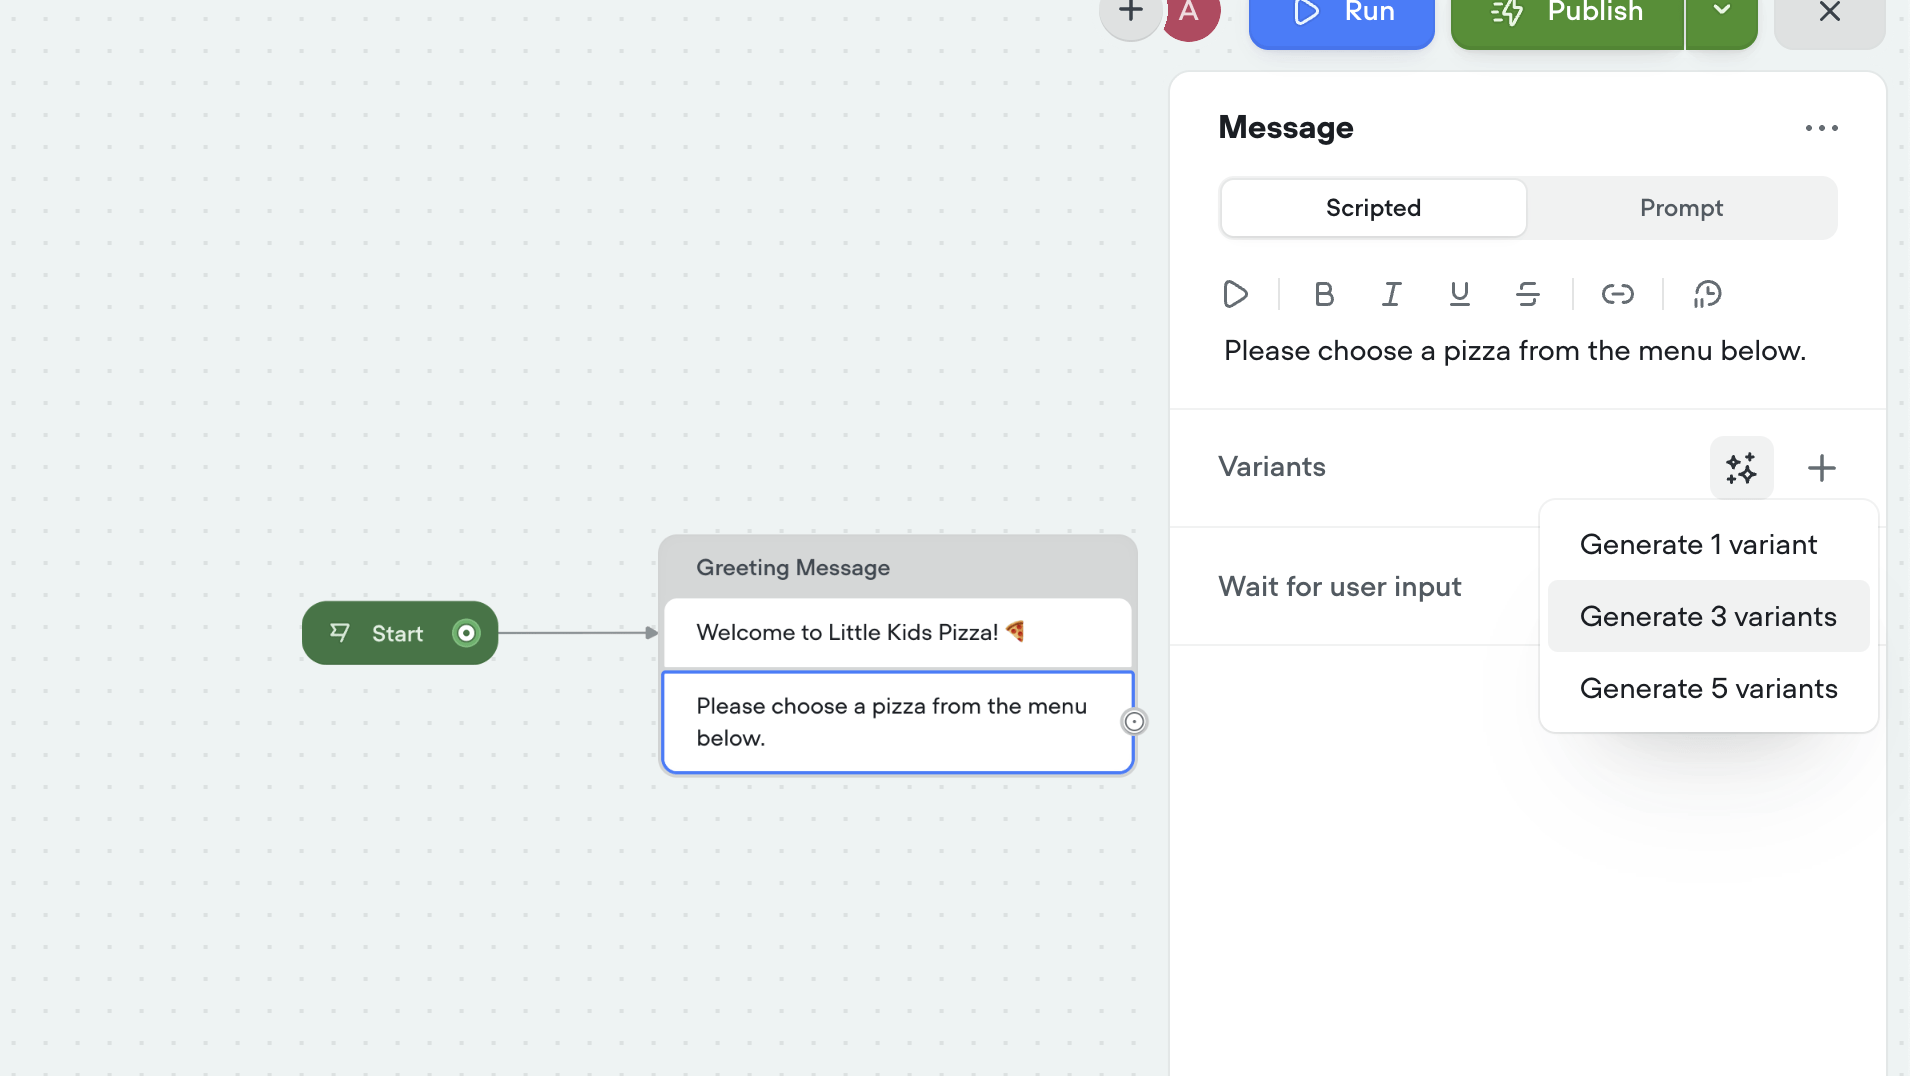
Variants feature uses AI to generate 3 different varieties of the same message, giving the bot a humanish feeling.

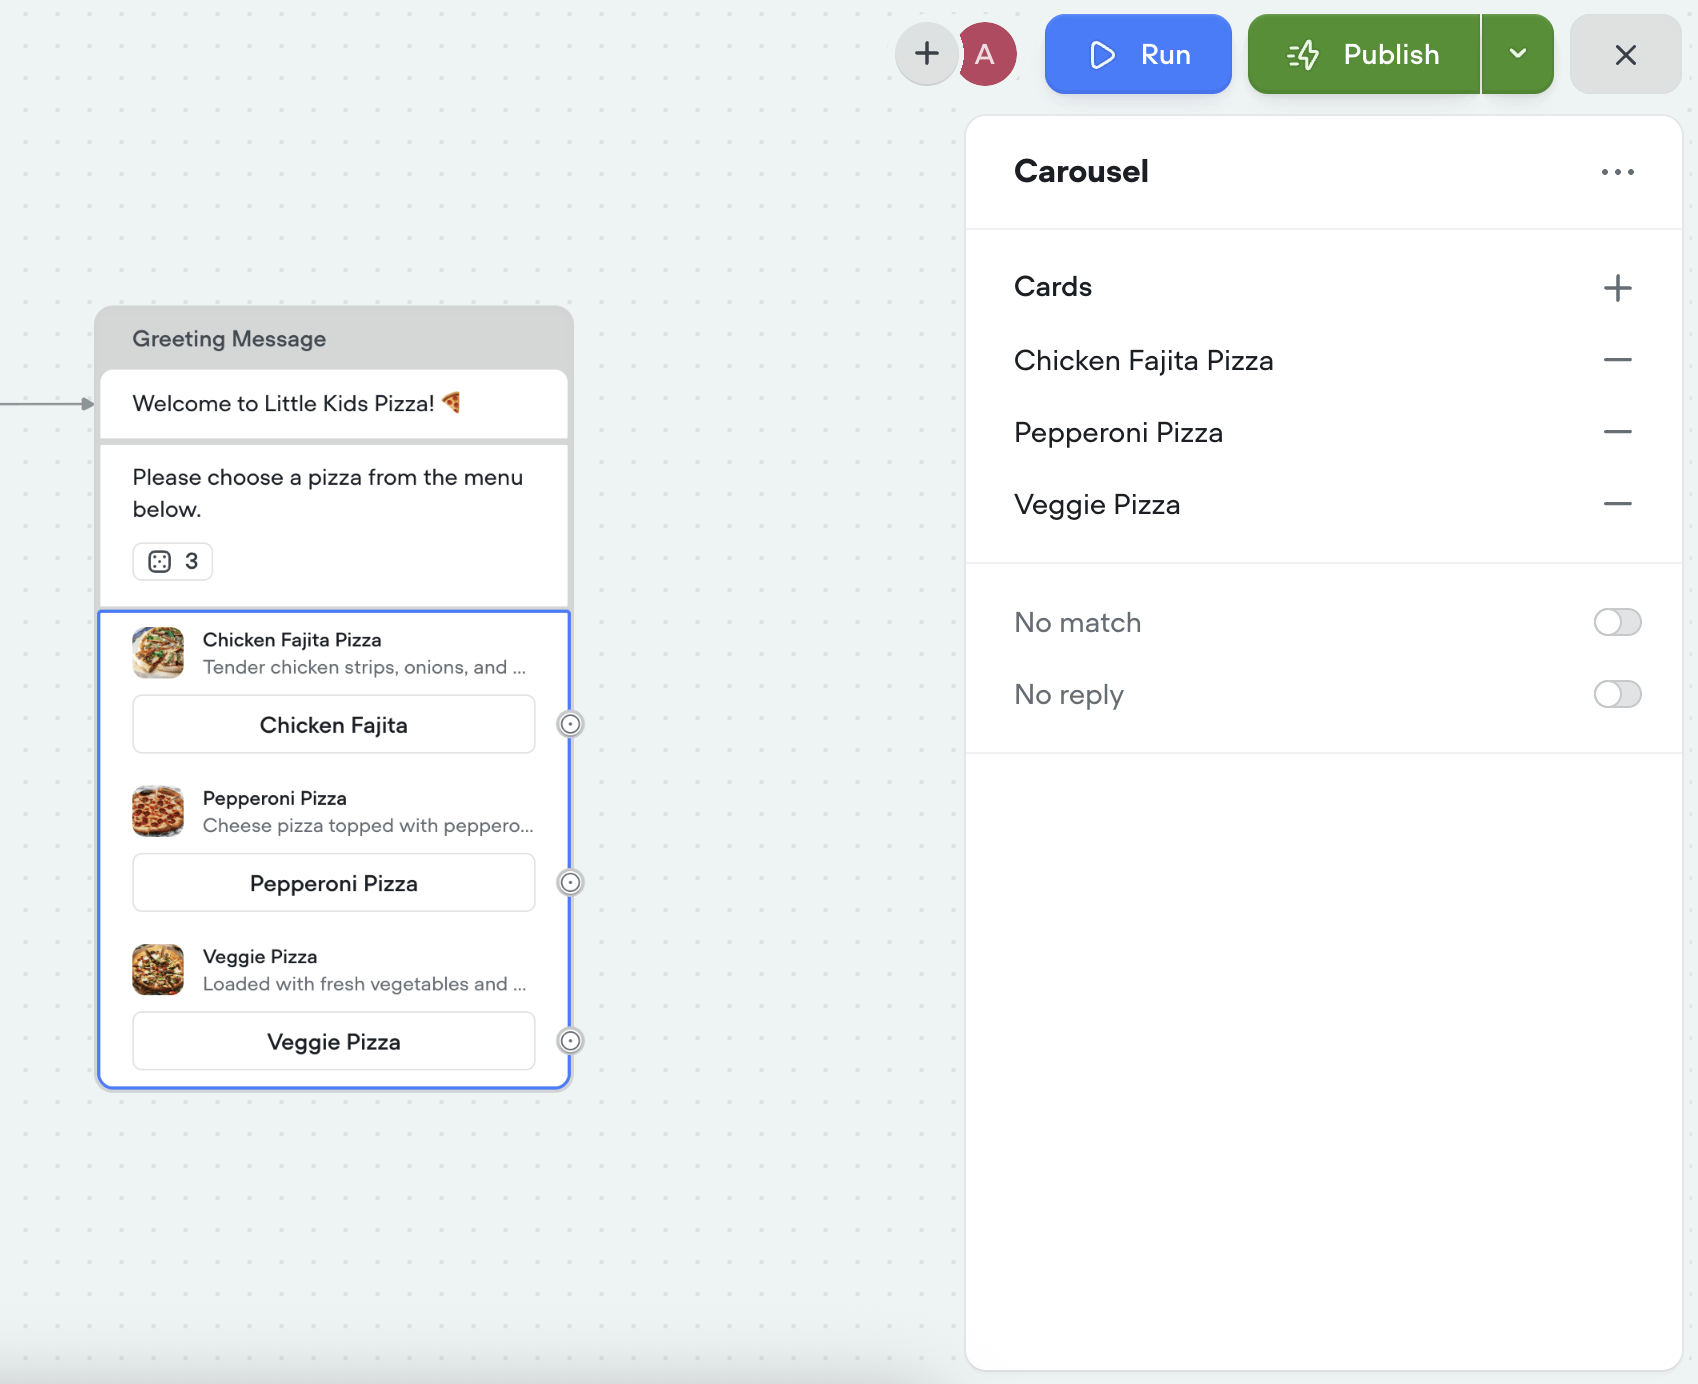
Next, we’ll use a Carousel component to display the available pizzas and allow users to make a selection:
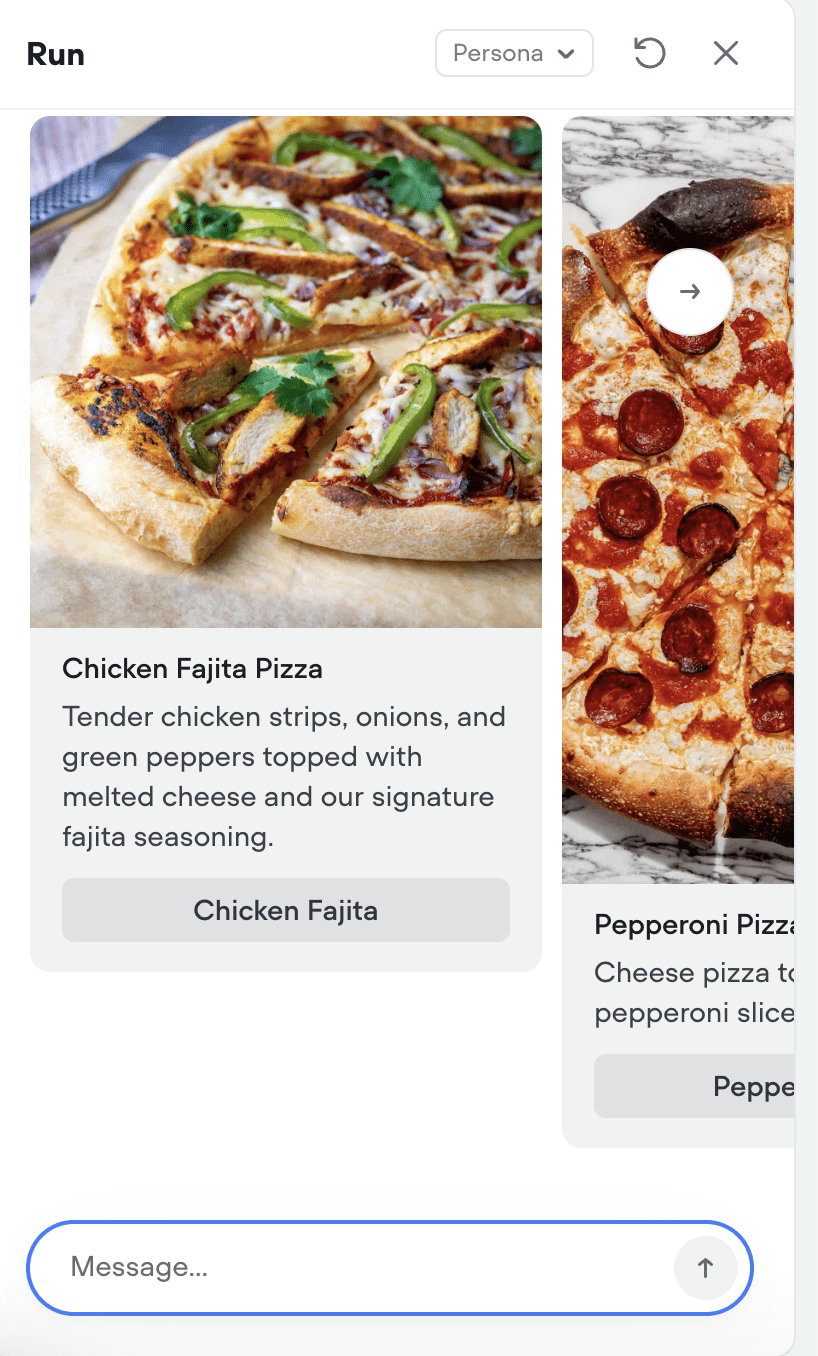
When you run it, it looks like the following:
Next, I am going to introduce Variables. Variables, as the name suggests, hold some value. We will be using two variables:selected_pizza and selected_size. Click on the Variables option in the left pane and add these variables.
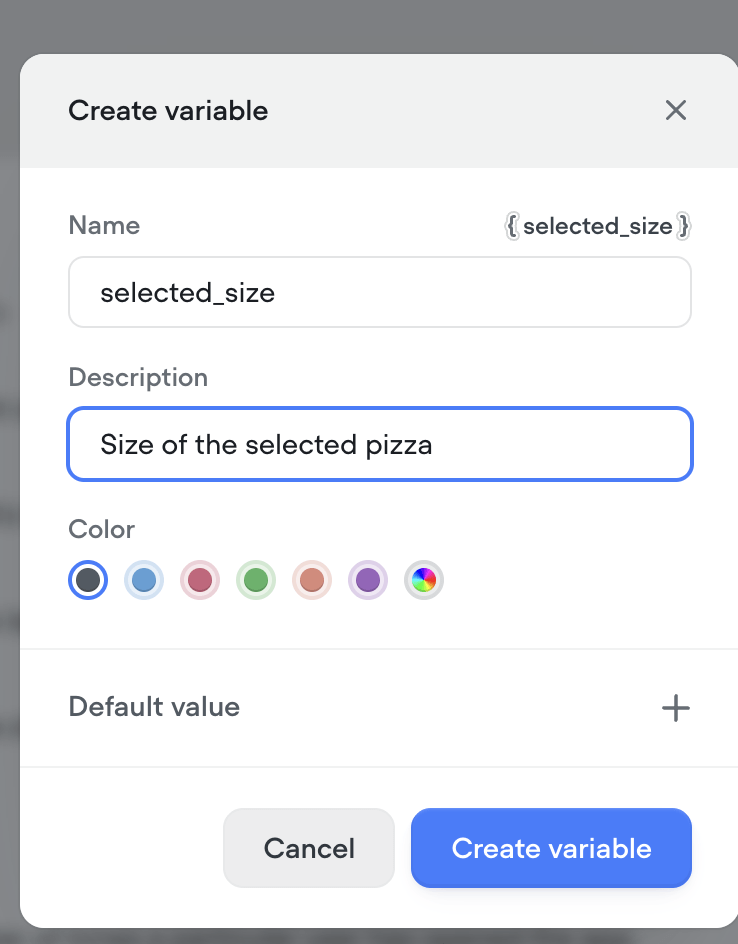
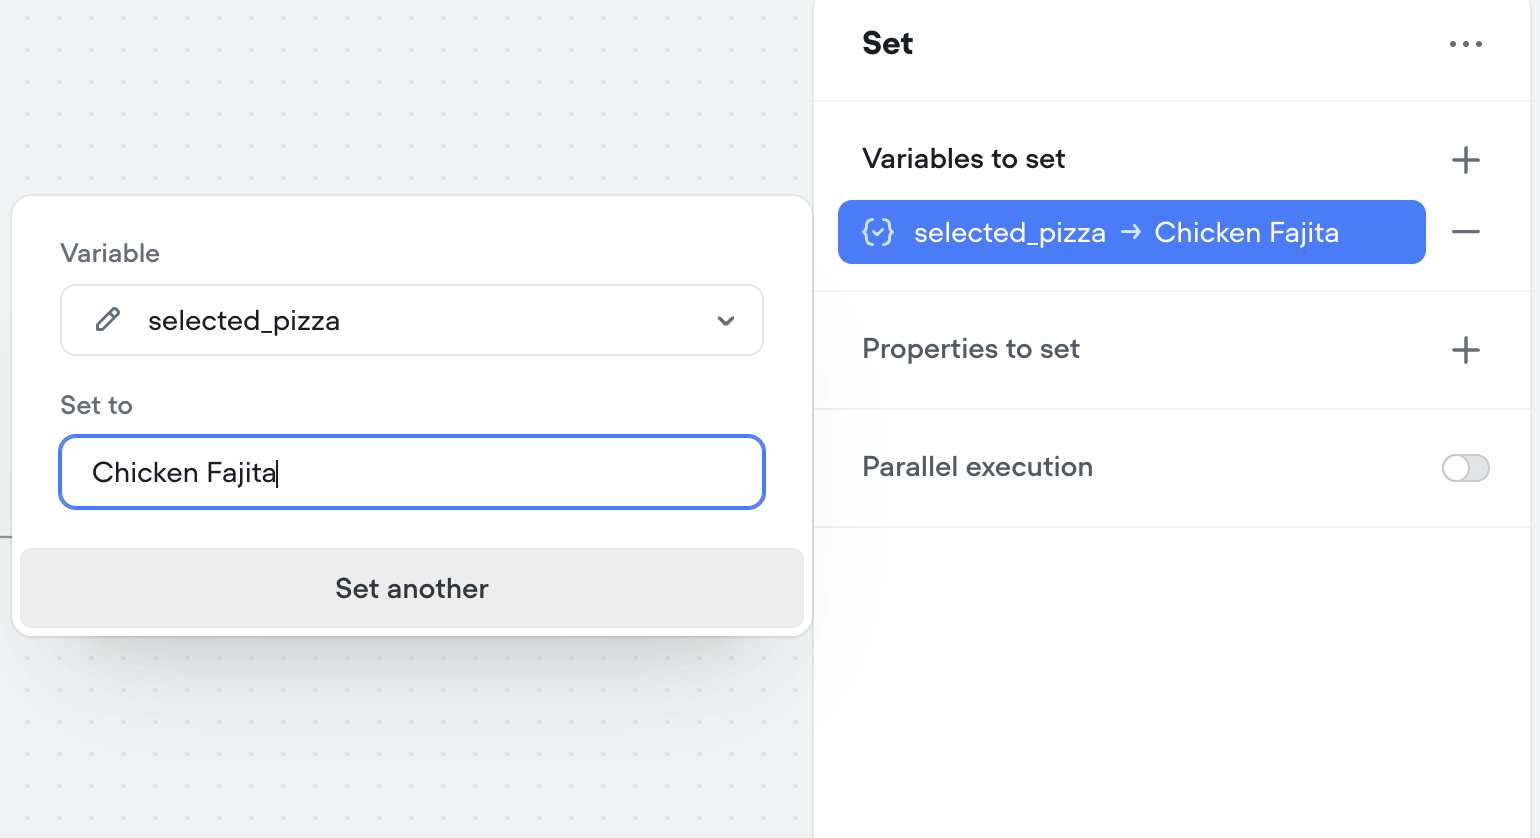
The goal is to assign values to these variables. To do that, we’d be using the Set step that will help to assign values:
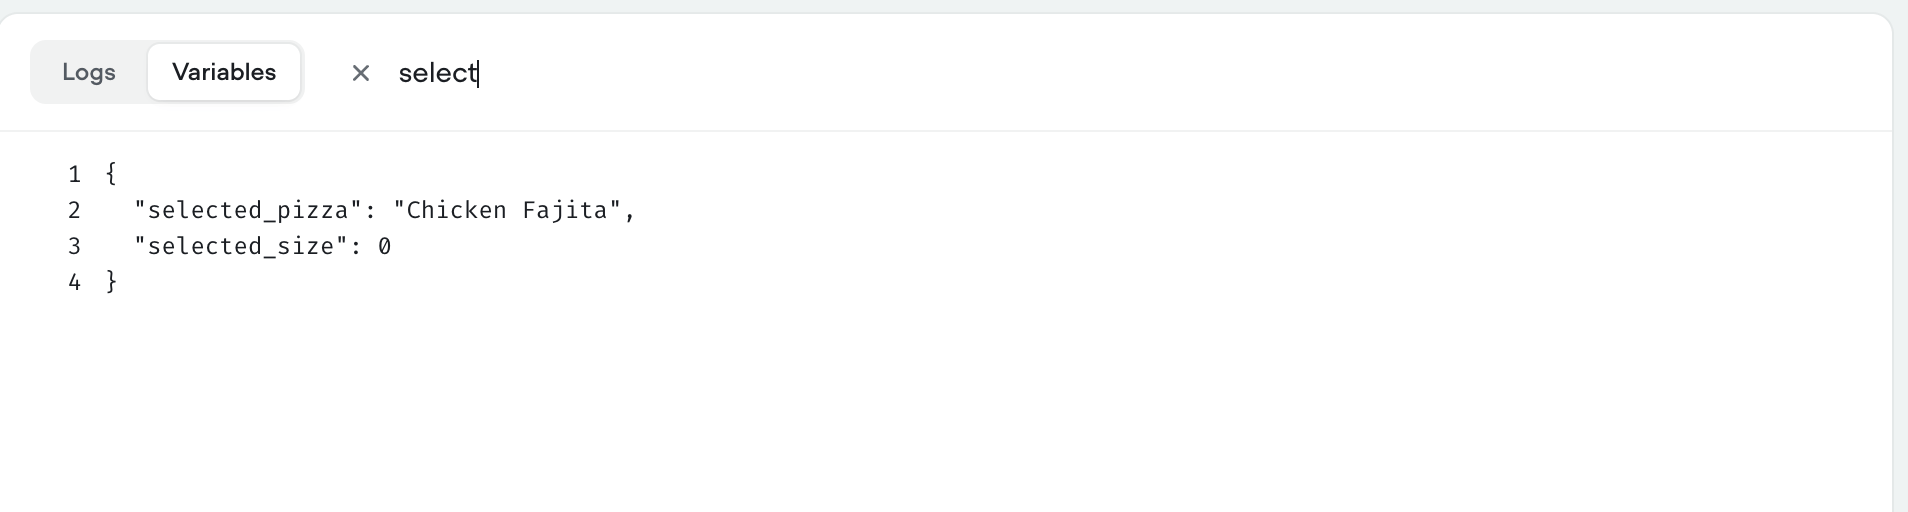
Let’s run it. Select your desired pizza. To see the current variable values, select the Variables section in the debug window and search selected_pizza variable, you should see something like below:
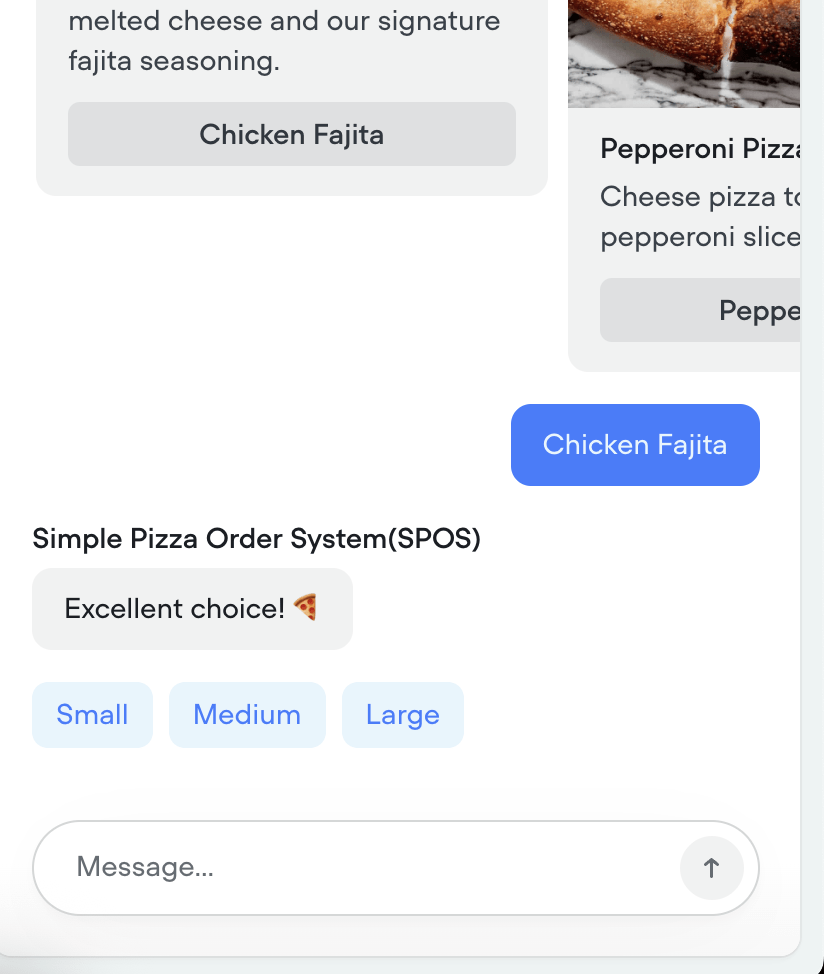
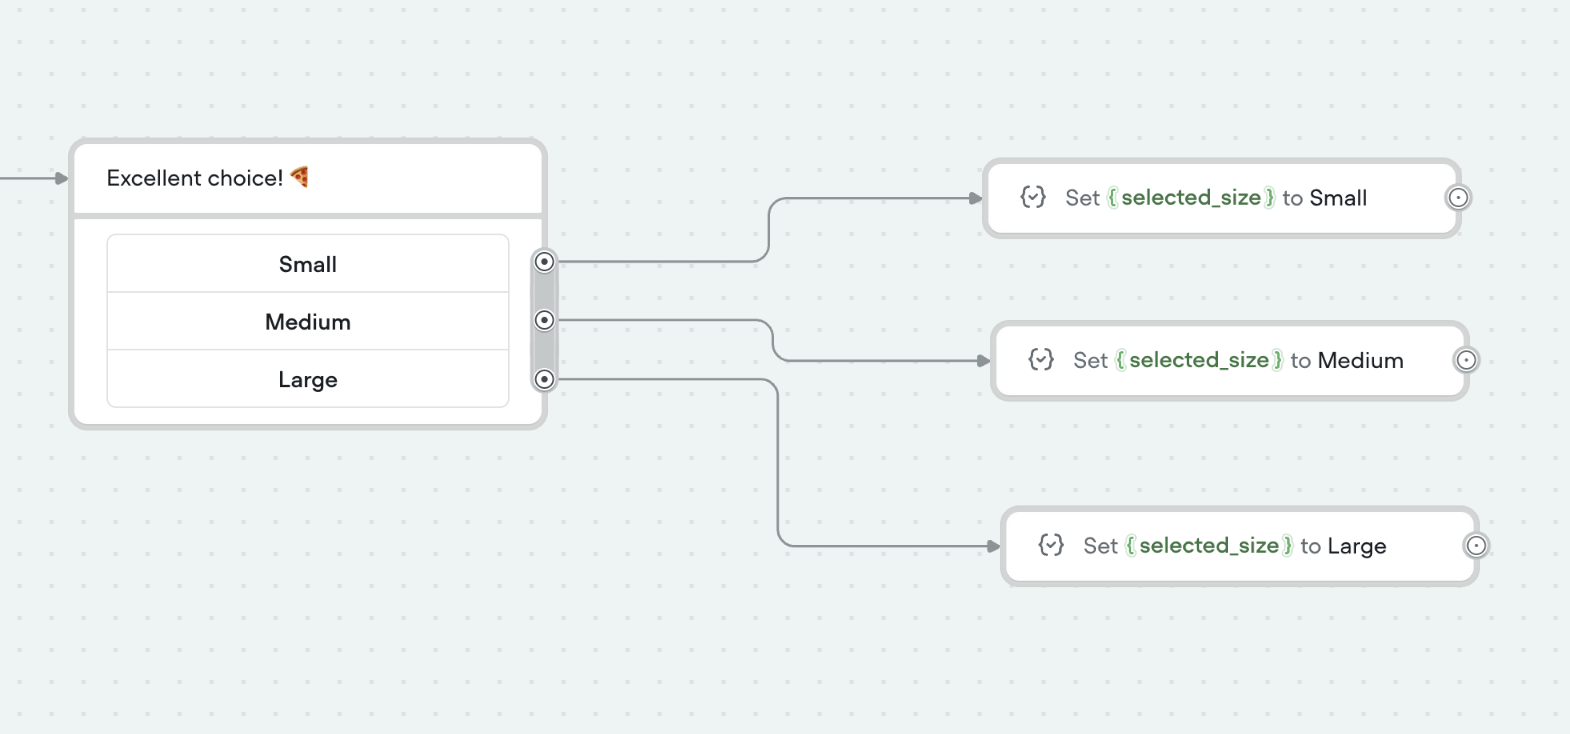
Next, select the size. I am going to add 3 buttons for it:

And when you run, it shows buttons like this:
Like before, we are going to assign values to the variable, selected_size
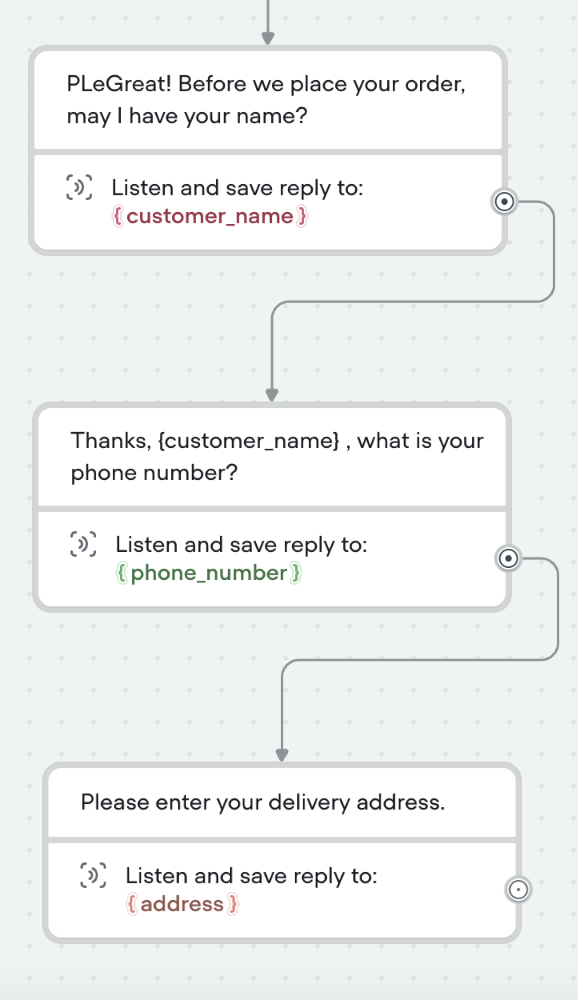
Next, we are going to grab contact details; for that, we will be using the Listen step.
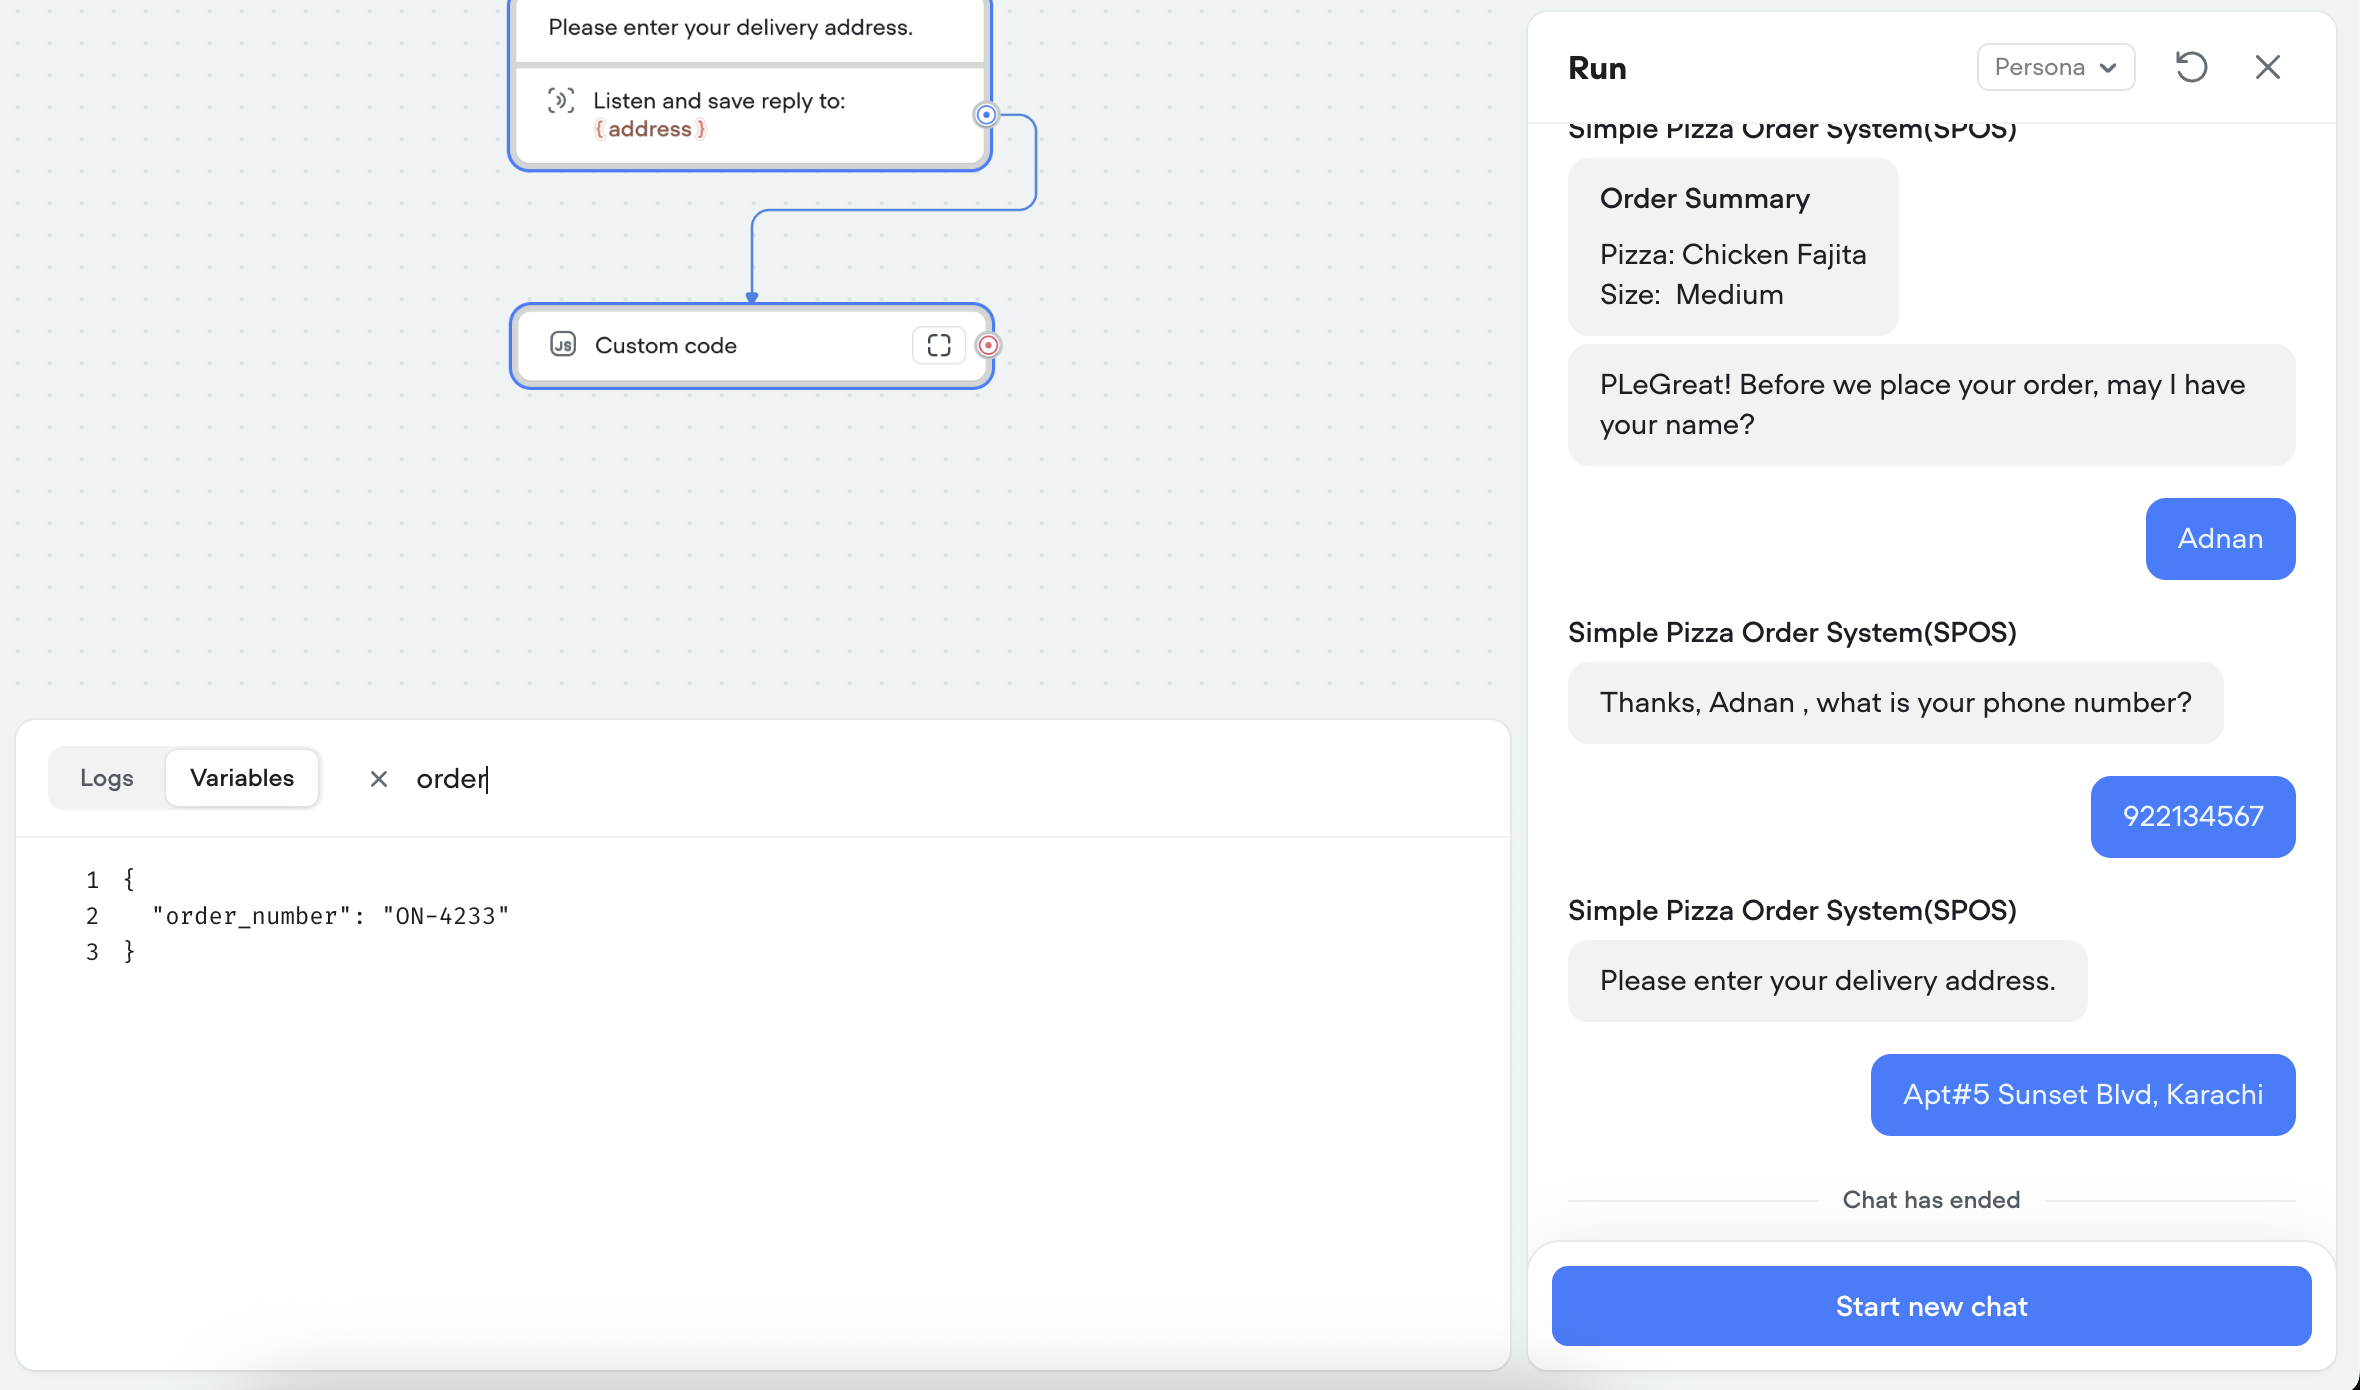
Last, we will be generating a random order number; for that, I introduce the Code step. You write code in JavaScript
const randomNumber = Math.floor(1000 + Math.random() * 9000)

{order_number} = `ON-${randomNumber}`
When you run the workflow till now, it produces the following:
In the end, we are going to add a screen that tells you about the order confirmation and end the session.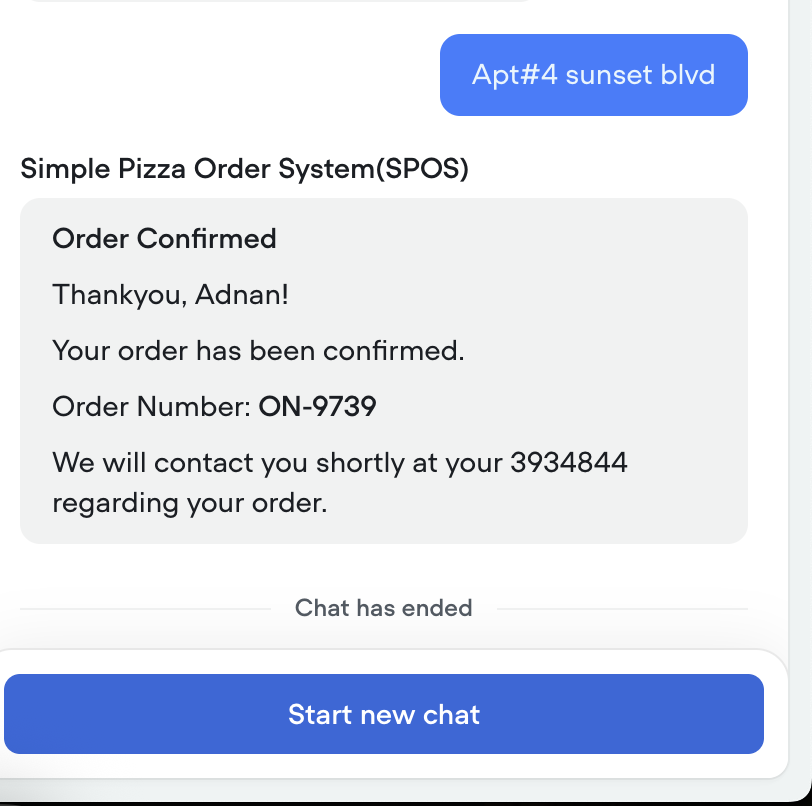
Conclusion
This was an intro of the world of Vocieflow. As you can see, it is easy to create a chatbot in it. It was a very basic having no flavor of AI in it. The purpose was to introduce you to the environment of the app. In future posts, we will be discussing more features of it. Sign up with my link and upgrade to the paid package, and in case you find an issue, lemme know.