I had written about Elasticsearch almost 3 years ago in June 2018. During this time a new Elasticsearch version launched which has some new features and changes. I’d be repeating some concepts again in this post so one does not have to go to the old post to learn about it. So, let’s begin!
What is ElasticSearch?
ElasticSearch (ES) is a distributed and highly available open-source search engine that is built on top of Apache Lucene. It’s open-source which is built in Java thus available for many platforms. You store unstructured data in JSON format which also makes it a NoSQL database. So, unlike other NoSQL databases, ES also provides search engine capabilities and other related features.
ElasticSearch Use Cases
You can use ES for multiple purposes, a couple of them given below:
- You are running a website that provides lots of dynamic content; be it an e-commerce website or a blog. By implementing ES you can not only provide a robust search engine for your web app but can also provide native auto-complete features in your app.
- You can ingest different kinds of log data and then can use to find trends and statistics.
- Full-Text search.
- Event Data and Metrics
Setting up and Running
The easiest way to install ElasticSearch is to just download it and run the executable. You must make sure that you are using Java 7 or greater.
Once download, unzip and run the binary of it.
elasticsearch-7.11.1/bin/elasticsearch
There will be a lot of text in the scrolling window. If you see something like below then it seems it’s up.
publish_address {127.0.0.1:9200}, bound_addresses {[::1]:9200}, {127.0.0.1:9200}
But, since, seeing is believing, access the URL http://localhost:9200 in your browser or via cURL and something like below should welcome you:

Version number is 7.11.1 which is the ES version.
Now, before I move on to accessing Elastic Search in Python, let’s do some basic stuff. As I mentioned that ES provides a REST API interface, we will be using it to carry on different tasks. I am going to use the Postman app for executing REST APIs.
Basic Examples
Creating Index
The very first thing you have to do is creating an Index. Everything is stored in an Index. The RDBMS equivalent of Index is a database so don’t confuse it with the typical indexing concept you learn in RDBMS. Do notice PUT is being used instead of POST.
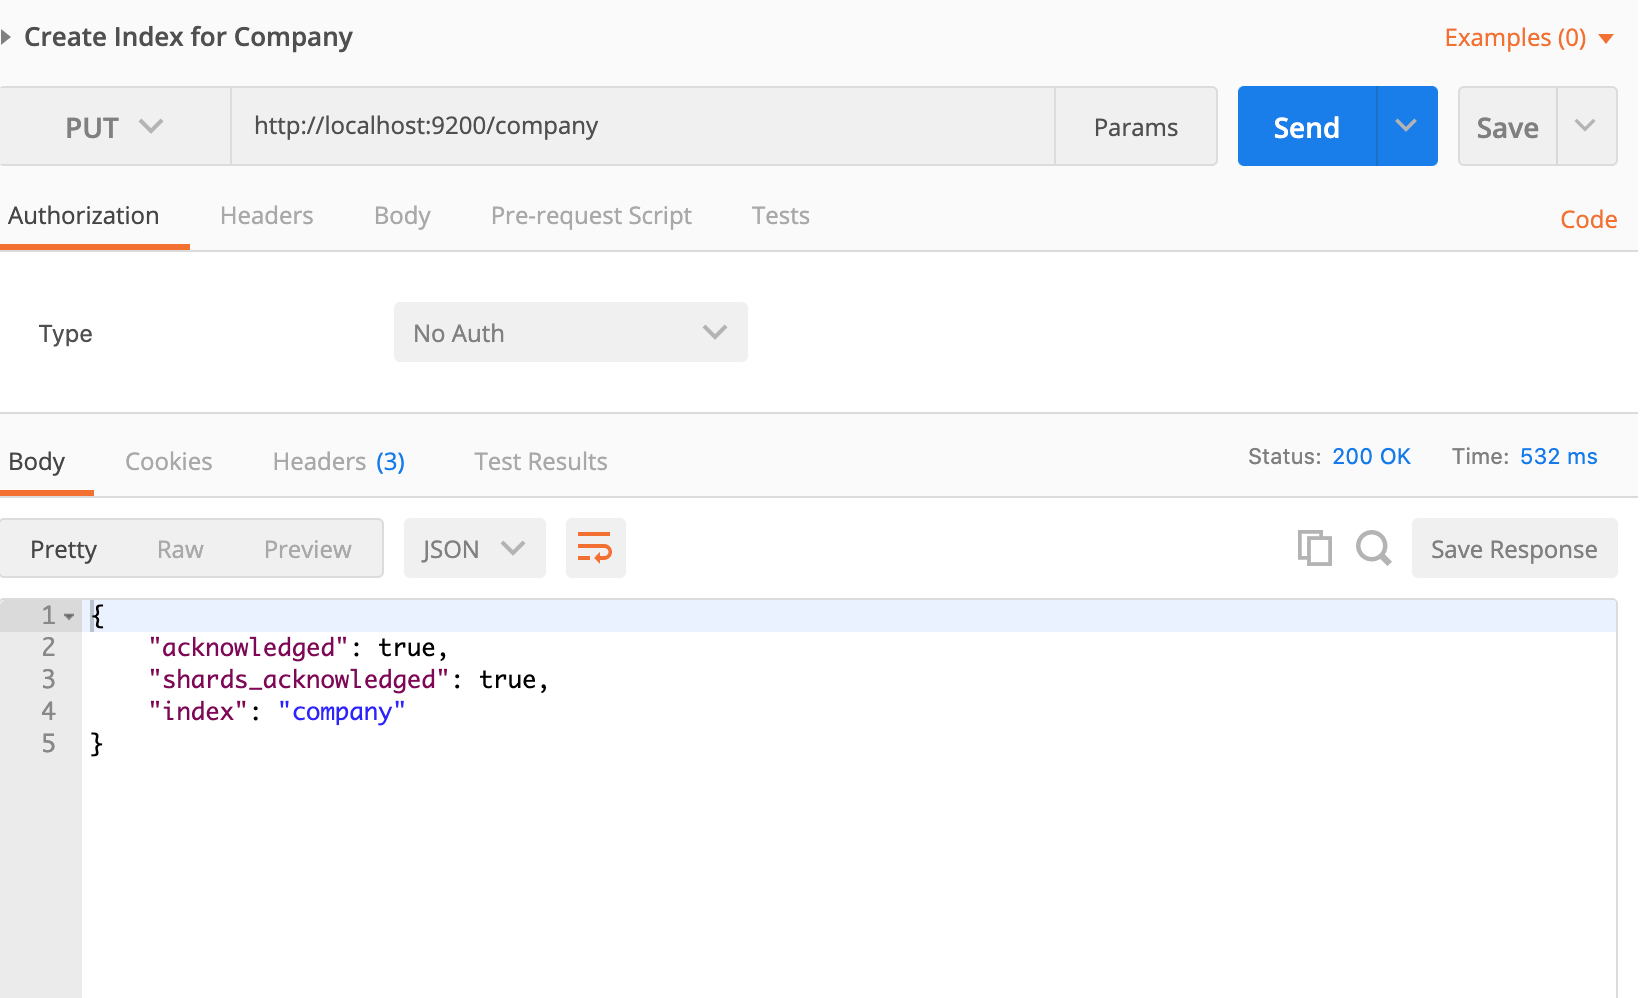
If I run again it’d be screaming like hell.
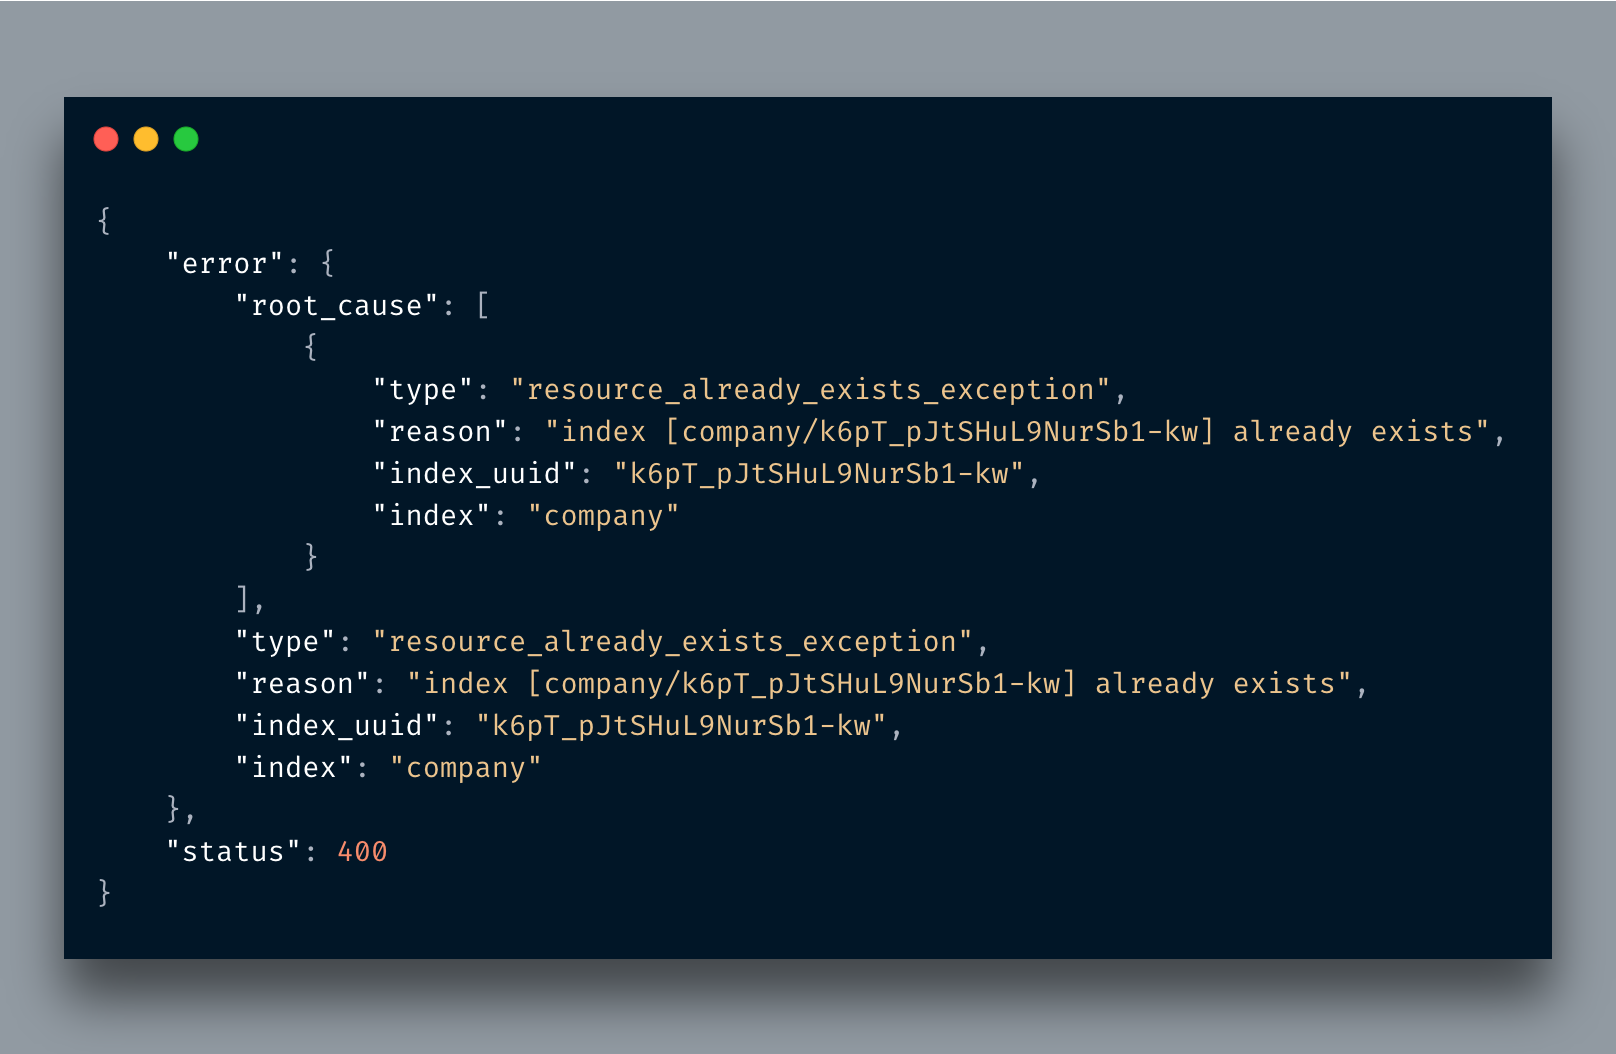
So we have created a database with the named company. In other words, we have created an Index called company. If you access http://localhost:9200/company from your browser then you will see something like the below:
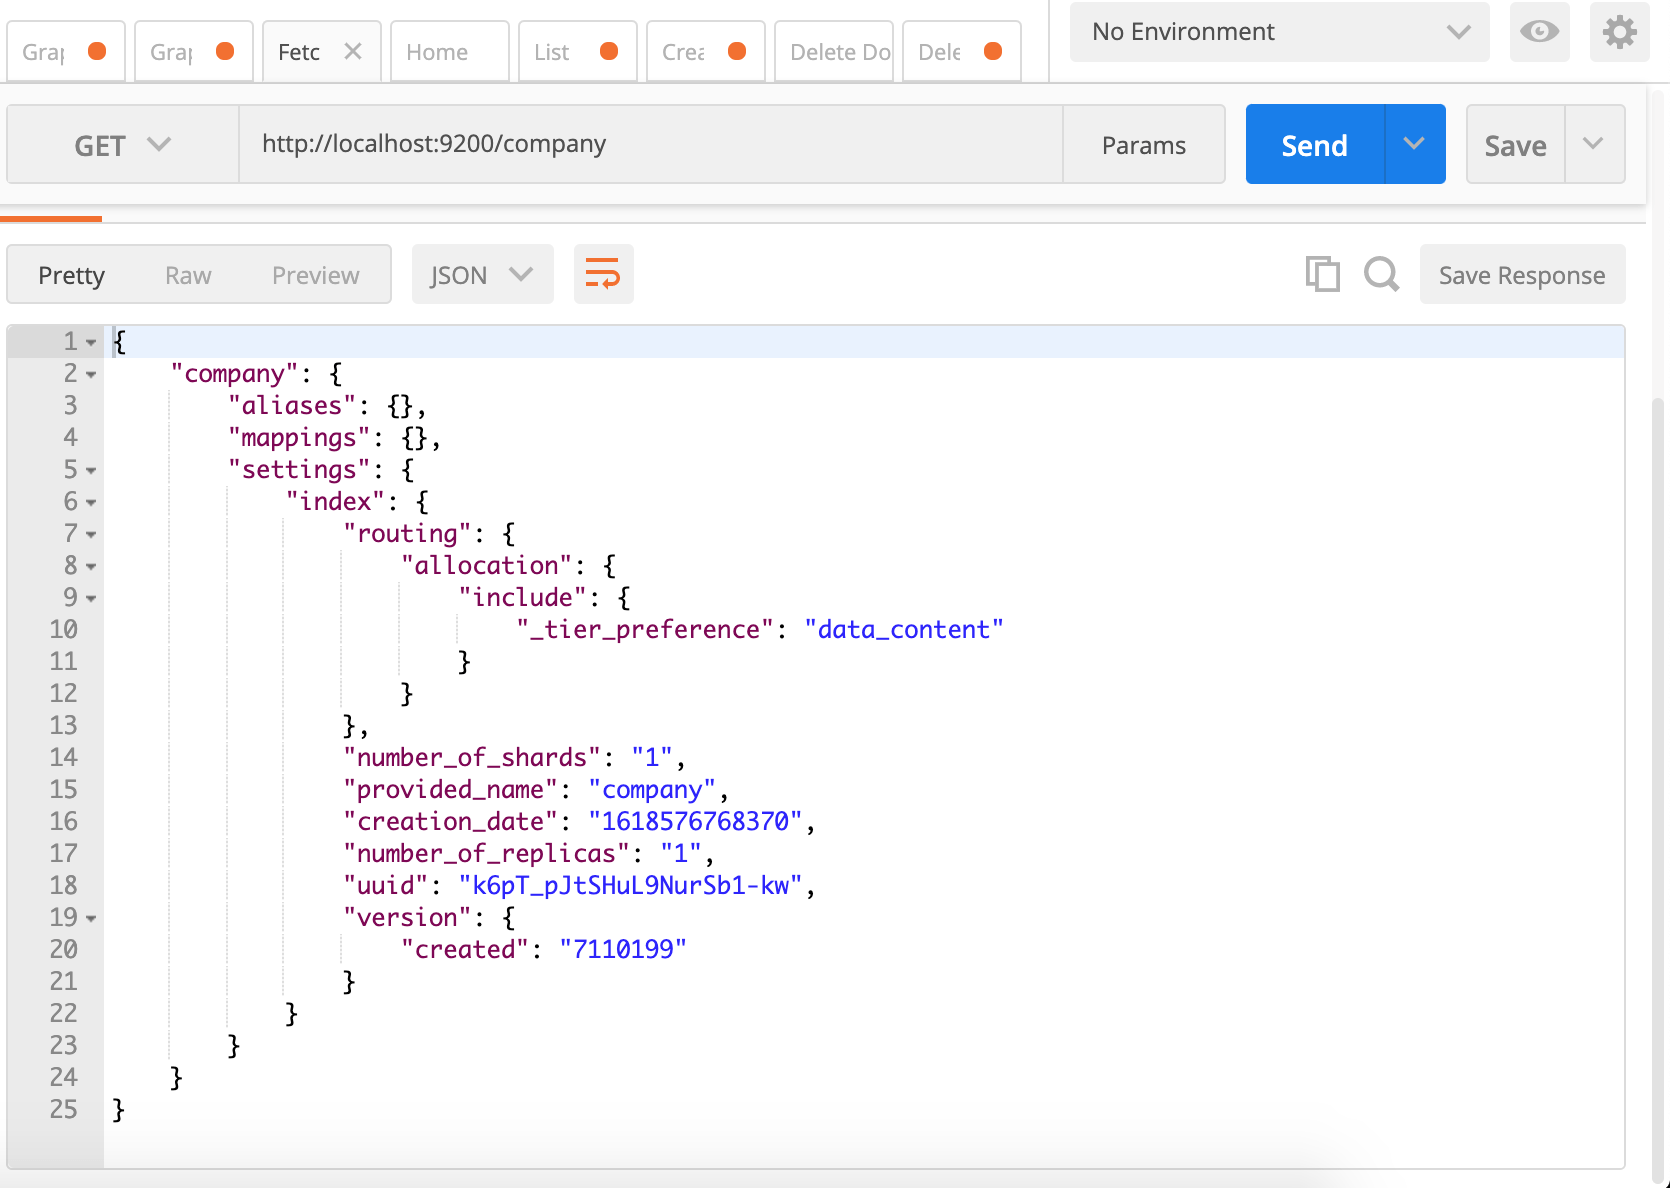
Ignore mappings for a while as we will discuss it later. It’s actually nothing but creating a Schema of your document. creation_date is self-explanatory. The number_of_shards tells about the number of partitions that will keep the data of this Index. Keeping entire data on a single disk does not make sense at all. If you are running a cluster of multiple Elastic nodes then the entire data is split across them. In simple words, if there are 5 shards then the entire data is available across 5 shards and the ElasticSearch cluster can serve requests from any of its nodes.
Replicas talk about mirroring your data. If you are familiar with the master-slave concept then this should not be new for you. You can learn more about basic ES concepts here.
You can also perform both index creation and record insertion in a single go. All you have to do is to pass your record in JSON format. You can something like below in PostMan:
If you read my previous version of this post you’d notice I had mentioned /employees instead of doc
It is because from ES7+ the document type has been removed thus can’t be used for mapping either. It is now recommended to create one index per document type hence a generic doc would be now used. You can still create the old way but would be facing issues while creating the mapping.
Creating/Updating a document
Earlier I created both index and document together but it’d not always be a case. What if you have to create more documents?
I am removing the index and the document I had created earlier and re-created the company index without document info. By the way, if you just remove the index it’d remove all related documents too.
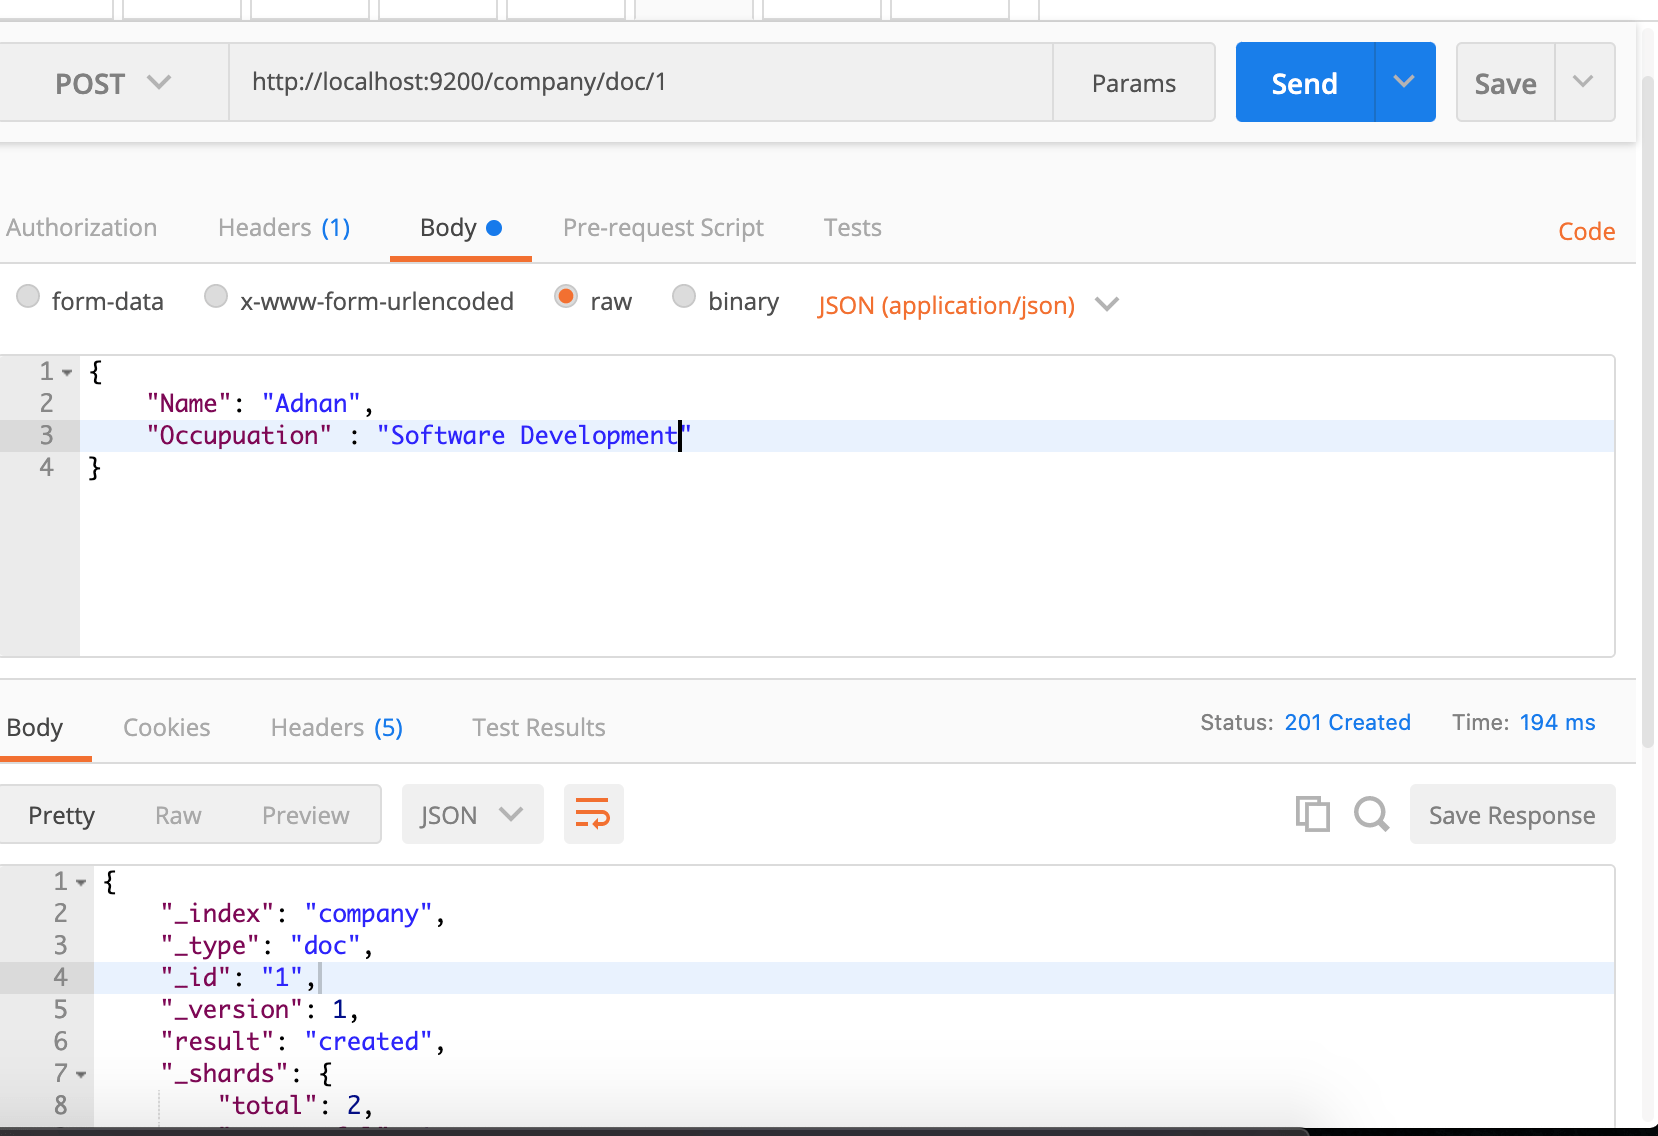
Now, I am going to create a single document in an existing index.

As you can see, I passed a JSON structure and it returned a JSON response. Notice the field result which is set to created. If I hut the same request again, it’d be changed to updated.
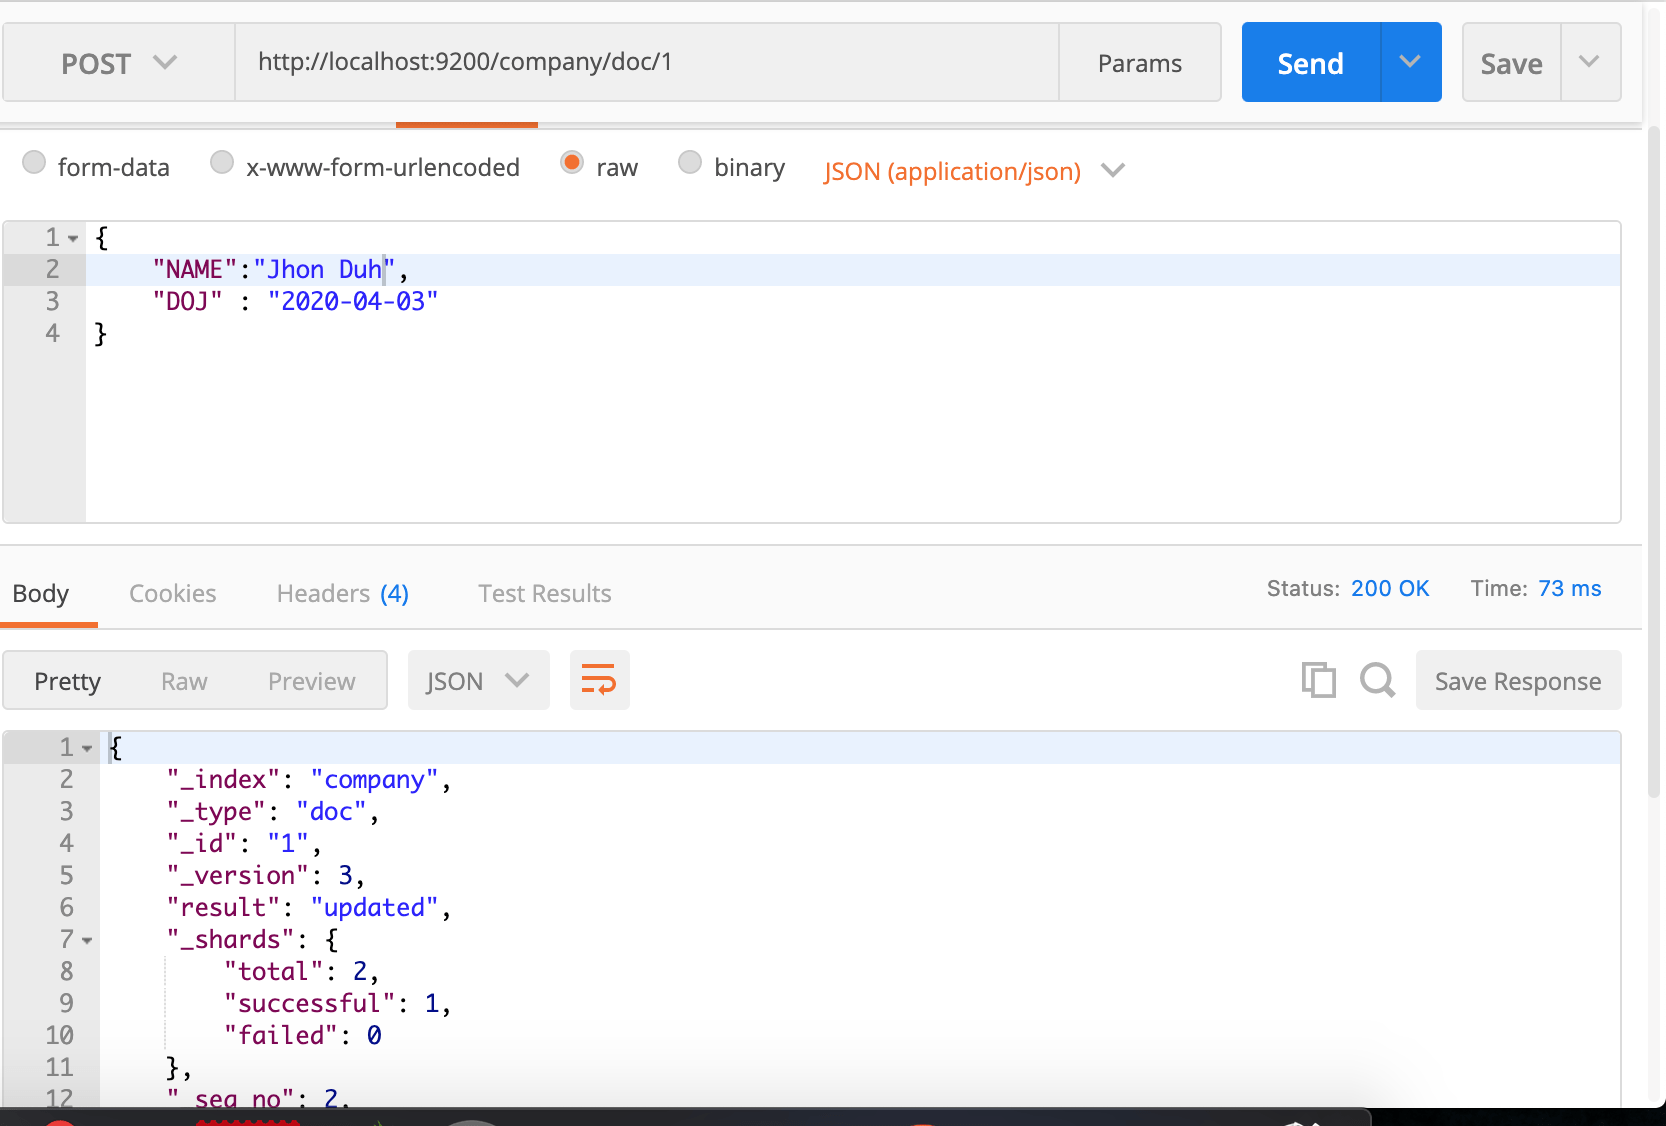
Here are few things to notice: result changed to updated. Though I changed NAME to Jhon Duh. Even if I do not change it, it’d still be considered an updated document for Elasticsearch. Notice the version field, it now changed to 3 because the first version was 1(Check the above image) and then I just it and now this one. Every time you hit the request it’d update the version. Do remember this versioning for internal purposes and you can’t retrieve previous versions of documents by mentioning the version number. You will have to implement the mechanism on your own.
In the above URL, I passed 1 as an ID. Elasticsearch set anything after the document type and / into ID.
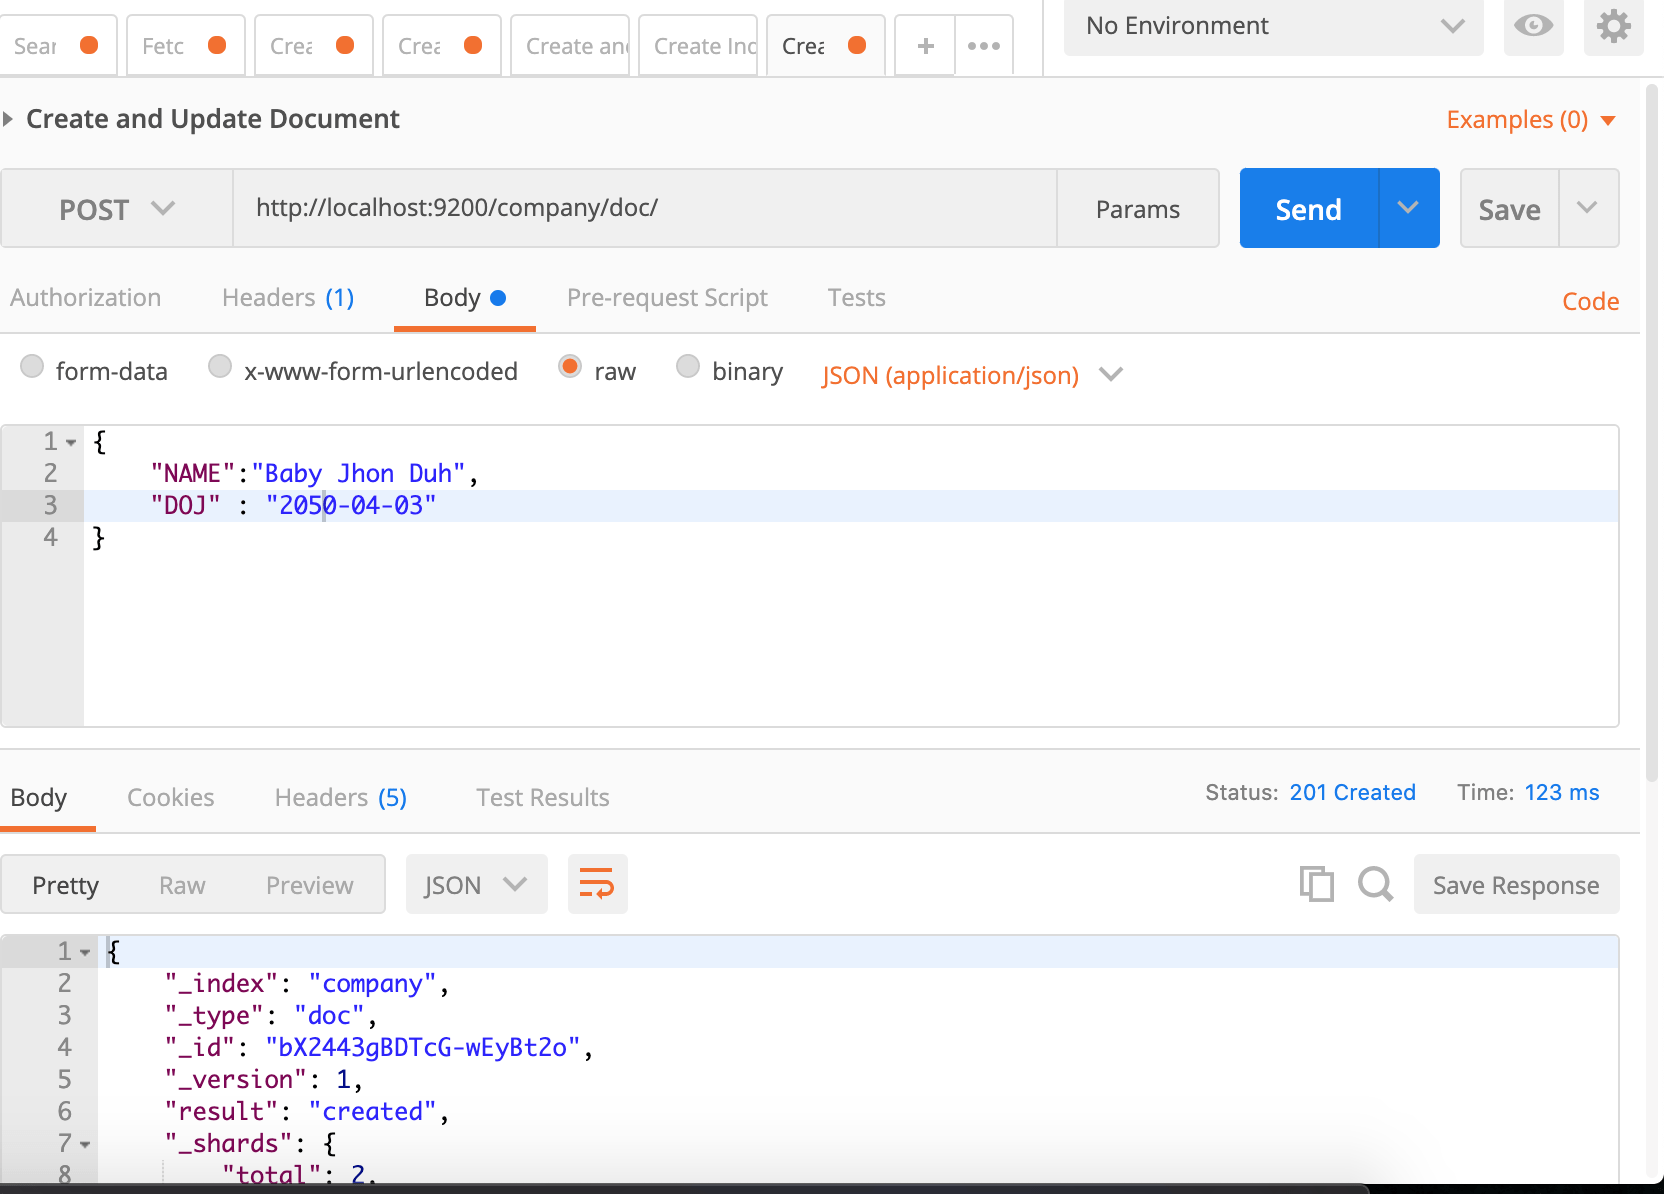
Notice the _id field here. It is a string of random alpha-numeric characters. IMO not mentioning an ID is better because it is not RDBMS and providing a random ID helps not to guess IDs hence one can’t run an automated process to fetch all documents.
Fetch a document
Fetching a document is not rocket science. All you have to do is to make a GET request to your document by passing its ID.
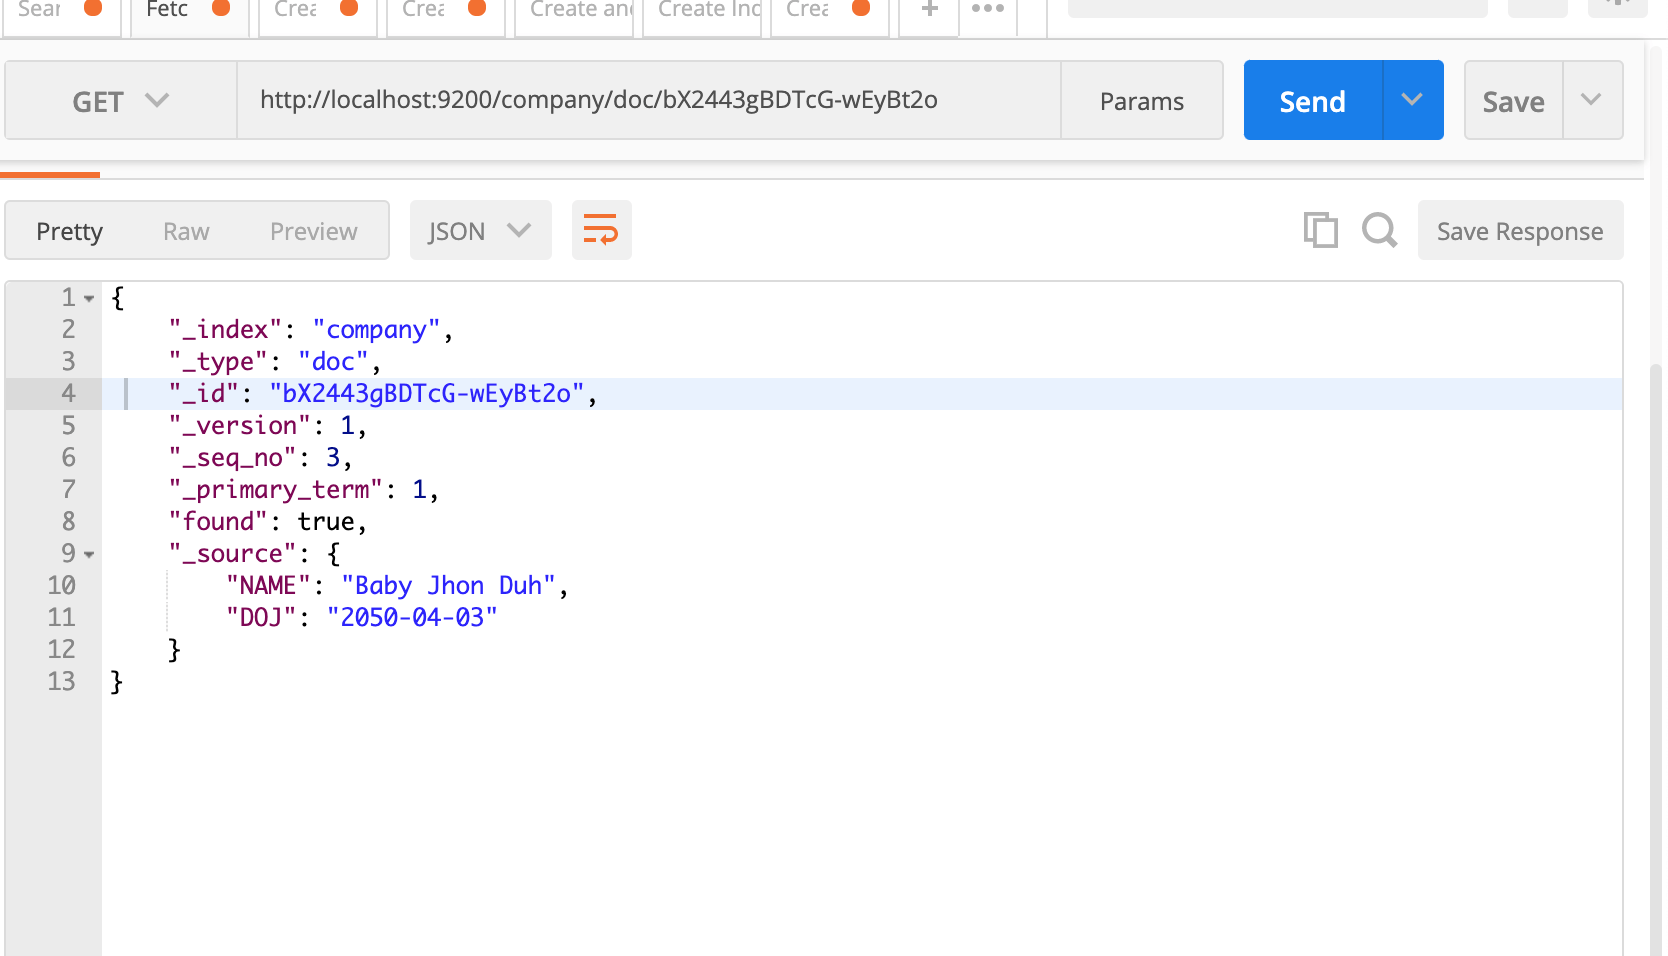
By mentioning the ID you can retrieve the document
Fetch all documents in an index
By accessing the URL http://localhost:9200/company/doc/_search you can fetch all documents within an index.
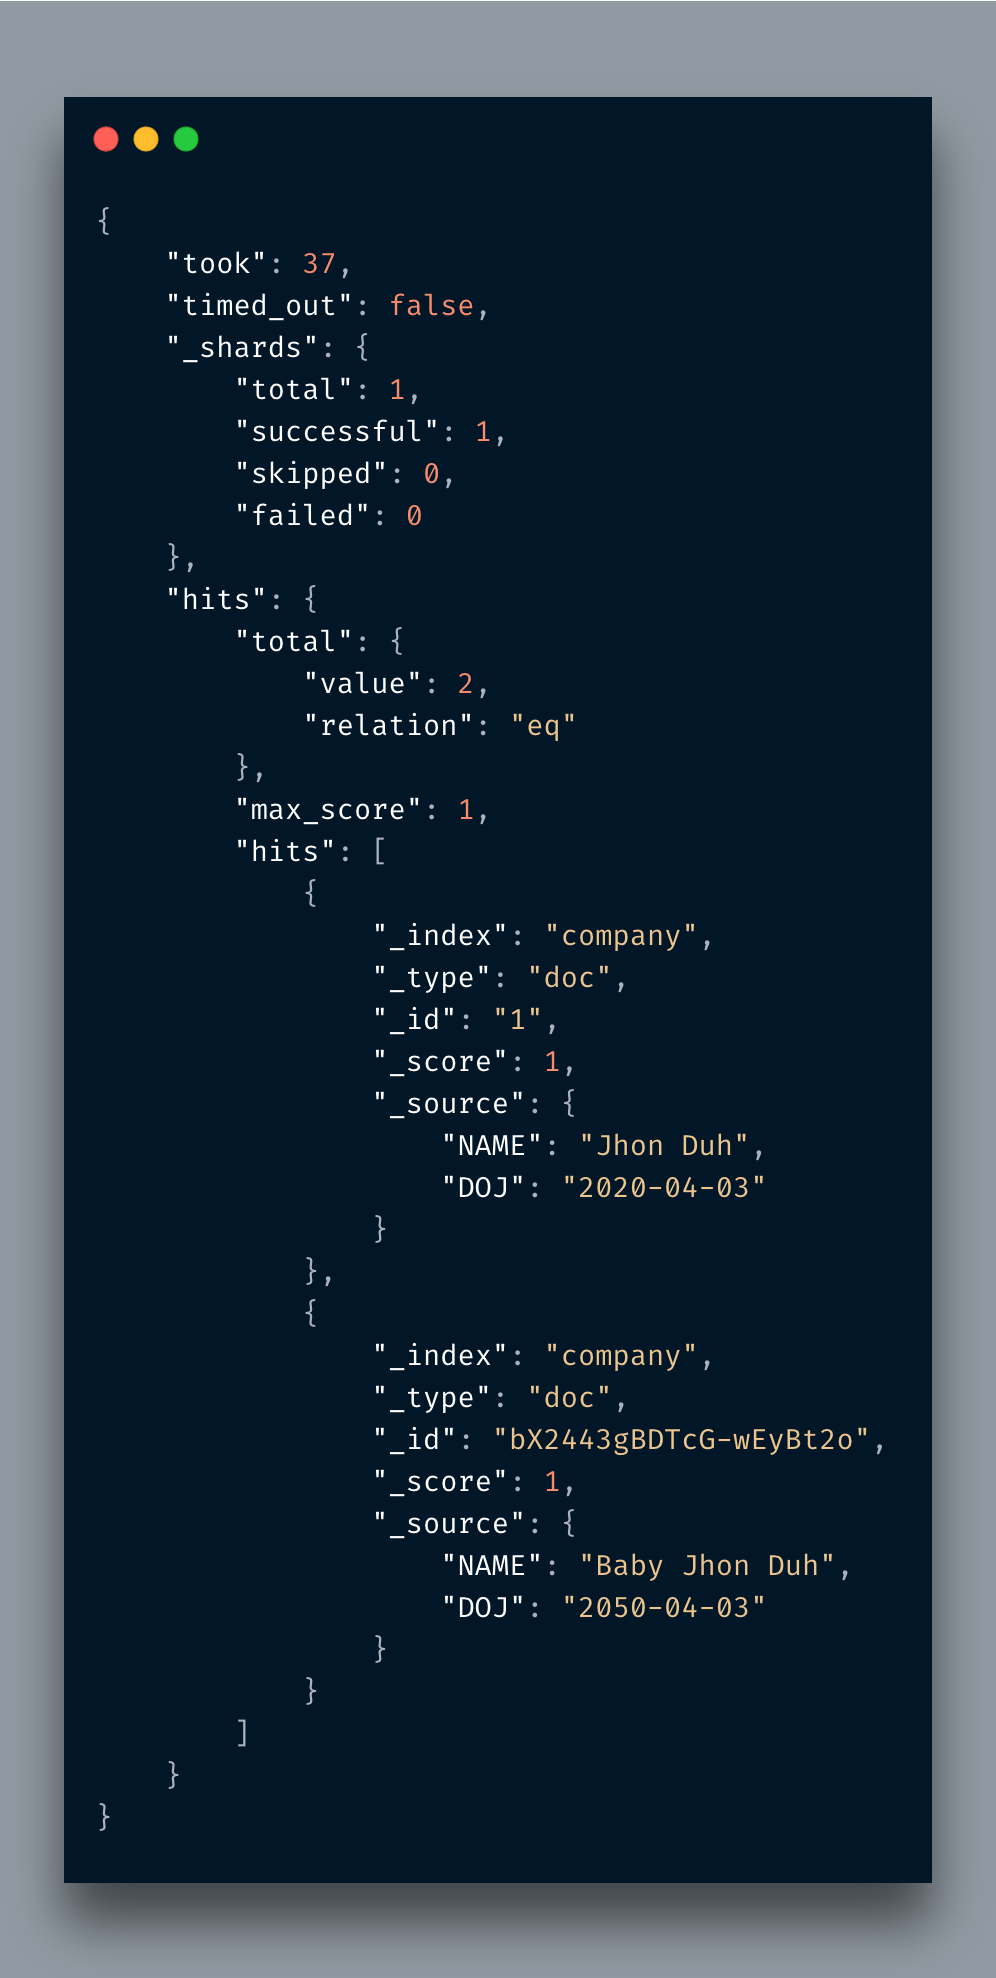
You just mention _search after /doc and it’d return all. It is similar to SELECT * FROm TABLE.
Deleting index/document
Deletion of an index or document is a pretty simple thing. All you have to do is to send a DELETE request.
- Deleting a document:-
curl -X DELETE \ http://localhost:9200/company/_doc/1 \ -H 'cache-control: no-cache' \ -H 'content-type: application/json' \ -H 'postman-token: 92e4cbf1-0019-16ec-bc1c-4ed8ffa16e99' - Deleting an Index:-
curl -X DELETE \ http://localhost:9200/company/ \ -H 'cache-control: no-cache' \ -H 'content-type: application/json' \ -H 'postman-token: c67845af-5c96-a6ce-06dd-50ad3d8070b0'
Create Mapping
As mentioned above, mapping is actually defining the schema of documents. When you create a document within an index, Elasticsearch defines its mapping itself by inferring the document fields and you can store flexible documents within a single index. What if you want to strict about what fields and kind of data should be stored? Mapping is the answer.
I am going to remove the old index and re-create it with proper mapping.
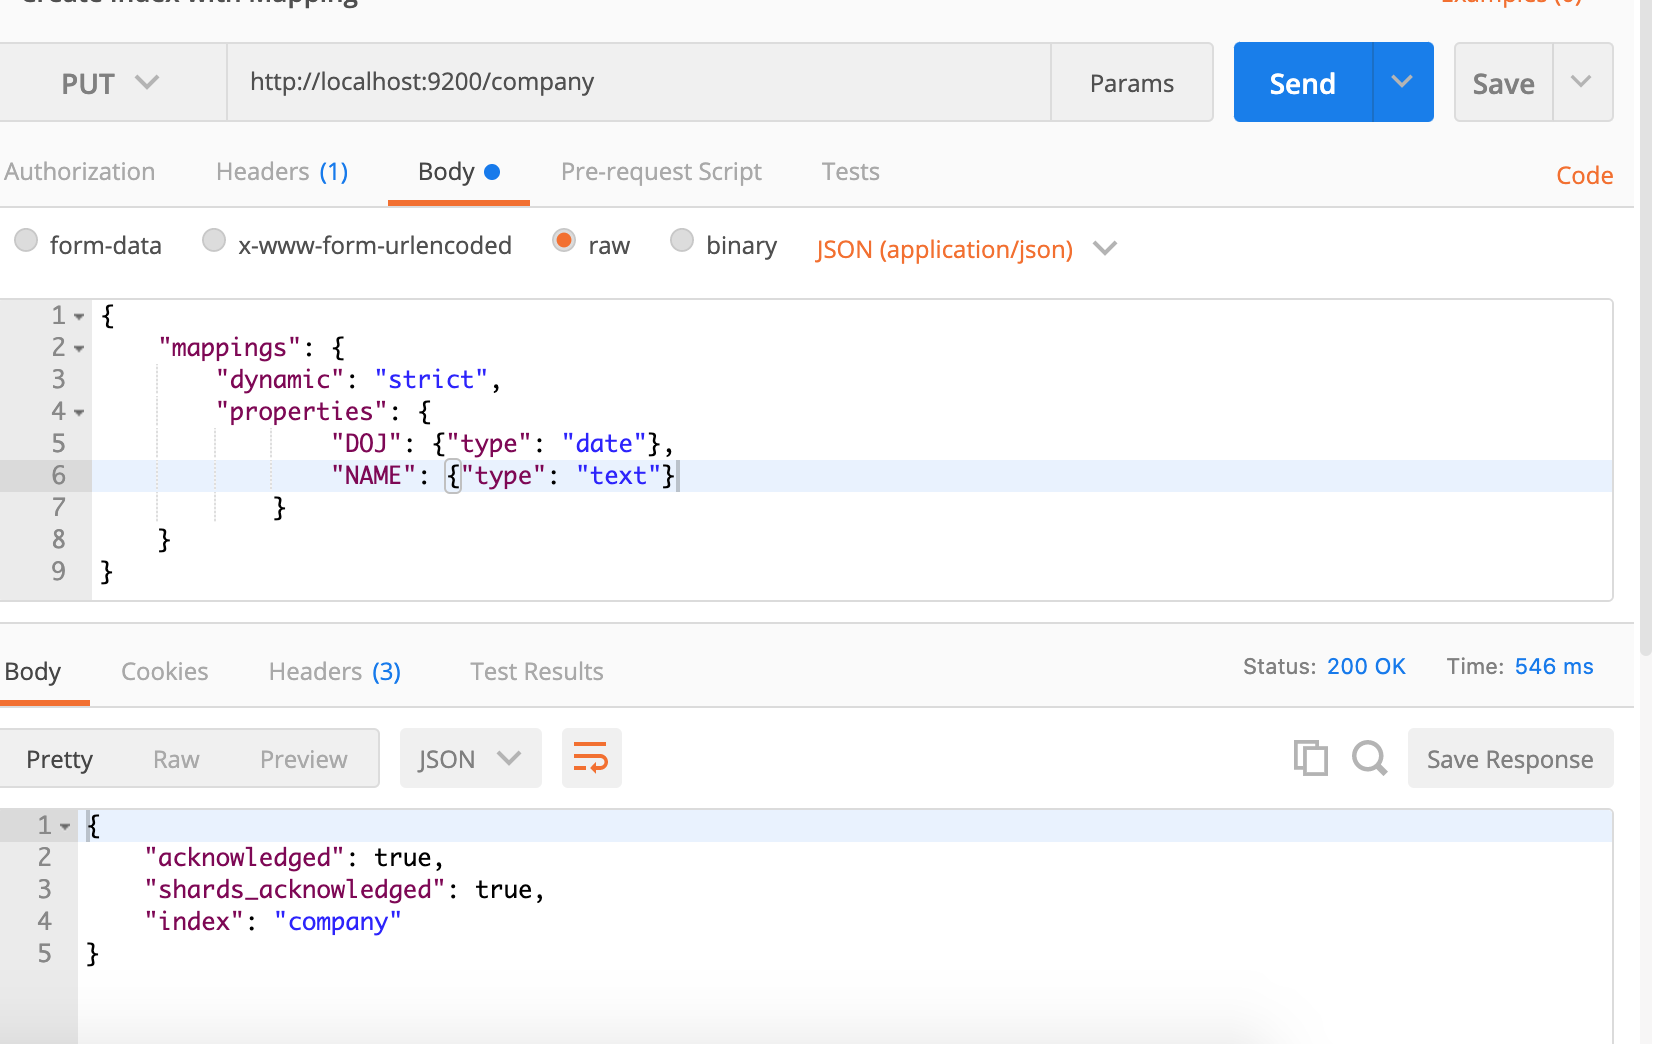
Here I am defining the mapping of two fields. That, a document must contain these fields and that too with these certain types.
OK let’s try to add the wrong document.
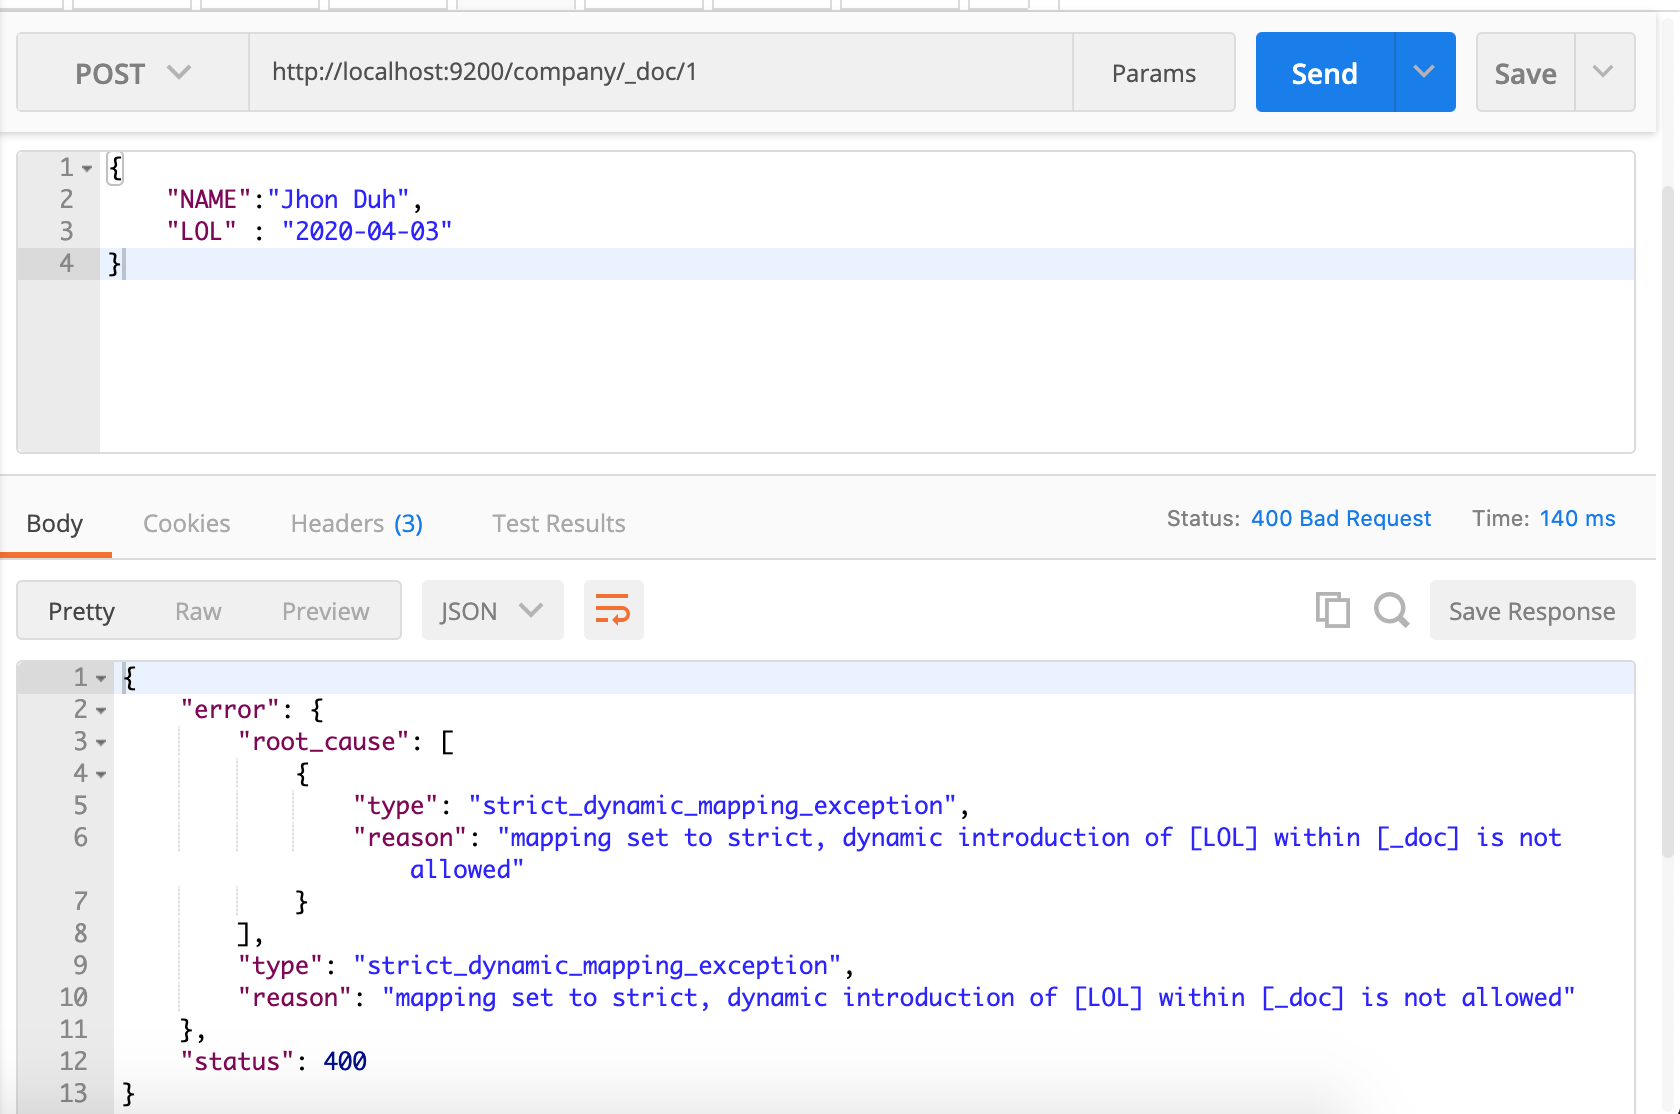
Kewl! I changed DOJ to LOL and it instantly complained. Now I am passing the following information. The field name is the same but wrong data.
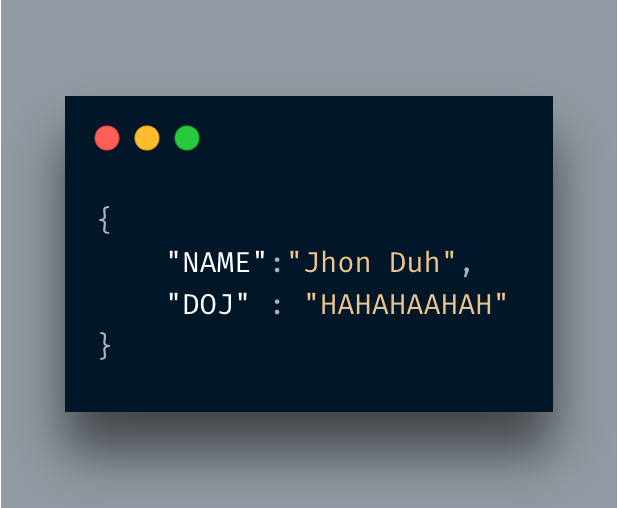
And now it gives the error:
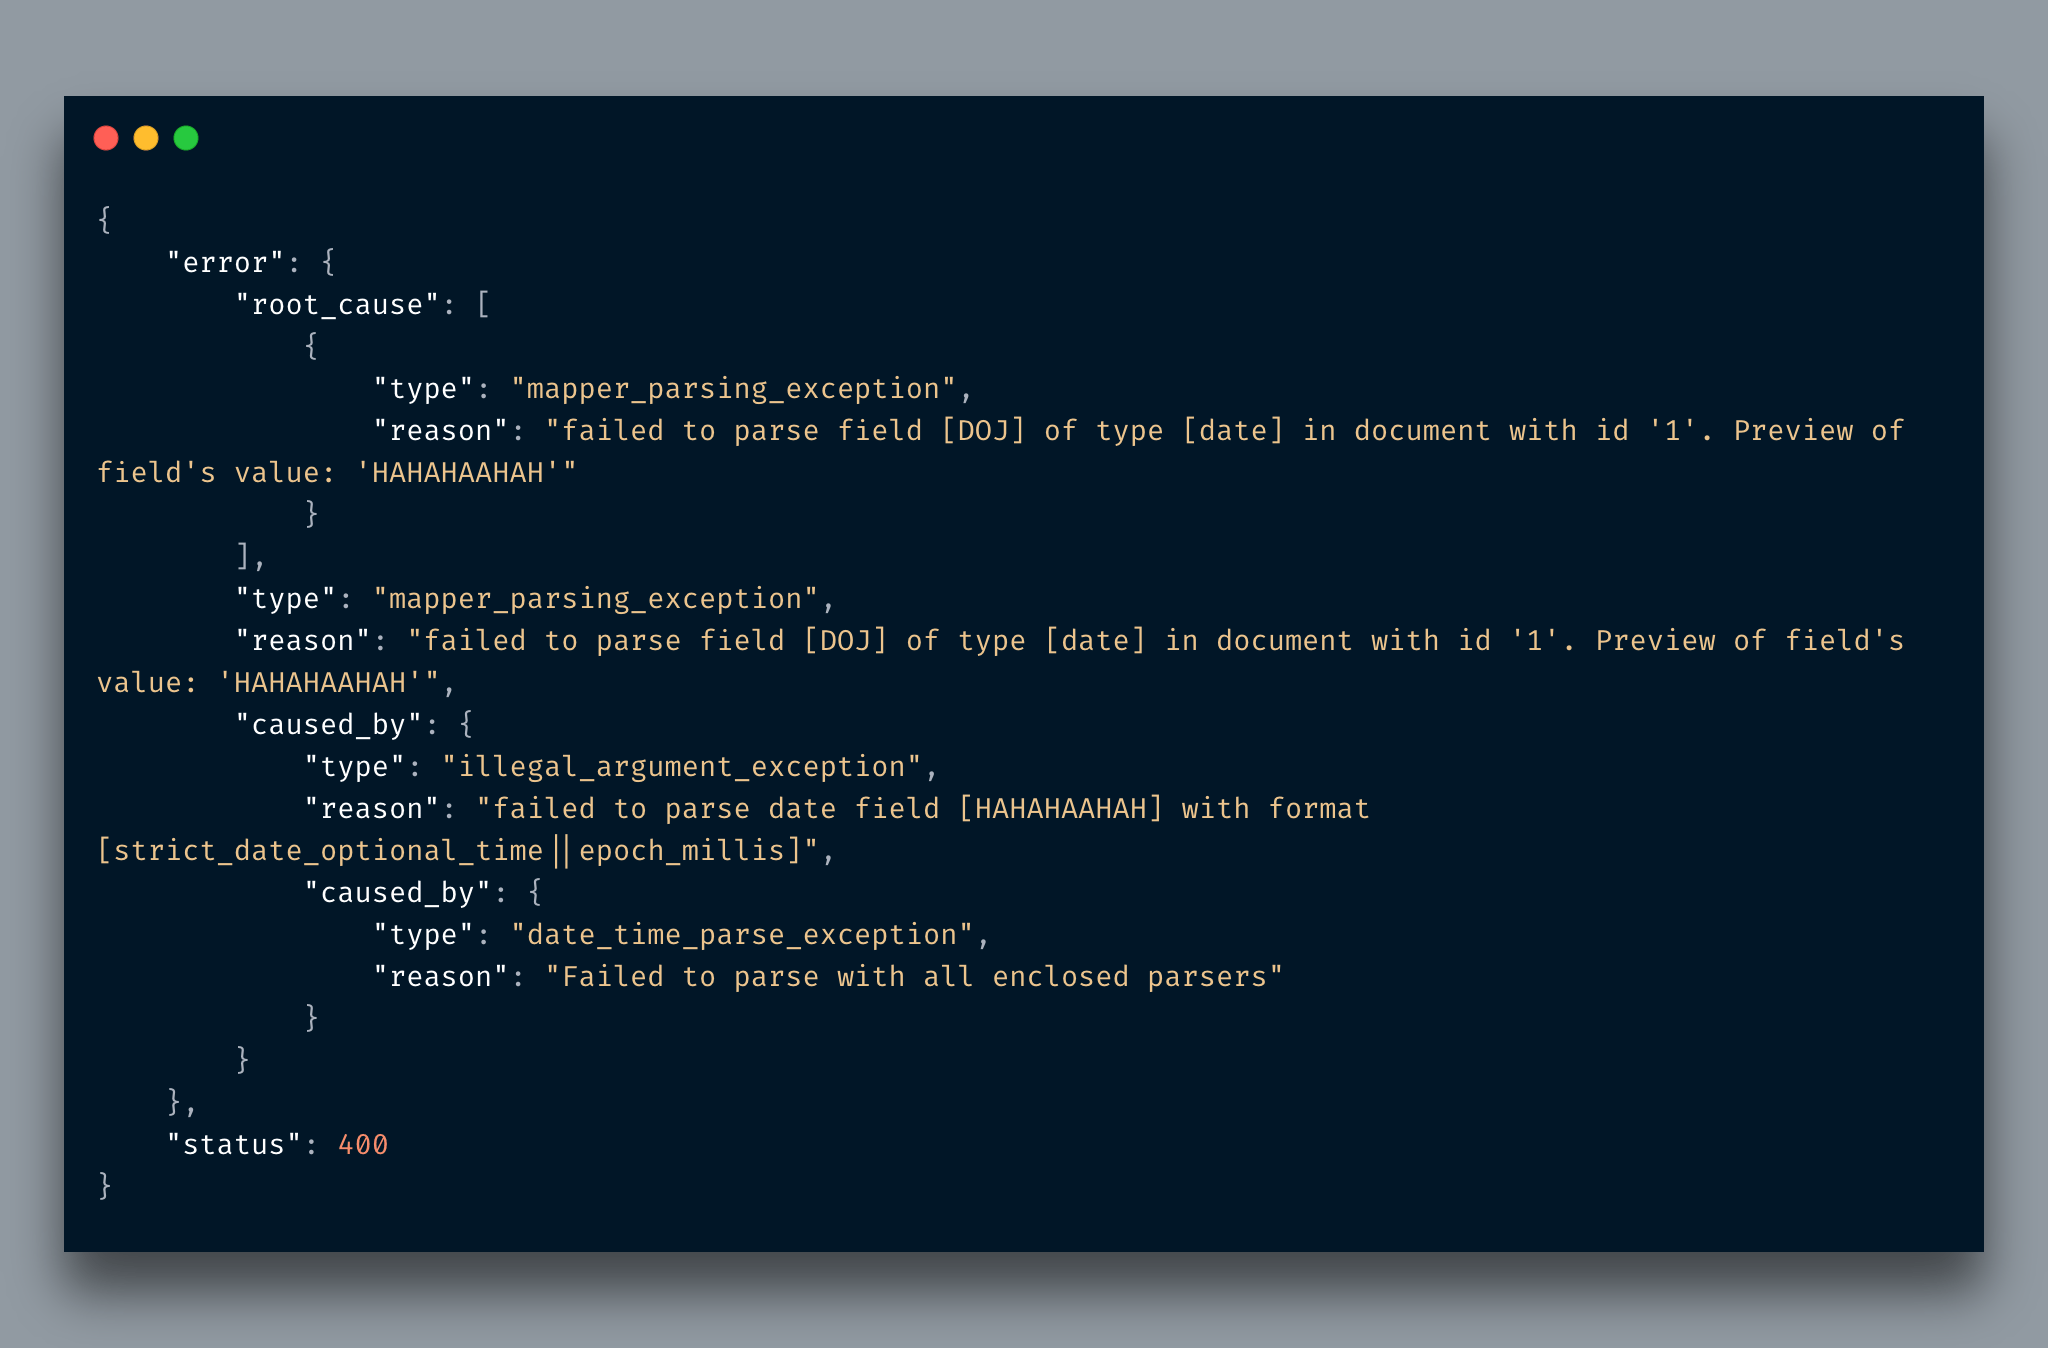
Awesome! As you can read, it instantly complained that I am sending text instead of date type data. Defining schema at a very early stage can you save from lots of pains.
Accessing ElasticSearch in Python
To be honest, the REST APIs of ES is good enough that you can use requests library to perform all your tasks. Still, you may use a Python library for ElasticSearch to focus on your main tasks instead of worrying about how to create requests.
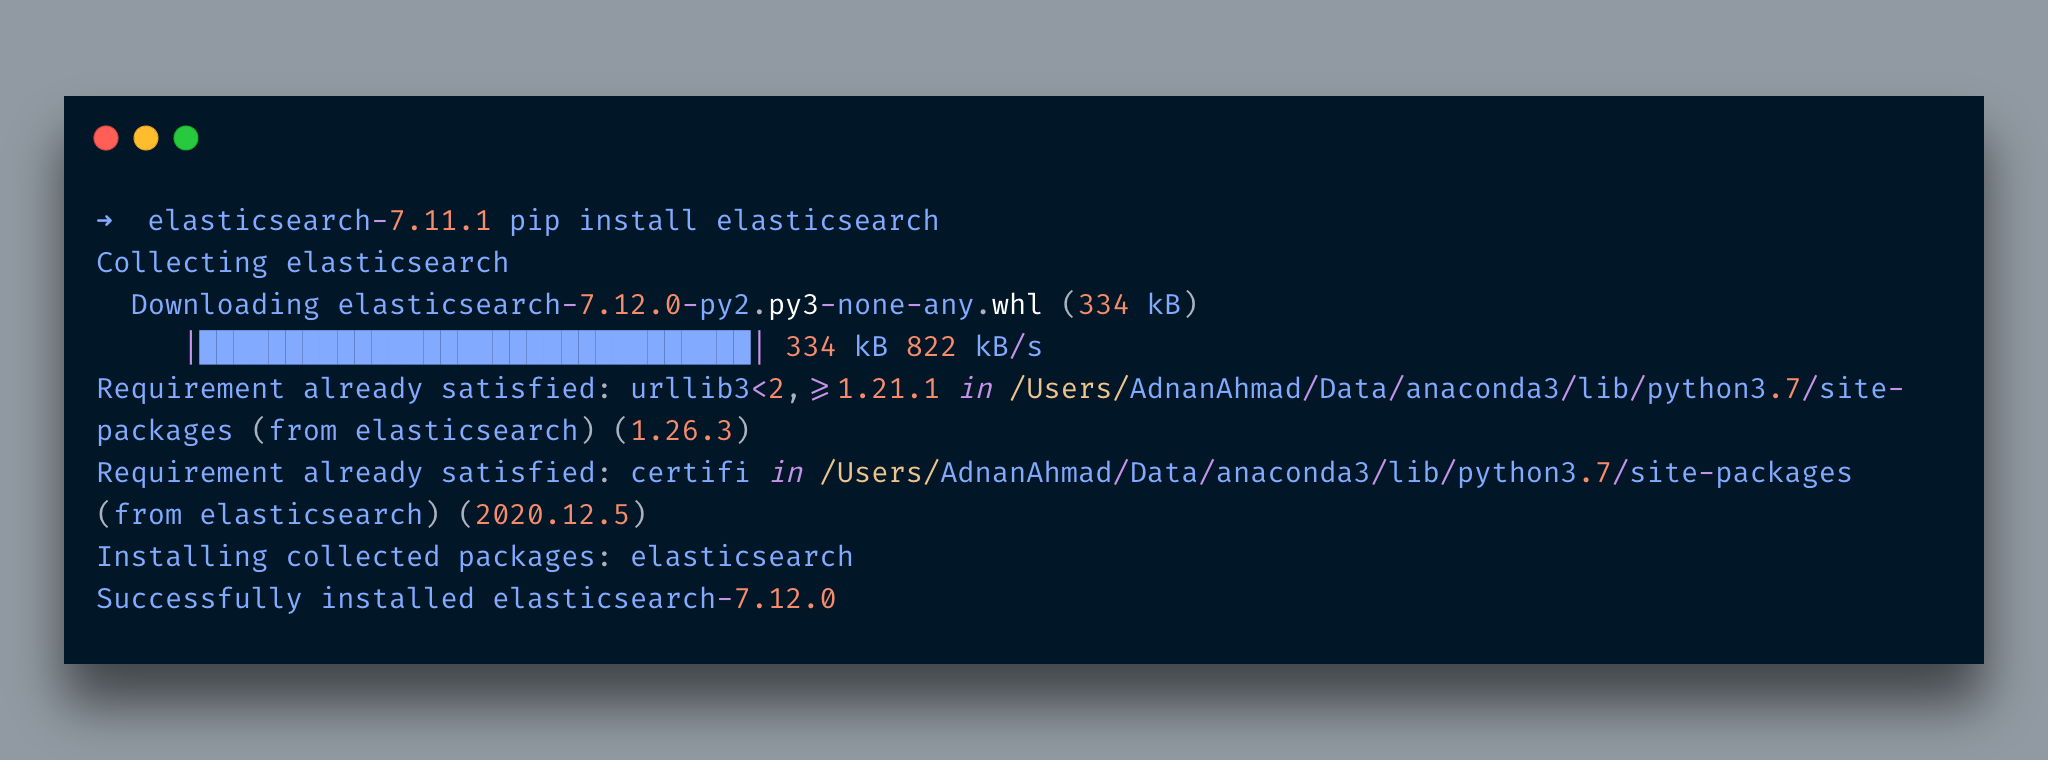
Install it via pip and then you can access it in your Python programs.
pip install elasticsearch
OK, so the lib is installed, now let’s connect with ES and insert a document in company index in our Python application.
import json

from elasticsearch import Elasticsearch


def connect_elasticsearch():
    _es = None
    _es = Elasticsearch([{'host': 'localhost', 'port': 9200}])
    if _es.ping():
        print('Yay Connected')
    else:
        print('Awww it could not connect!')
    return _es


def store_record(es_object, index, data):
    is_stored = True

    try:
        outcome = es_object.index(index=index, doc_type='_doc', body=json.dumps(data))
        print(outcome)
    except Exception as ex:
        print('Error in indexing data')
        print(str(ex))
        is_stored = False
    finally:
        return is_stored


if __name__ == '__main__':
    data = {
        "NAME": "ES",
        "DOJ": "2012-04-02"
    }
    es = connect_elasticsearch()
    r = store_record(es, 'company', data)
    print(r)
The code is self-explanatory. After connecting with the instance of ES I am sending a JSON payload for storage. When it runs it generated the following output.
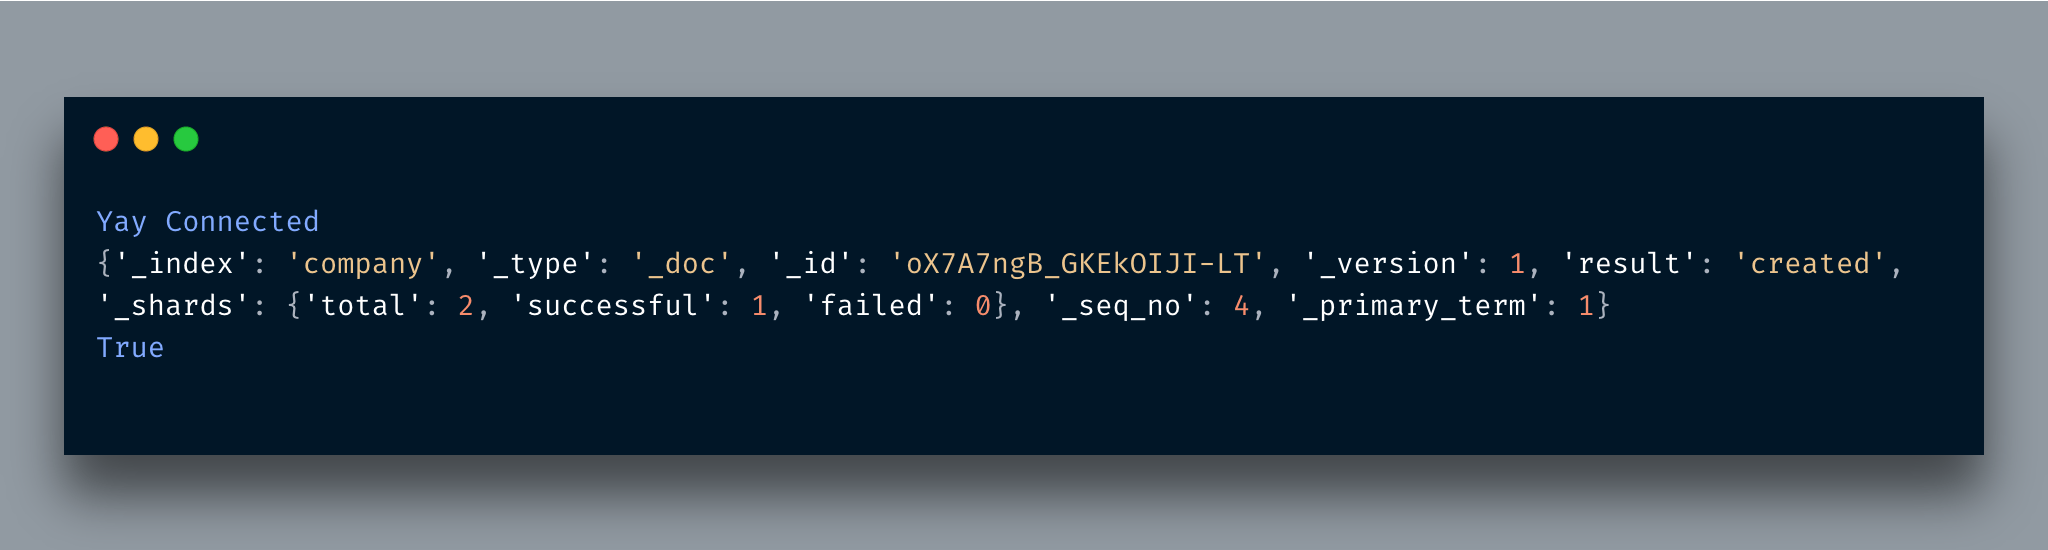
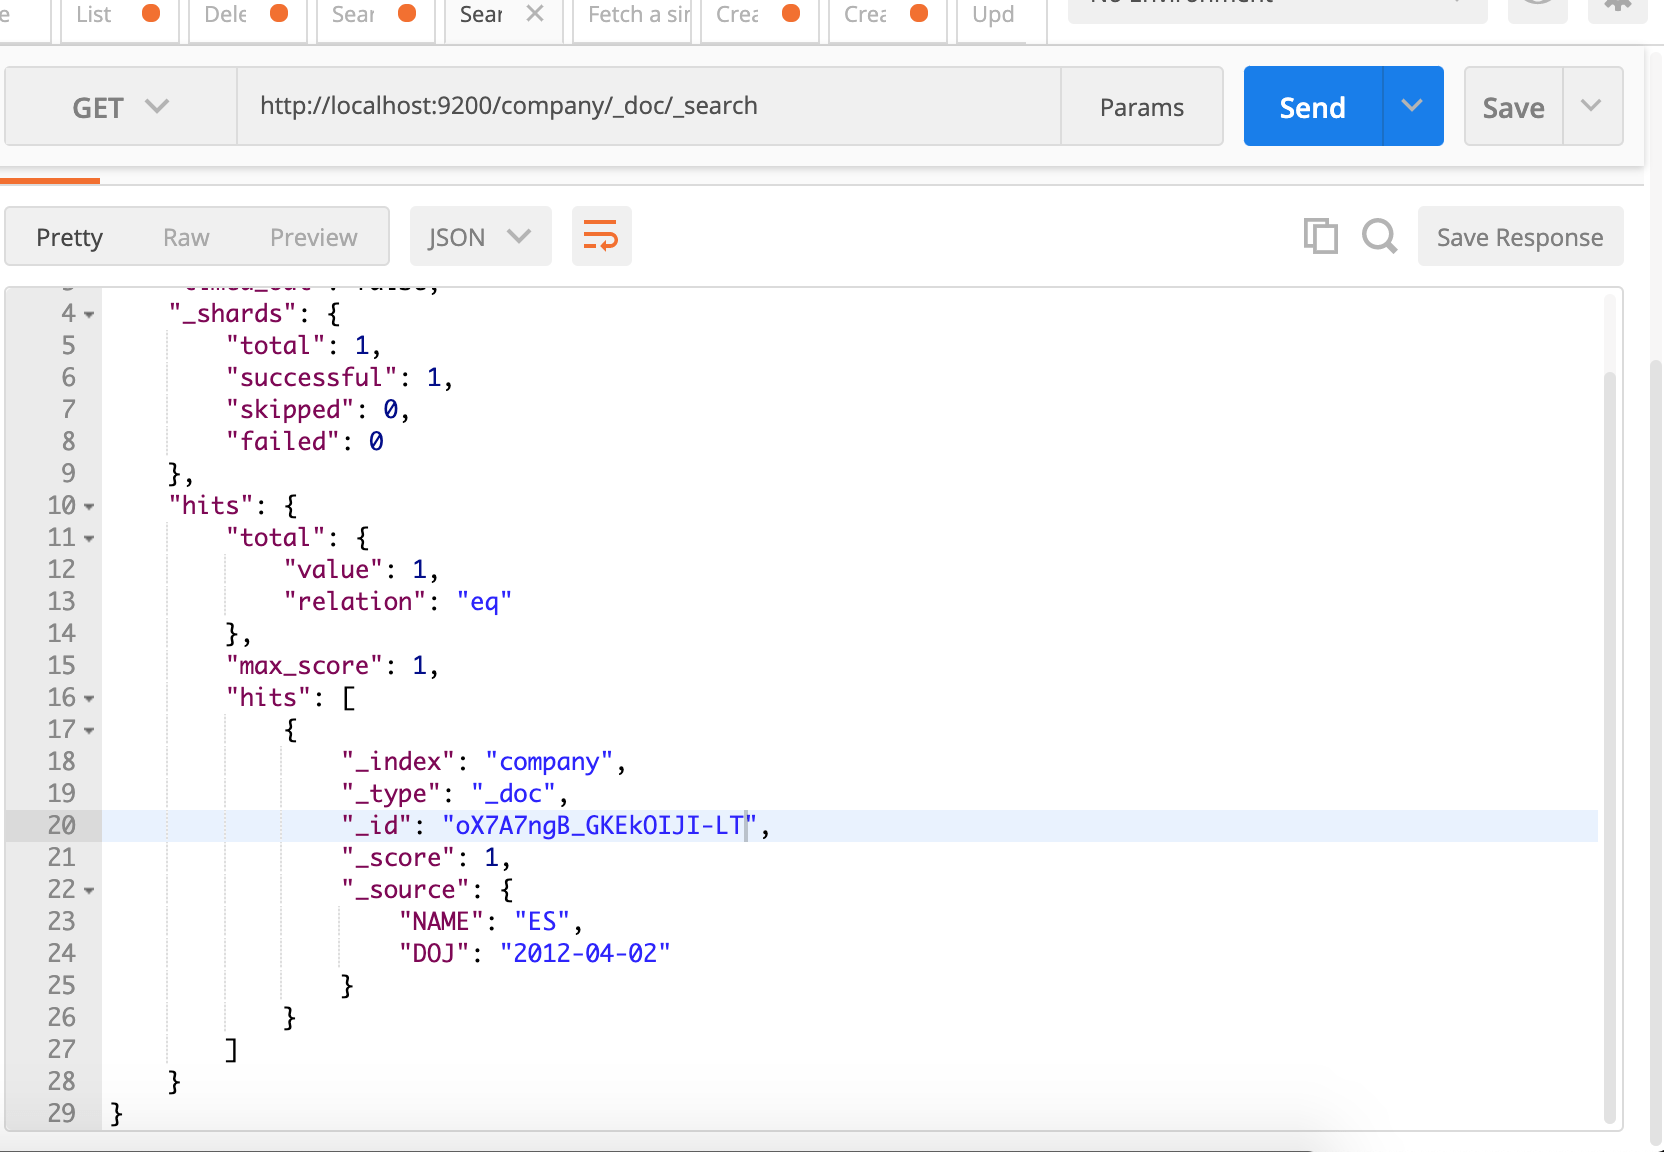
A new document is generated with the id here which you can see in the _id field. You can pass id parameter too but I am relying upon internally generated id. In order to verify whether the document was really generated, I just made a search request we had discussed earlier.
Conclusion
Elasticsearch is a powerful tool that can help to make your existing or new apps searchable by providing robust features to return the most accurate result set. I have just covered the gist of it. Do read docs and get yourself acquainted with this powerful tool.


