
Actually, I had planned another topic in Solidity Series for web3.js but then the post could go off tangent hence I am discussing the basics of web3.js and how to interact with a smart contract. I am going to use the same contract I had created here. Basically, it is the web3.js version of the last post.
Unlike other posts about web3.js based frontends that use NodeJs and React, I am not going to use any such thing because it is not required to create the front-end of a decentralized app. You do not even need NodeJS at all. You can use your existing skillsets like PHP/Laravel, Django, Rails, etc to create a dApp that talks with an Ethereum blockchain via web3.js.
In this post, I am going to create a simple HTML-based interface that will be interacting with the smart contract I made earlier. We will learn how to interact with MetaMask and how to connect MetaMask with Ganache. In the end, the app will be working something like the below:

What is MetaMask
According to MetaMask official website:
A crypto wallet & gateway to blockchain apps
They started as a Chrome extension to let web applications interact with Ethereum based blockchains. Users interact with MainNets or TestNets by either creating a new wallet or an existing one by importing private keys.
MetaMask and Ganache Integration
In the previous post, I already told you how to set up Ganache. Now we have to connect our Ganache-based blockchain with MetaMask which is pretty easy.
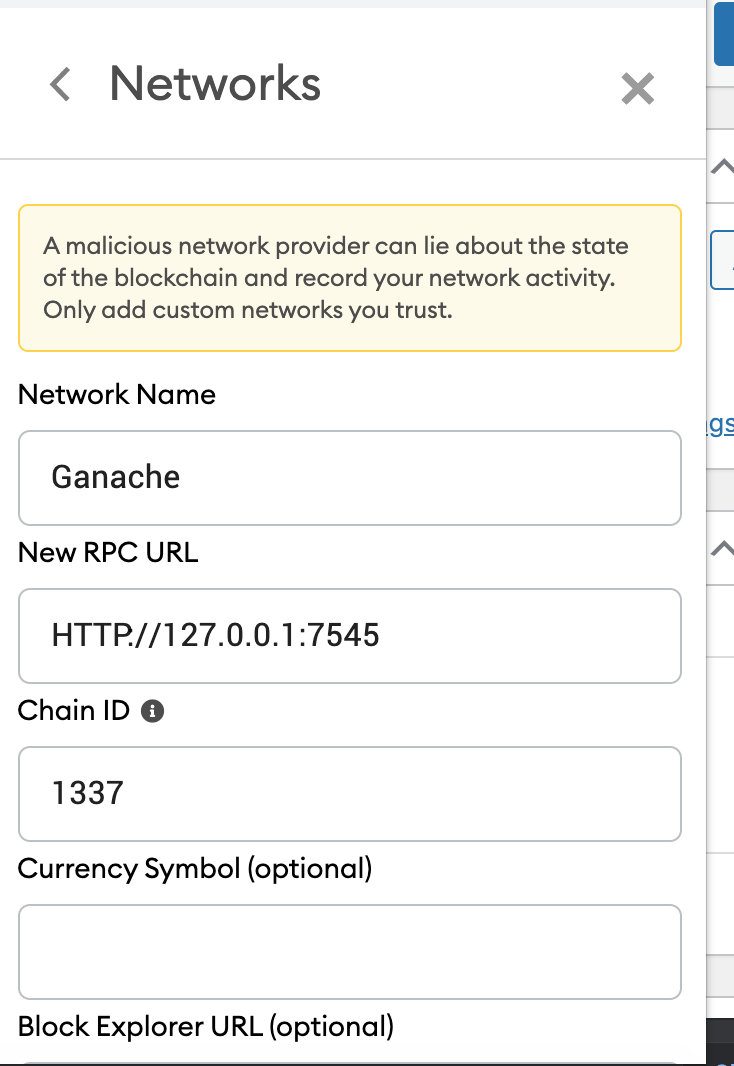
The RPC URL is the one provided by Ganache on its interface. 1337 is the ChainID of Ganache.
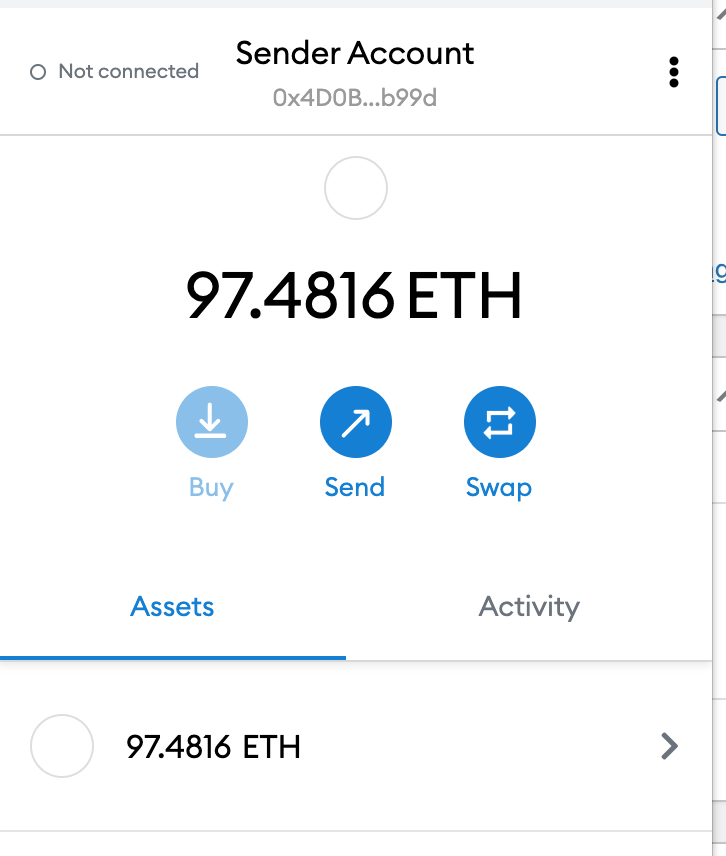
Once the blockchain node is connected, you will have to add an account in the MetaMask wallet. All you have to do is to import the keys from one of your accounts and label it. I integrated my first account here for the development purpose.
Now let’s start coding. One of the first things we have to do is to include all required libraries. I am using Bootstrap and Jquery apart from web3.js library.
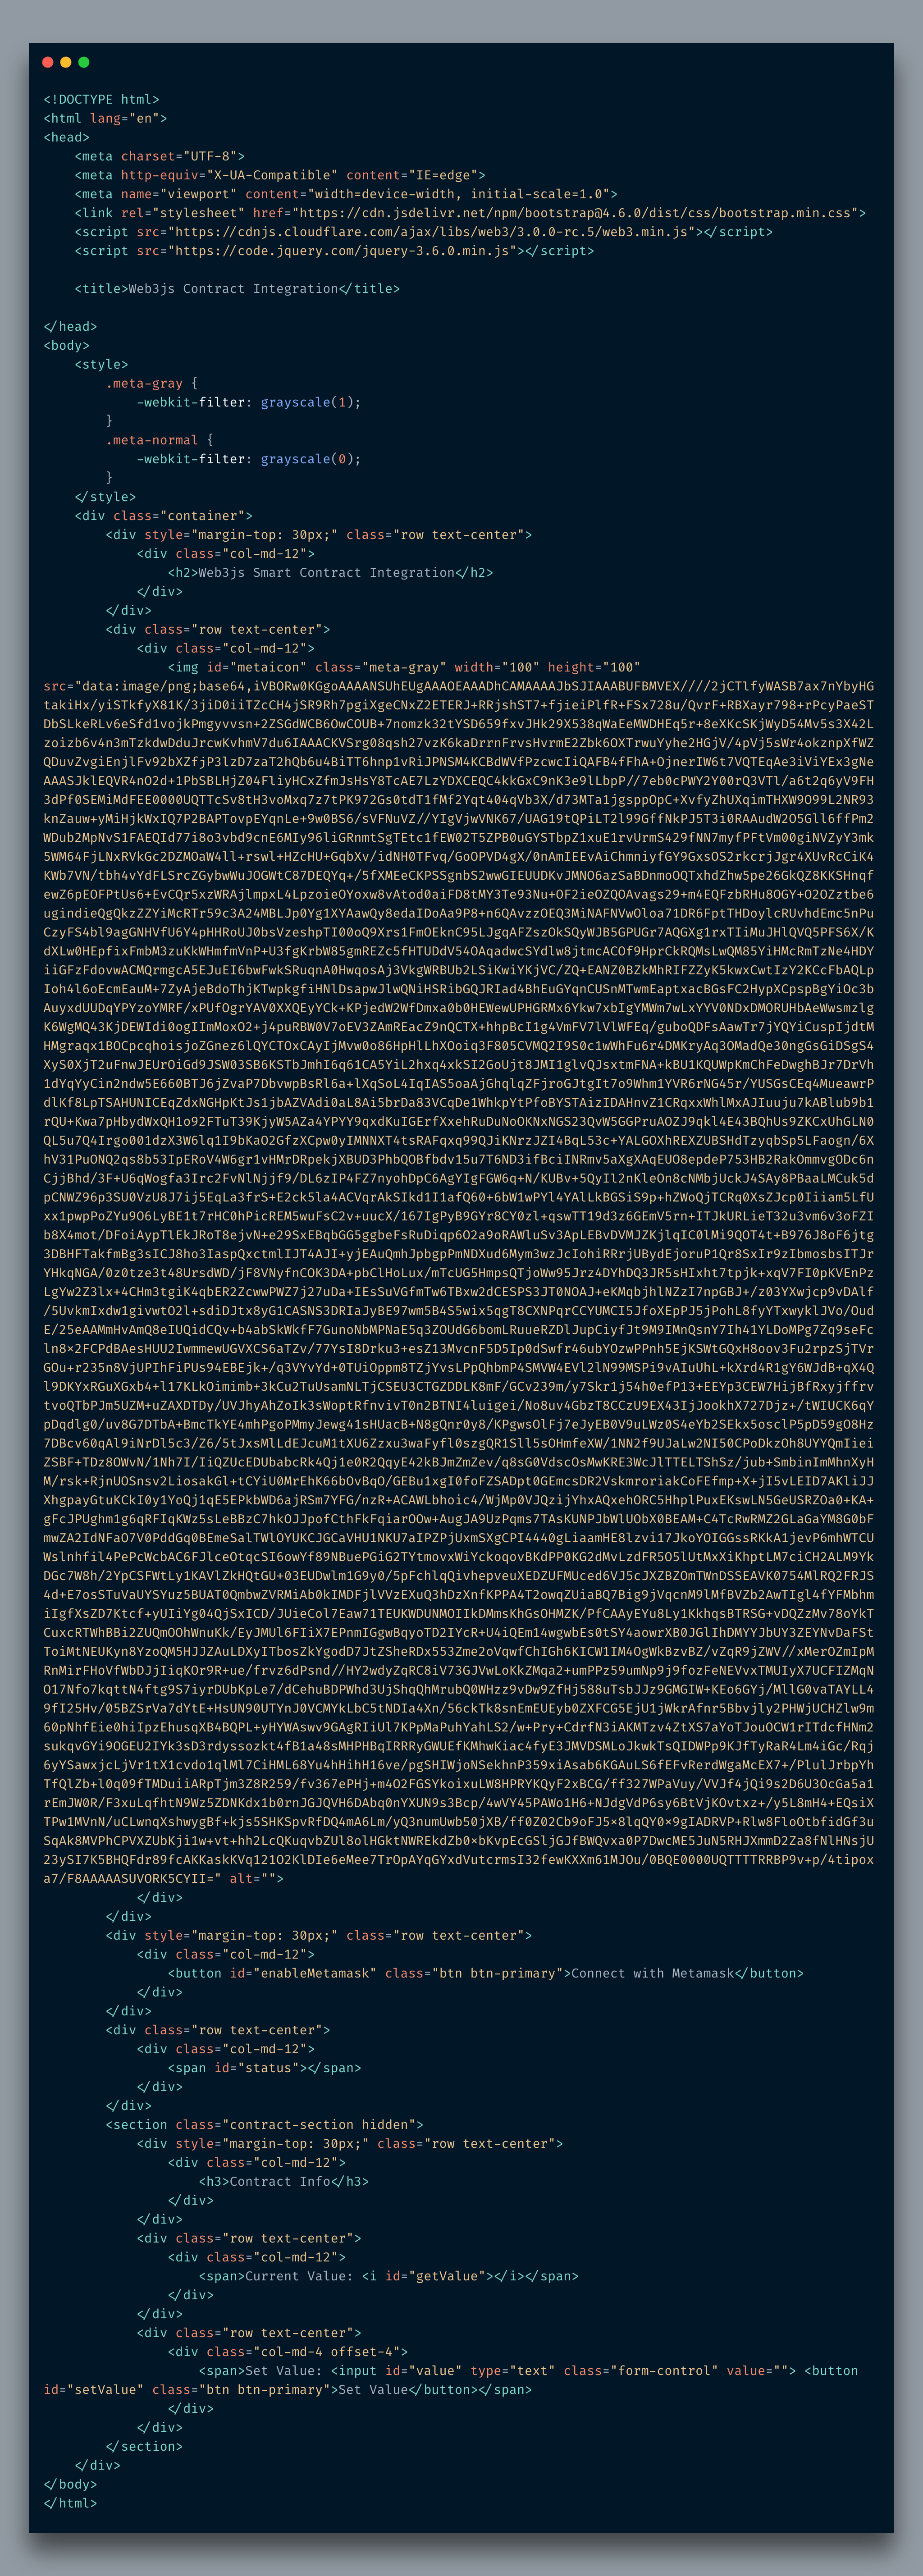
This is the structure of the same page I demoed above. It contains the icon of MetaMask which is greyed out to inform the user that MetaMask is not installed yet. We will write the code to implement this functionality.
function detectMetaMask() {
            if (typeof window.ethereum !== 'undefined') {
                return true
            } else {
                return false
            }
        }
The function is pretty simple. When you add MetaMask, it exposes ethereum object globally. If this object is available it means Metamask is enabled. I am using jQuery to gray-out/colorized the logo. Before we call it, I will use jQuery’s onready() function to call it.
$( document ).ready(function() {
            m = detectMetaMask()
            if(m) {
                $('#metaicon').removeClass('meta-gray')
                $('#metaicon').addClass('meta-normal')
                $('#enableMetamask').attr('disabled',false)
                connect()
            } else {
                $('#enableMetamask').attr('disabled',true)
                $('#metaicon').removeClass('meta-normal')
                $('#metaicon').addClass('meta-gray')
            }
        })
If you run this code it’d produce the following result
As you can see above, it disables both the button and logo when I remove the extension.
Now, the next step is to write the logic of Connect with MetaMask button. I am introducing a new function conenct() here for this purpose. I am also going to introduce handleAccountsChanged callback function that handles the response of eth_requestAccounts method offered by MetaMask.
function handleAccountsChanged(accounts) {
            console.log('Calling HandleChanged')

            if (accounts.length === 0) {
                console.log('Please connect to MetaMask.');
                $('#enableMetamask').html('Connect with Metamask')
            } else if (accounts[0] !== currentAccount) {
                currentAccount = accounts[0];
                $('#enableMetamask').html(currentAccount)
                $('#status').html('')

                if(currentAccount != null) {
                    // Set the button label
                    $('#enableMetamask').html(currentAccount)
                }
            }
            console.log('WalletAddress in HandleAccountChanged ='+walletAddress)
        }


function connect() {
            console.log('Calling connect()')
            ethereum
            .request({ method: 'eth_requestAccounts' })
            .then(handleAccountsChanged)
            .catch((err) => {
            if (err.code === 4001) {
                // EIP-1193 userRejectedRequest error
                // If this happens, the user rejected the connection request.
                console.log('Please connect to MetaMask.');
                $('#status').html('You refused to connect Metamask')
            } else {
                console.error(err);
            }
            });
        }
ethereum.request is a generic function provided by MetaMask to carry out different operations. Here I am asking MetaMask to return the attached accounts. If they are not, it pops up a dialog box to connect it. You can learn more about it here.

Lots of things are happening above. Assuming you have imported wallet keys when I click on the button, it activates the MetaMask interface and asks you to connect the wallet you want to use on this website. You can connect multiple wallets but for now, let’s rely on a single wallet. Once it successfully connects this website with the wallet, I am displaying the wallet address on the button. This process is somewhat akin to a typical login mechanism where you show a welcome note after logged in. On cancellation, I am showing a message that the visitor of the site refused to connect his/her MetaMask wallet. Now whatever the operation you perform, it will be using your connected wallet.
OK, so we have connected our wallet, the only thing is left now to interact with the smart contract. So let’s begin to write the code!
I just noticed I have not written the code to interact with Ganache. For that, we have to use the web3.js library. I already have included it in my HTML file(You do not need node or npm for that purpose. After all it is a simply JS library, we can remain part of old school yet use new technology).
let web3;
let abi;

$.getJSON("build/contracts/FirstContract.json", function(result) {
    abi = result.abi
});

try {
      web3 = new Web3(new Web3.providers.HttpProvider("http://localhost:7545"));
} catch (error) {
      alert(error)
}
A couple of things happening here: After declaring the required variables, I first got the ABI of the contract. We will be using it while interacting with the smart contract routines. Next, I am connecting the Ganache Ethereum blockchain.
So far so good, now I am going to add a function, named, getValue() here. This function will be called on page loading. The document.ready() now looks like the below:
$( document ).ready(function() {
            m = detectMetaMask()
            if(m) {
                $('#metaicon').removeClass('meta-gray')
                $('#metaicon').addClass('meta-normal')
                $('#enableMetamask').attr('disabled',false)
                // connect()
            } else {
                $('#enableMetamask').attr('disabled',true)
                $('#metaicon').removeClass('meta-normal')
                $('#metaicon').addClass('meta-gray')
            }

            $('#enableMetamask').click(function() {
                connect()
            });


            try {
                web3 = new Web3(new Web3.providers.HttpProvider("http://localhost:7545"));
            } catch (error) {
                alert(error)
            }

            //Fetch Value from Smart Contract
            getValue()
        })
The getValue() contains the following code to interact with the blockchain
async function getValue() {
            console.log('GetValue')
            const contractFirst = new web3.eth.Contract(
                        abi,
                        contactAddress
            );

            contractFirst.methods.getValue().call().then(function (result) {
                $('#getValue').html(result)
            });
        }
I am creating the instance of eth.Contract and passing both abi and contactAddress in the constructor. Once it’s established, I call the smart contract’s getValue() function here and displaying the result in the div.
Next, I am going to write the logic of setValue() function which will be called on click event of the button and pass the value from input to the smart contract.
async function setValue() {
            console.log('Set Value')

            input_value = $('#value').val()

            if(input_value.trim() == '') {
                input_value = 0
            }
            if(!isNaN(input_value)) {
                input_value = parseInt(input_value)
            }

            const contractFirst = new web3.eth.Contract(
                        abi,
                        contactAddress
            );

            contractFirst.methods.setValue(input_value).send({from:currentAccount}).then(function (result) {
                console.log(result);
                $('#getValue').html(input_value)
            });

        }
It is very similar to getValue() one. The only differences here are that I am using send() instead of call()
I am also setting the wallet address here. I am doing this because when you pass a value in the blockchain you are actually making a transaction hence it’d deduct the gas amount from your wallet.
Ok, so when I click the Set Value button it returns the following JSON:
![]()
You can always confirm:
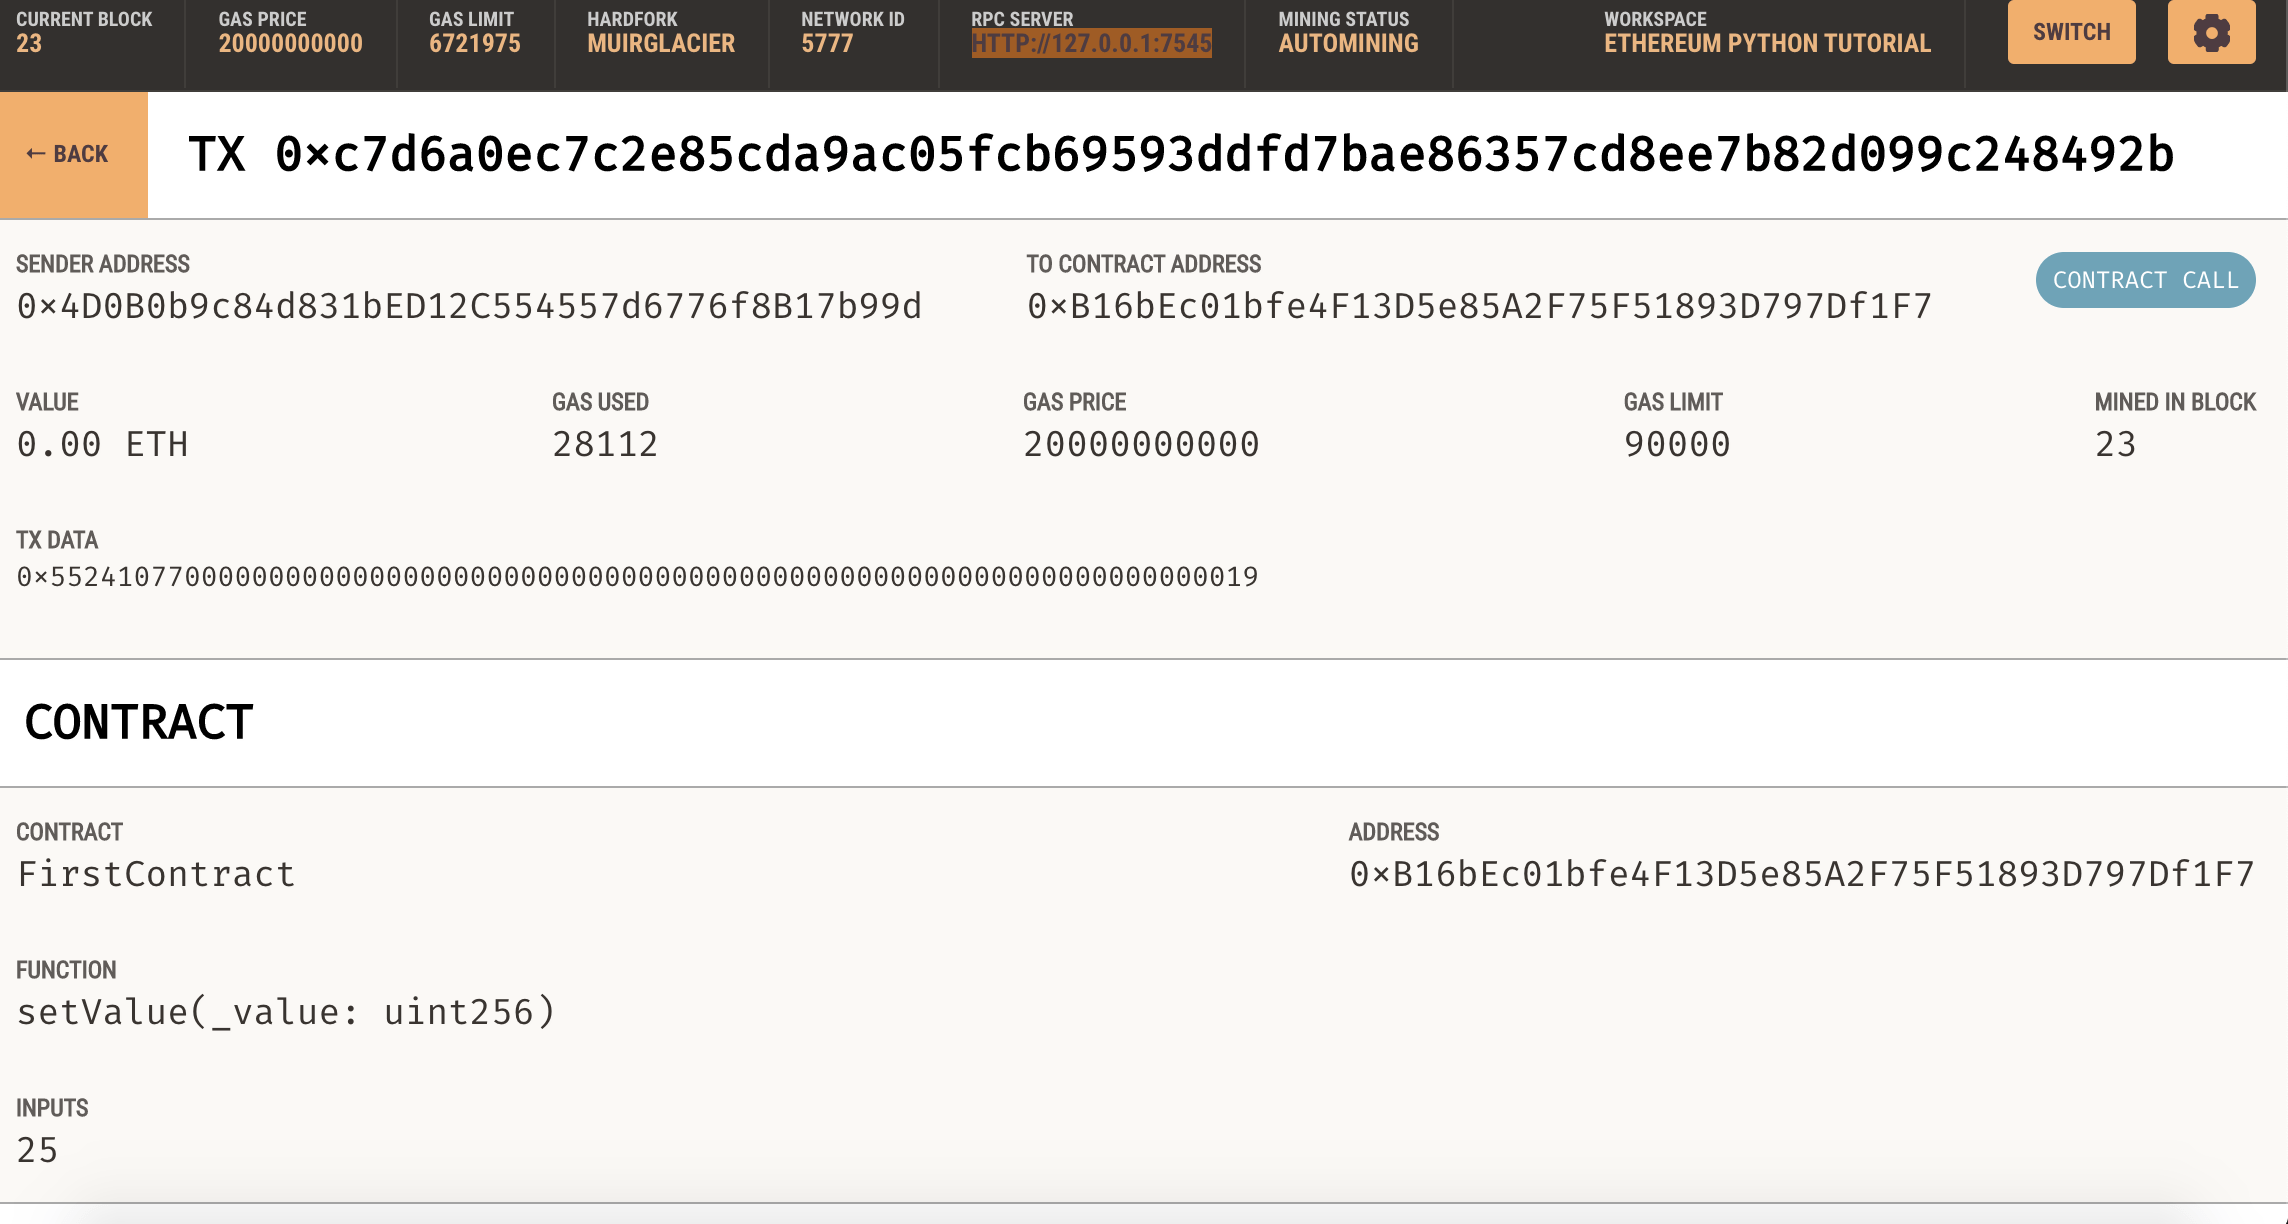
As you can see the transaction hash is the same. You can see that the 25 was the input value.
Conclusion
So in this (another long) post, you learned how you can harness your existing HTML/Javascript skills to write frontends of dApps. You do not need to learn NodeJS or React, as you see here. Since it was a single HTML file, I have committed here on Github with the name contract_demo.html.