What is Azure Video Analyzer?
Azure Video Analyzer for Media (also called Video Indexer) is part of Azure Applied AI services. This application is built on Azure Cognitive Services (including Computer Vision, Translator, Face, and Speech) and Azure Media Services. It lets you gather information for your videos through the use of Video Analyzer for Media audio and video models.
To begin gathering insights with Video Analyzer for Media, you must establish an account and upload your videos. Once you have uploaded your videos to this application, it examines both audio and visuals by running AI models. In this sense, Azure Video Analyzer is an alternative to setting up your own machine learning operation for video analysis.
Azure Video Analyzer capabilities include:
- Deep search—improves the search experience of a video library using insights gained from videos
- Content creation—develop trailers, social media content, highlight reels, or news clips using the insights Video Analyzer Media extracts from your content
- Monetization—insights can improve a video’s value by driving content and advertising optimization
- Recommendations—insights from the video may be used to enhance user engagement by featuring relevant or compelling video moments
What Insights Does Azure Video Analyzer Provide?
Most of the value of Azure Video Analyzer is in the insights it can derive from video content via AI analysis. Here are some of the insights the solution can provide:
- Face detection—groups and isolates faces that appear in the video
- Visual text recognition (OCR)—extracts text that is displayed in a visual form in the video
- Shot detection—decides when a shot alters in the video according to visual cues
- Keyframe extraction—isolates keyframes that are stable in the video
- Audio transcription—translates speech to written text in over 50 languages
- Automatic language detection—identifies the main language that is spoken
- Two channel processing—auto detects transcripts and unifies them to a single timeline
- Noise reduction—eliminates noisy recordings and improves poor quality telephony audio
- Translation—translates any audio transcript into 54 languages
Quick Tutorial: Uploading Videos and Deriving Insights
A note about pricing: You can start using Video Analyzer for Media with a free account, which offers up to 600 free indexing minutes for web interface users and 2400 free minutes for video API users, for a trial period. There is also a paid version with no limitations, and usage is billed by connecting Azure Media Services to your Azure subscription. Learn more in this in-depth blog post about Azure pricing.
You can sign up for a free trial on the official product page.
1. Upload a Video via Web Interface
To upload a video to Azure Video Analyzer:
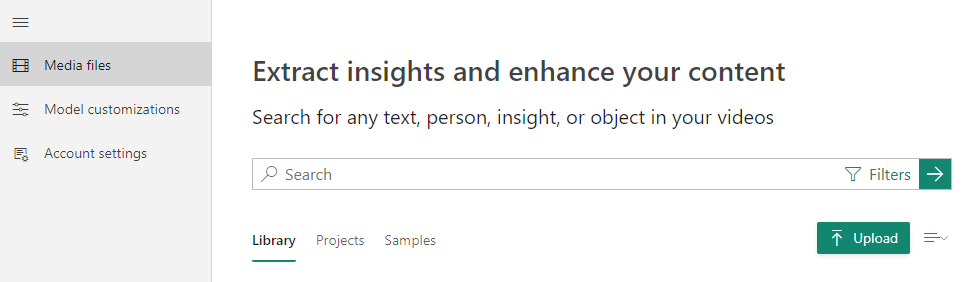
- Log into the web interface
- Click on the Upload button to upload your video
3. After you have uploaded your video, the application will begin analyzing and indexing your video. You can view progres.
4. After Video Analyzer for Media has finished analyzing, you will receive an email that will include a link to the video and a concise description on what was identified in your video. For instance, written and spoken words, people, named entities, and topics.
2. View Insights
To view the insights derived from your video content:
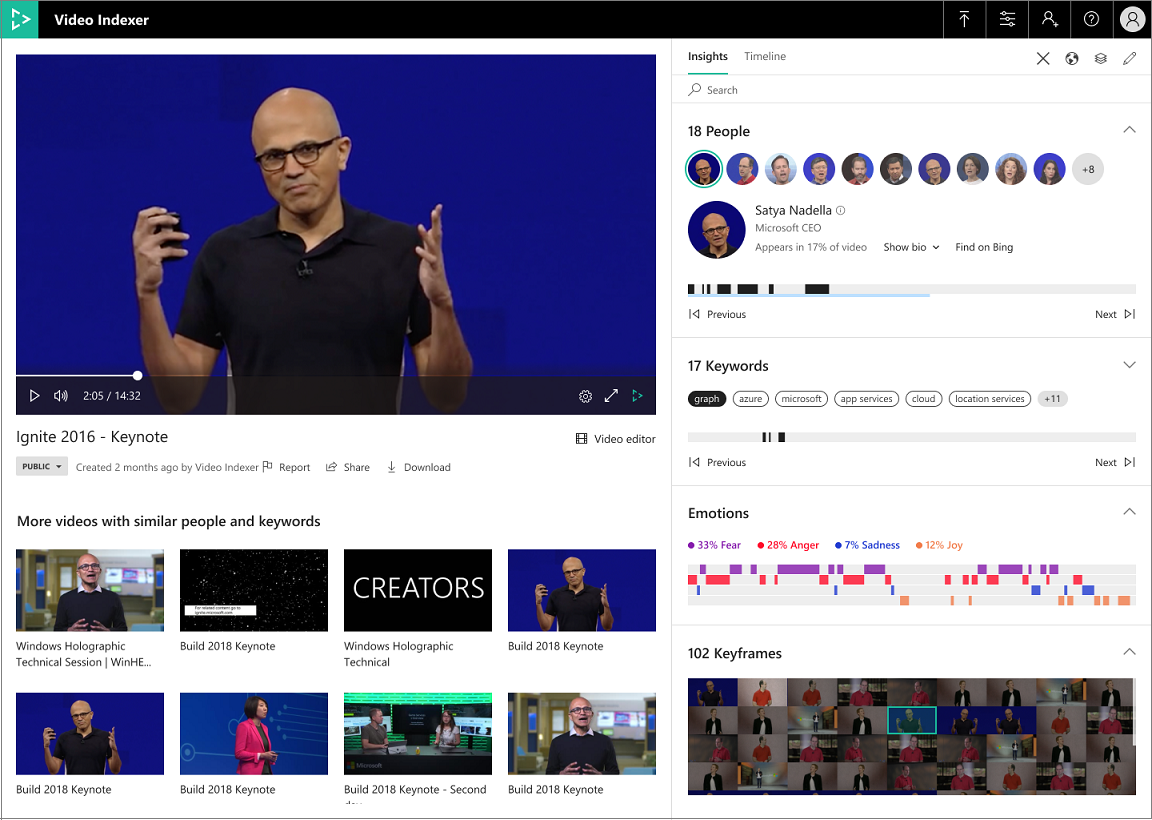
Select a video from the list of uploaded videos and click Play. Summarized insights for the video are shown.
These summarized insights reveal an aggregate reading of the data in the video: keywords, sentiments, and faces. For instance, you can view people’s faces and the time ranges of each face, and the percentage of time the face appears.
3. Search for Moments in Videos
This is an example of Azure Video Analyzer’s advanced AI analysis capabilities.
To look for an exact moment in a video:
- Type one or more search keywords and click the green → button to search all the videos in your account’s library.
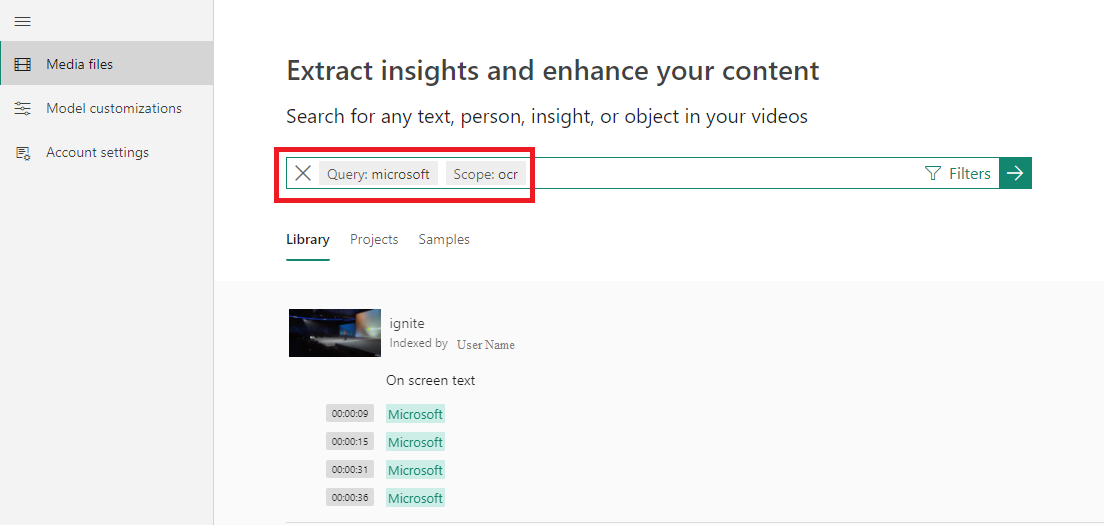
2. The search results show a list of moments within videos that match your search. Select a result, and the player will take you to that precise moment in the video.
3. You can view and edit each moment by clicking it. You can search, edit, and view video transcripts by selecting the Timeline tab.

Considerations When Using Video Analyzer
When Uploading Videos Prefer Using a URL and Direct Upload
Video Analyzer for Media provides you with the option to upload videos from a URL or to upload files directly as a byte array. The second option does have some limitations.
To start with, it has file size constraints. The byte array file size is restricted to 2 GB, in contrast to the 30-GB upload size restrictions you get when using a URL.
Secondly, there are several problems with the byte array method that can affect upload performance and reliability:
- Connectivity issues can disrupt the upload
- Speed of upload will be determined by your bandwidth
- Lost packets

When you use an URL to upload videos, you simply have to provide a path to the media file’s location and the Video Indexer deals with the rest.
Automatic Scaling of Media Reserved Units
Azure Video Analyzer for Media allows Reserved Units (MRUs) to be auto-scaled via Azure Media Services (AMS), beginning August 1st 2021. Due to this, you don’t have to organize them via Azure Video Analyze for Media. This may result in a reduction in price, because Azure Video Analyzer resources may be automatically scaled down if you use it less.
Index in Optimal Resolution, not Highest Resolution
In most instances, indexing performance shows little difference between 4K videos and HD (720P) videos. In the end, you will receive similar insights with the same level of confidence. The better the quality of the video you upload, the greater the file size, and this results in higher power of computing and greater time required for the video to upload.
For instance, when using the face detection tool, a higher resolution may assist where there are various small yet contextually significant faces. However, this will greatly increase the run time and also cause greater risk of false positives.
You should test your use case locally first to verify that you get the correct results. Upload the identical video in 4K and in 720P and look at the insights you receive side by side. Select the resolution that gives you adequate results with minimal file size.
Conclusion
In this article I introduced Azure Video Analyzer, a managed AI service that helps you derive insights from your videos, which can help you provide a better user experience to viewers. I showed how to:
- Upload a video via the Video Analyzer web interface
- View insights extracted from your video content
- Search for moments in your videos using the Video Analyzer video indexing engine
In addition, I shared a few useful tips on making the best use of Video Analyzer in your organization. I hope this will be of help as you consider automating video analysis to take your video content to the next level.